You are browsing the archive for Cracked It | independence.

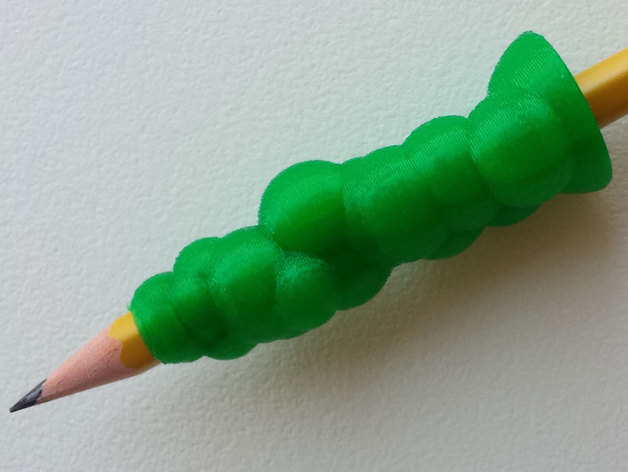
3D printed Pencil grip

September 28, 2016 in Solution

bubble_grip_detail_preview_featured

Via Thingiverse

A funky pencil holder to improve grip, why not make this and give it a go!

Download the design files

Our sponsor charity DEMAND Design & Manufacture for Disability will be happy to help if you donā€™t have access to a 3D printer, just get in touch via their website.

Remember to click the ā€˜This Solution Helped Meā€™ button at the top of this page, or leave a comment letting us know how you got on!

Via Thingiverse

Pen lid remover

September 28, 2016 in Solution

2012-11-13_19.59.17_preview_featured

Via Thingiverse

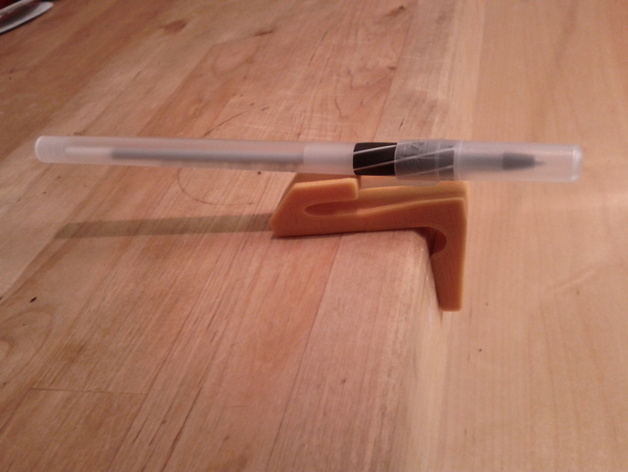
This nifty 3D printed device is designed to make it easier to remove caps from pens, why not make it and test it out!

Download the design files

Our sponsor charity DEMAND Design & Manufacture for Disability will be happy to help if you donā€™t have access to a 3D printer, just get in touch via their website.

Remember to click the ā€˜This Solution Helped Meā€™ button at the top of this page, or leave a comment letting us know how you got on!

Via Thingiverse

Torch holder

September 28, 2016 in Solution

torch_holder_walking_stick_preview_featured (1)

Via Thingiverse

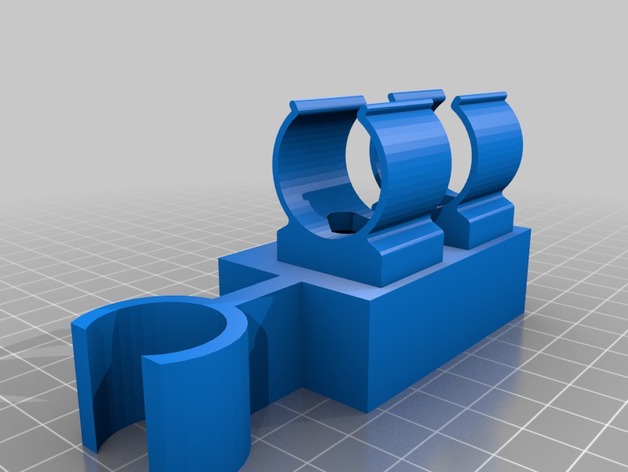
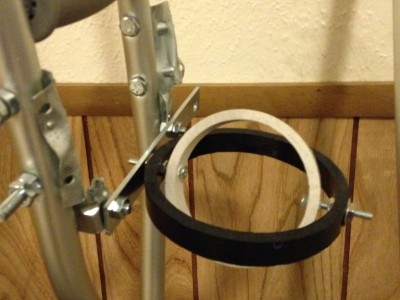
A device to hold a torch (flashlight) when you’re walking with crutches, walking sticks or even a walking frame.

Download the design files

Our sponsor charity DEMAND Design & Manufacture for Disability will be happy to help if you donā€™t have access to a 3D printer, just get in touch via their website.

Remember to click the ā€˜This Solution Helped Meā€™ button at the top of this page, or leave a comment letting us know how you got on!

Via Thingiverse

Yoghurt pot opener

September 22, 2016 in Solution

Via Pinshape

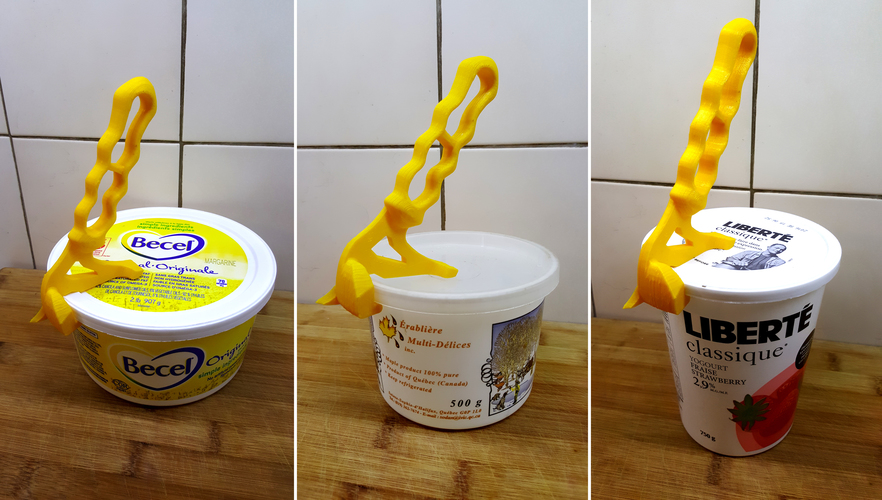
container_handy-tool-to-open-plastic-containers-contest-3d-printing-97149This handyĀ 3D printable handle will help open those tricky pots of yoghurt, margarine, ice cream and more, why not give it a go!

Download the 3D CAD file

Remember to click the ‘This Helped Me’ button at the top of this page, or leave a comment letting us know how you got on!

Via Pinshape

Keyboard and button helper

August 31, 2016 in Post, Solution

Via Pinshape


container_use-easily-your-keyboard-3d-printing-92885

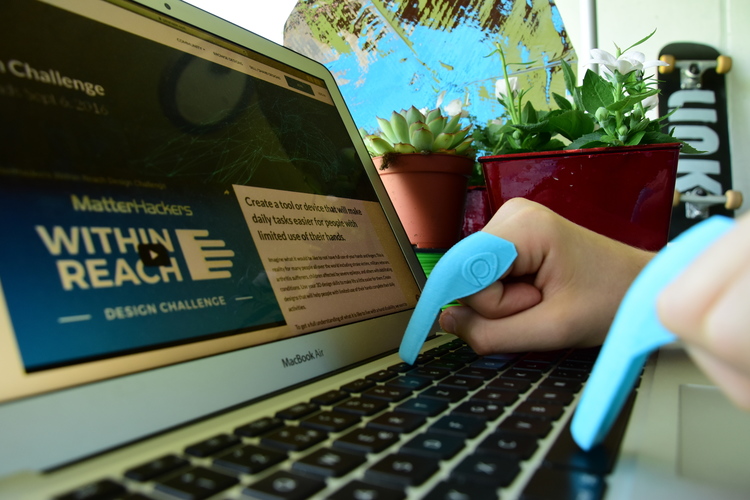
A nifty 3D printing project with great potential to help people with dexterity issues. Head over to Pinshape to download the 3D printing files, which are available in 4 sizes to suit different hands!

Don’t forget to click the ‘This Helped Me’ button at the top of the page if youĀ give this a try.


Double drinking straw holder

August 1, 2016 in Solution

Straw_1

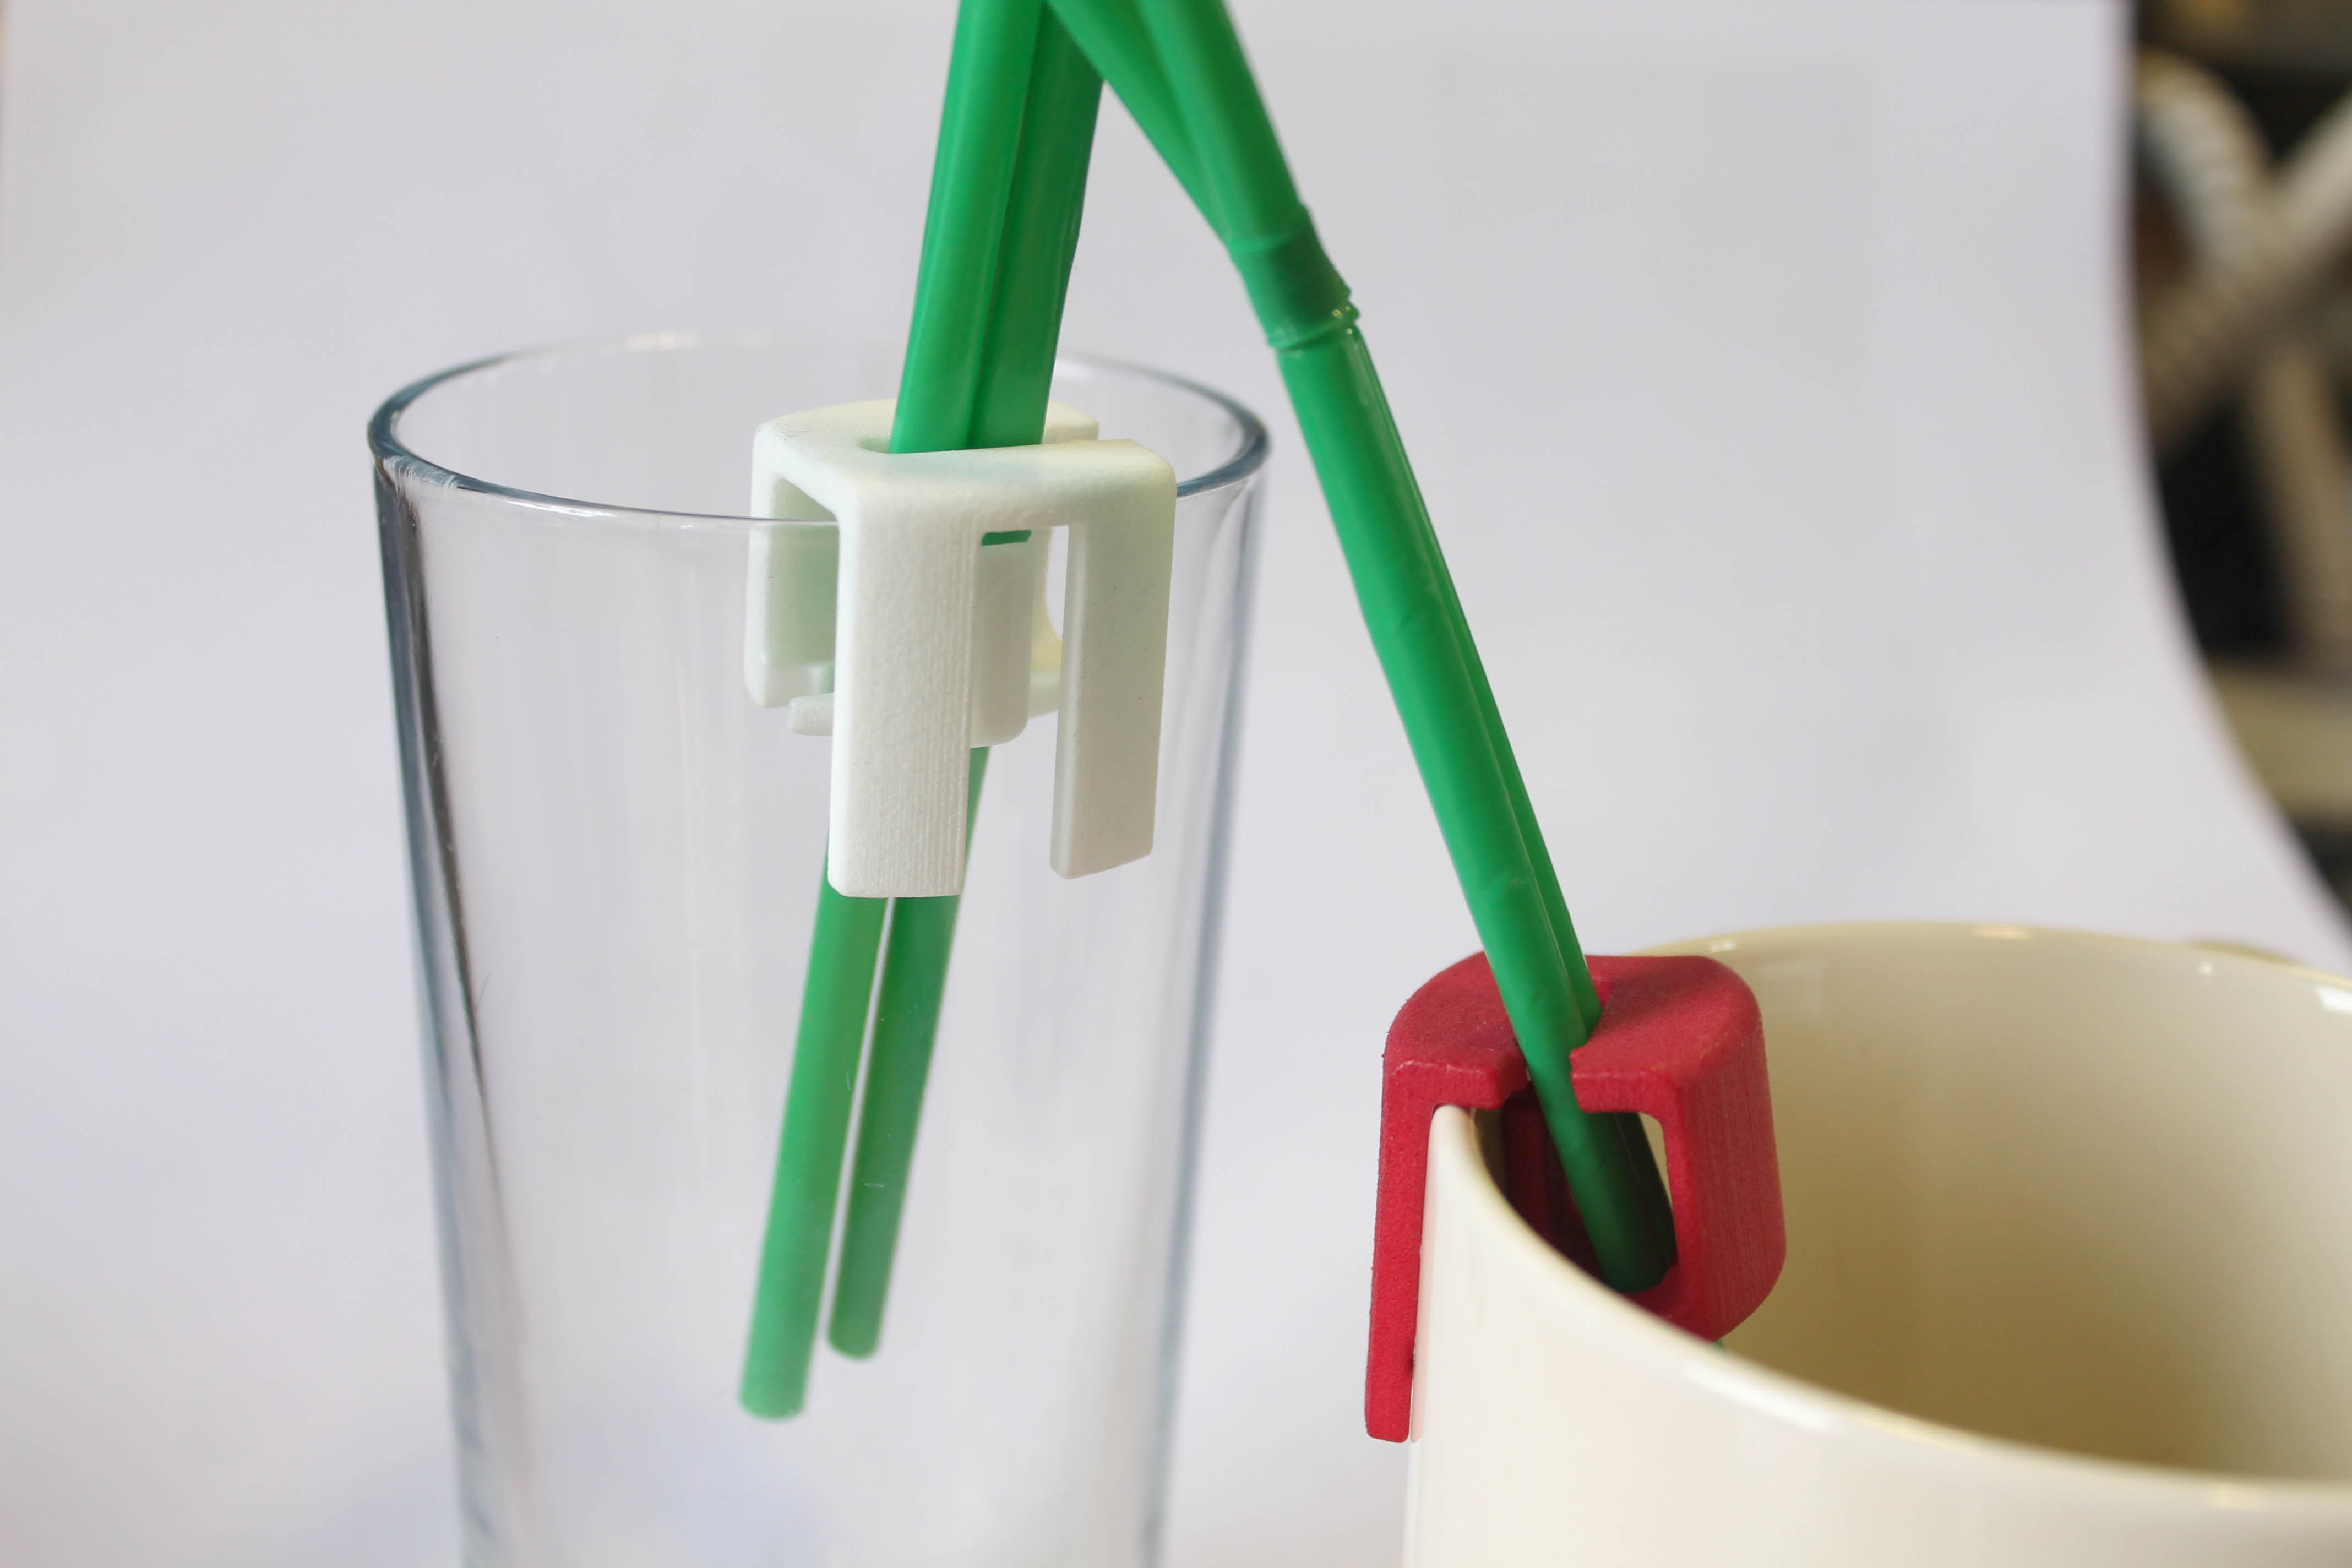
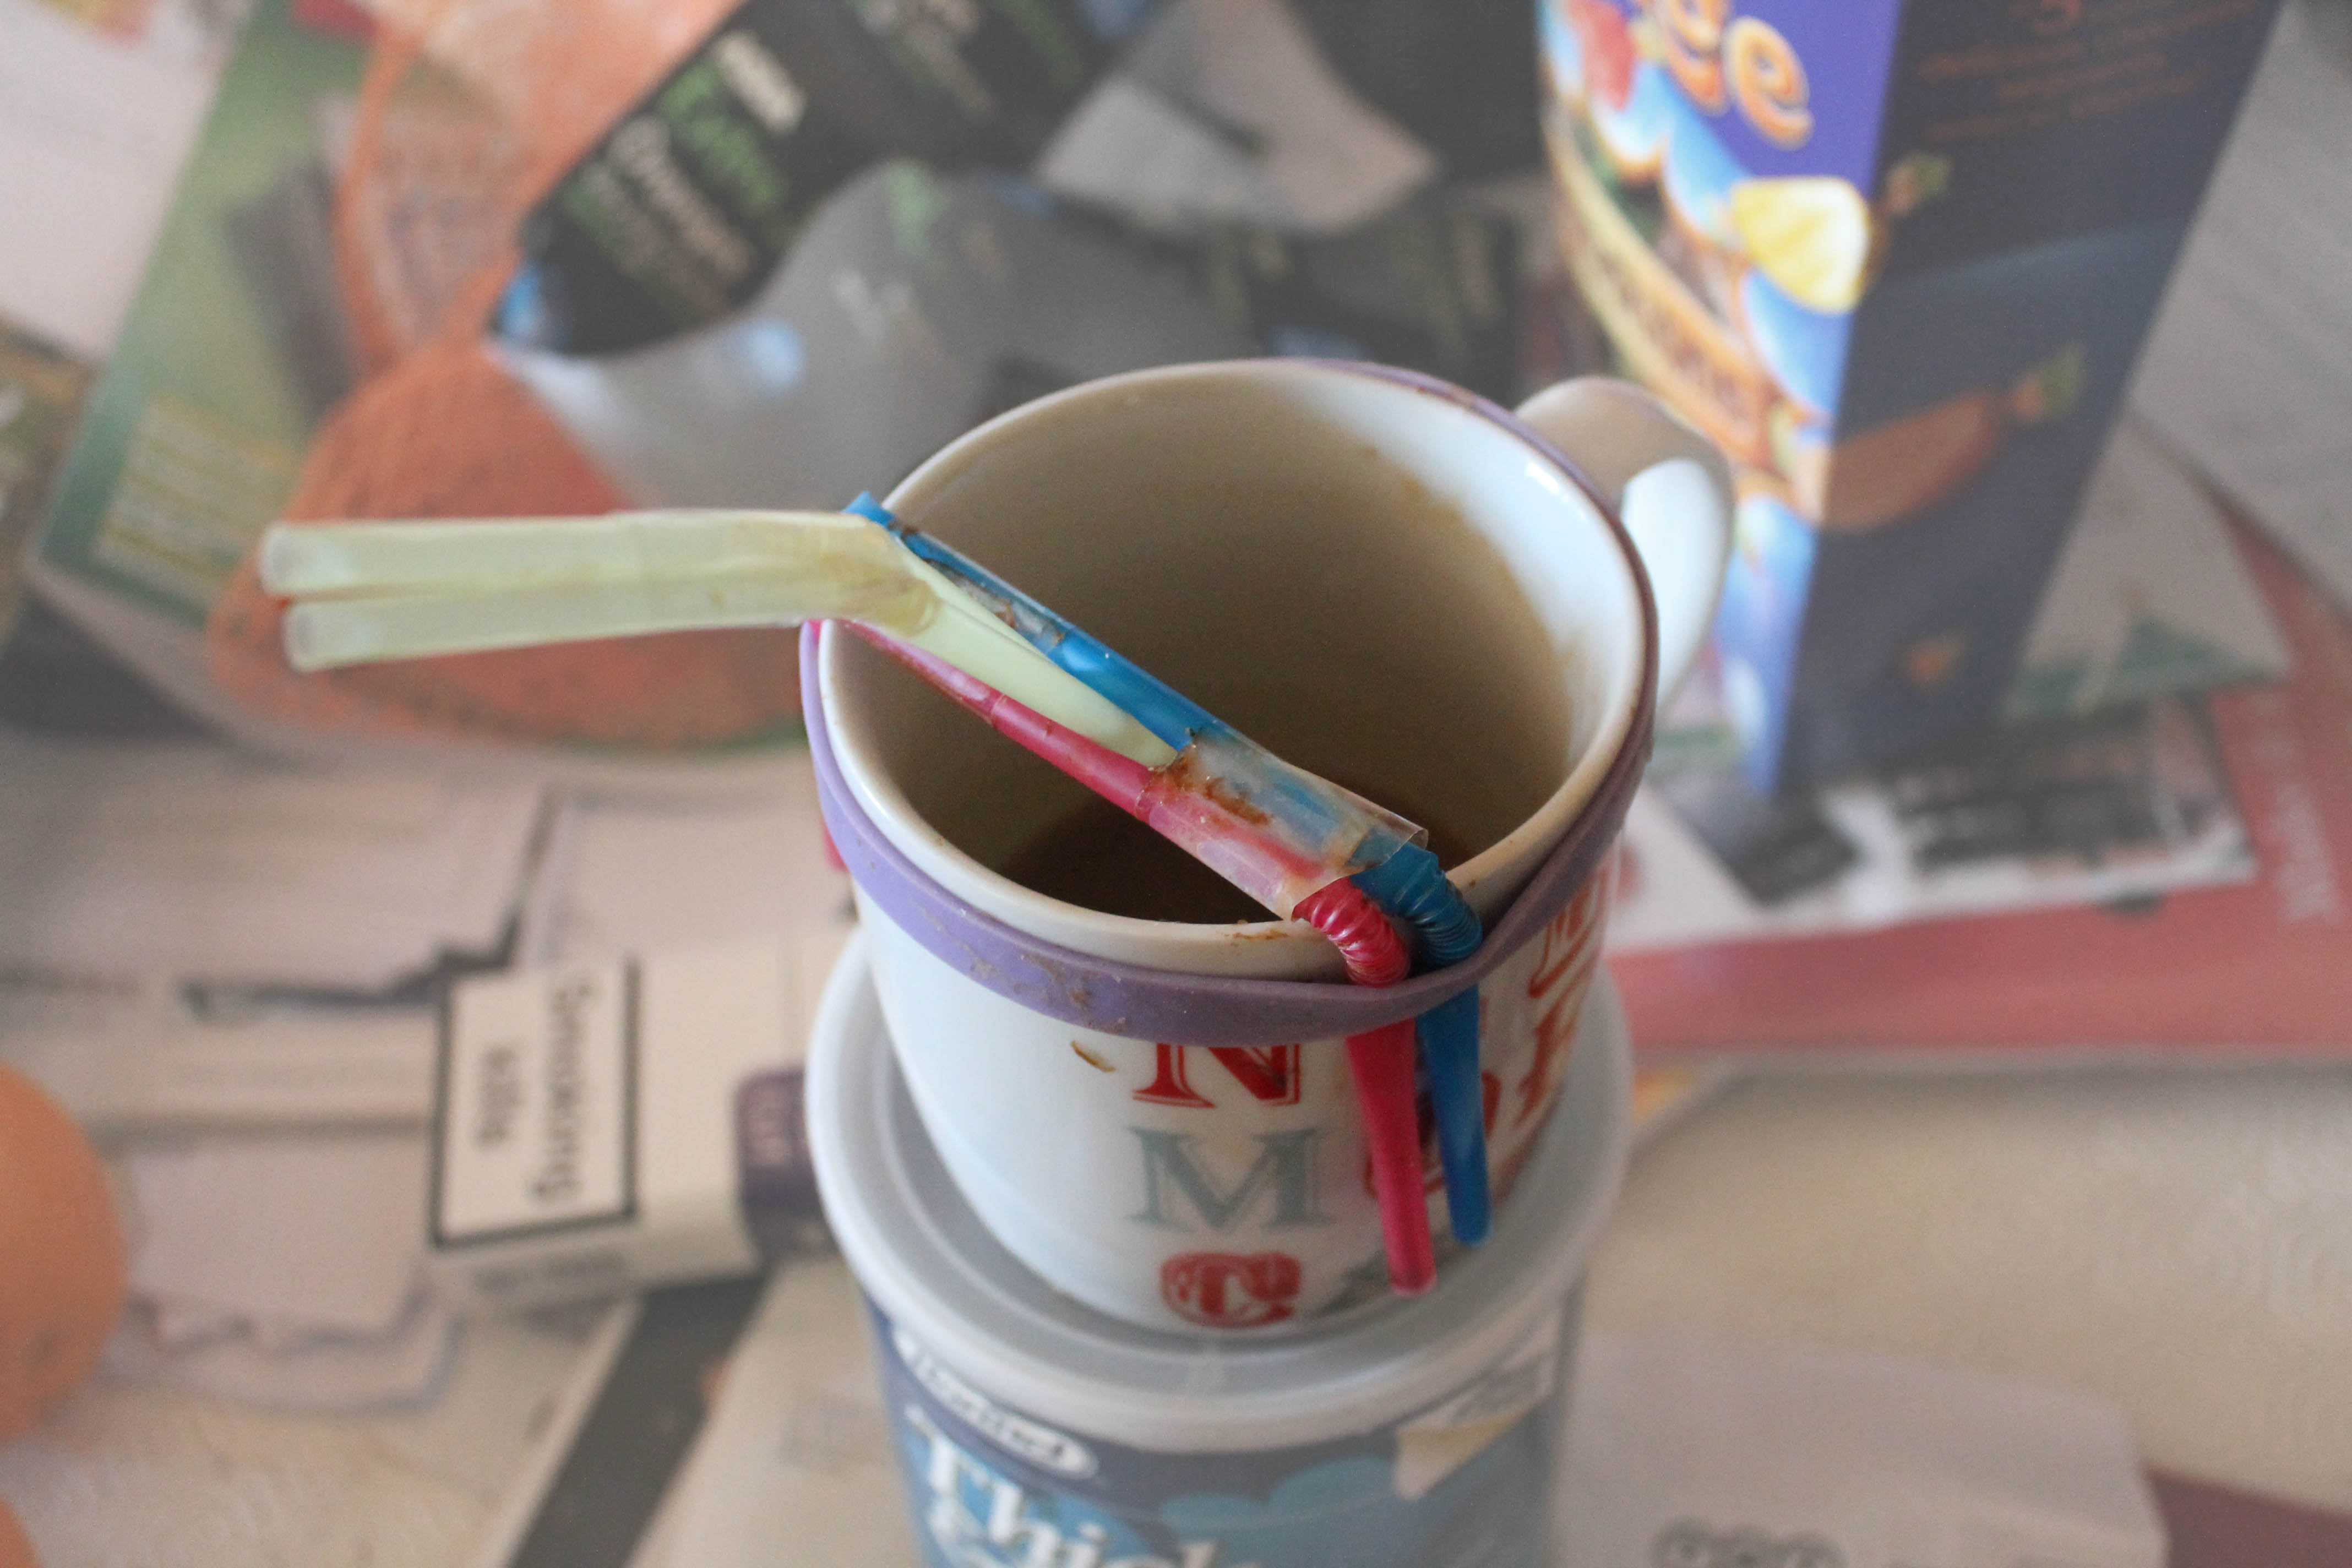
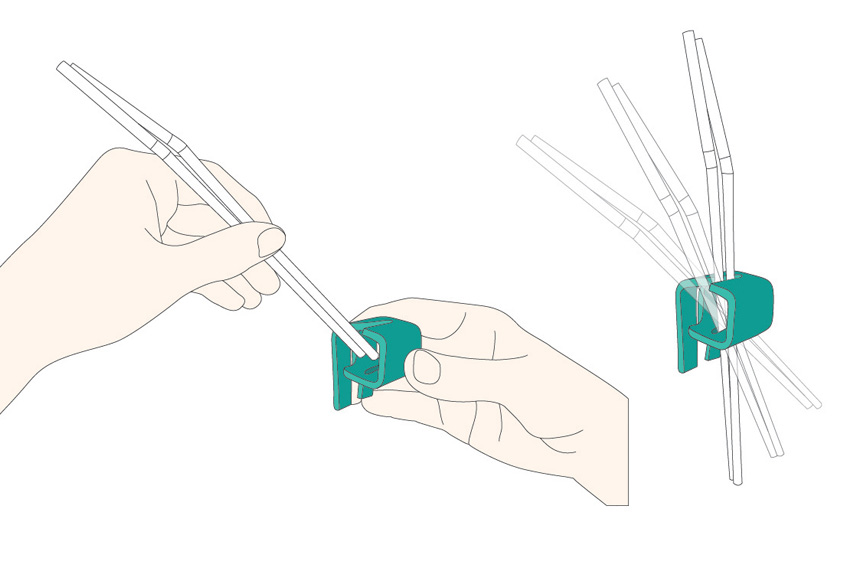
A nifty product to hold two straws on the side of any mug or glass. The straw holder was initially designed for Wendy who has MS and needs to use two straws to drink. Her husband had made a support from tape and a rubber band which did the job beautifully but was difficult to assemble and also unhygienic.

Straws_2

Straws_3

Here’s the final design, you can download the CAD file amd make your own using a 3D printer! Find a 3D printer at your local makerspace, alternatively contact DEMAND Design & Manufacture for Disability for help getting or making this straw holder.

Download the 3D CAD file here.

Make sure to post a picture if you make your own, we’d love to hear your feedback!

Deodorant Helper

November 24, 2015 in Solution

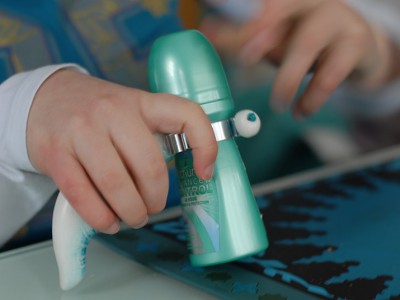
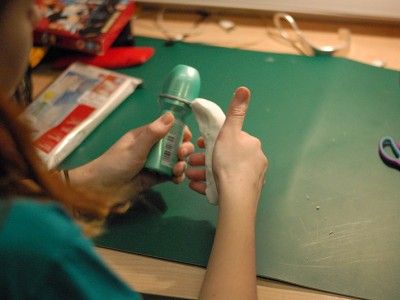
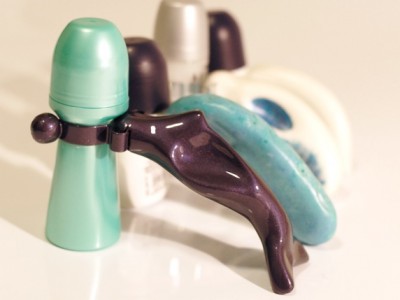
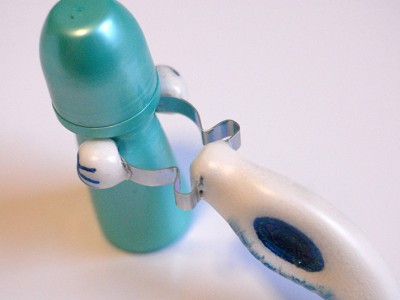
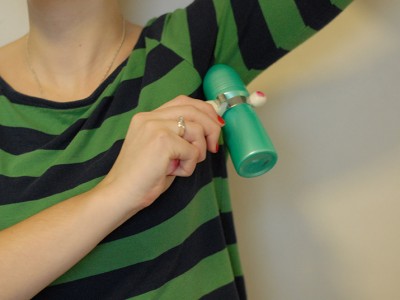
How to make a handle for roll on deodorant

Step-by-step instructions; how to make a handle for roll on deodorant. Useful if itā€™s difficult to grip the bottle or hold it at the angle needed to get the deodorant in the right place. This handle could also be useful for other household tasks because of itā€™s simple clip holder. If you discover another use take a picture and share your tips in the comments!

DSC_0342small

Materials:

Tools:

  • Pliers
  • Junior hacksaw


Method:

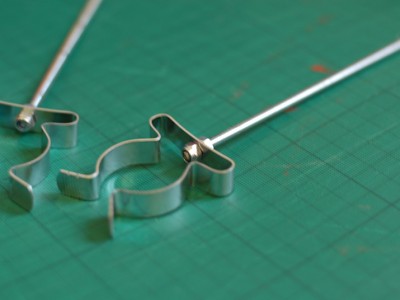
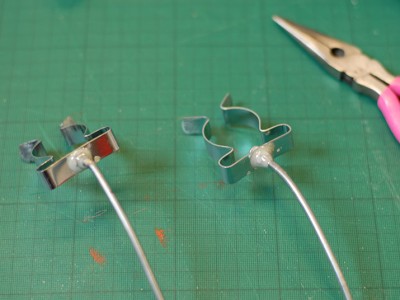
  1. Insert the threaded rod into the hole in the tool clip. Use one nut on either side to secure it in place, tighten with the pliers if necessary.

DSC_0305small

2. Mix a small amount of epoxy glue and cover each nut to make sure they wonā€™t loosen over time. Leave to harden.

3. Use the pliers to bend the threaded rod into a curve. Test the handle with a deodorant bottle to find the correct angle to easily reach the underarm.

4.Ā Trim the threaded rod using the hacksaw if it is too long. People with smaller hands might find a shorter handle is easier to hold.

DSC_0315small

5. Use some of the lightweight air dry clay to mould the handle. Make a sausage shape and push the threaded rod inside. Use your hand to shape the clay and make the handle comfortable to hold. Use 2 small balls of clay to cover the sharp edges of the tool clip that could scratch. Leave everything to dry for at least 24 hours. (Donā€™t dry in the microwave because of the metal parts!)

DSC_0414small

6. Paint the handle with acrylic paint or spray paint to make it wipe-clean. The clay is porous before painting. Here are just a few ideas:

SmithLynnetteMIBImage

7. To make the handle more ā€˜grippyā€™ dip it in Plasti-Dip and leave to cure.

8. The handle is ready to use! Slip the tool clip over the thinnest part of the deodorant bottle, take off the lid and put some on!

DSC_0378 copysmall

DSC_0407small


Accessible Zipper Pull Up

September 28, 2015 in Solution

This post was originally on www.instructables.com created by user

Accessible Zipper Pull

Accessible Zipper Pull

Many people with arthritis or other fine-motor difficulties have problems with zippers.Ā  Being unable to use a zipper makes it much harder to dress oneself independently.Ā  There are many instructables on this site that deal with making zippers easier to use – building up the zipper tab with Sugru, using a knotted cord as a zipper pull, making zipper fobs, inserting a key ring through the hole in the zipper tab, etc.

This is an easy-to-make zipper puller that will work with most zippers.Ā  It is small enough that it can be carried in a pocket or a purse.Ā  We have actually used these as a craft project for some of our senior events.Ā Ā  The puller can be made with or without the handle.Ā  The length of the puller can be adjusted by using a longer dowel.

For example, many ladies dresses have a zipper in the back.Ā  This is difficult or impossible for many people to use independently (arthritis, shoulder problems, etc.) – for that matter, I know many women without disabilities that have a hard time getting to the inaccessible zipper.Ā  As an example of how the inability to reach a zipper can amplify things – consider a woman who can not reach the zipper by herself.Ā  She lives alone.Ā  Because she can’t reach the zipper, she can’t wear her favorite dress, which might mean that she stay home instead going to a party – thus negatively impacting her social life – all because of a tiny $0.05 piece of metal.Ā  I have worked with women in this exact situation – as well as with old men who couldn’t get their fly up and stayed in for that reason.

Step 1: Materials & Tools
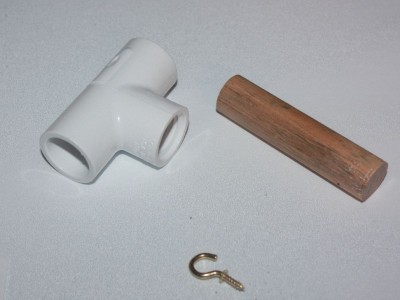
Accessible Zipper Components

Accessible Zipper Components

Materials needed:

Cup hooks (hardware store)
dowel (hardware store)
PVC T joint (with at least one side threaded)

Tools:
Sandpaper
Saw
drill

For a basic one, I use a 1/2″ tee joint and a 3/4″ dowel.Ā Ā  Test fit in the hardware store before buying.

Step 2: Cut, Sand, Drill
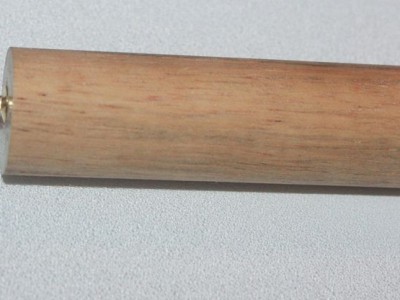
Cut, Sand, Drill

Cut, Sand, Drill

Cut the dowel to about 3″ for a standard zipper pull, or about 18″ for a ladies dress zipper puller.

Sand to remove rough edges.

Drill a small pilot hole in one end, screw the cup hook into the hole in the end.

This is the most basic version of the zipper puller (no handle).


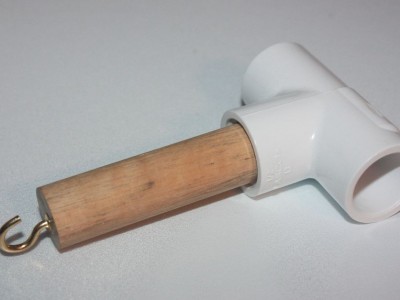
Step 3: Add the Handle
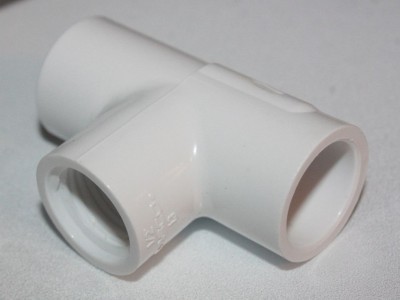
Handle
Handle

Accessible Zipper Pull

Accessible Zipper Pull Assembled

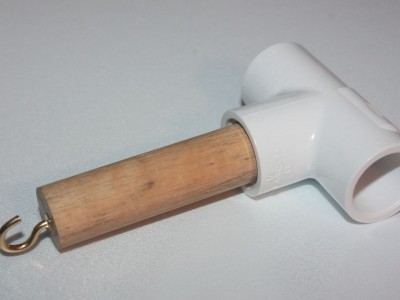
A T-handle makes it easy the puller easy to grip.

You want to get a PVC T-joint that has the threaded end slightly smaller than the diameter of the dowel.Ā  Shove the dowel into the T-joint and screw it into the threads by hand.Ā  The pine and oak are both soft enough that the thread will cut slightly into the wood.Ā  It holds very well without additional means.Ā Ā  If you are concerned with it pulling out smear the threads with a strong general adhesive (E6000 or similar) before screwing the dowel into the PVC, but I’ve not needed it.

Don’t use this to hang from the ceiling – but for pulling zippers the fit should be enough.

If more grip is needed, wrap the body of the puller and the T-joint with PVC.
Cup Holder for Crutches

September 28, 2015 in Solution

This post was originally on www.instructables.com created by userĀ 

Crutch Cup Holder

Crutch Cup Holder

Those who have broken an ankle know how frustrating it is that you can’t carry anything in your hands while crutching. Just because you’re off your foot for six weeks doesn’t mean you can’t drink with the best of them! Use this mod to be more independent and wow your friends.

Step 1: Materials And Tools

Materials and Tools

Materials and Tools

All of these materials I found at an ACE hardware in Salt Lake City.

Materials:
– a six-inch steel plate
– corner brackets x 2
– 1/4″ hex bolts (1″ x 4, 1/2″ x 2)
– washers and nuts
– 1/2″ section of 3″ dia PVC pipe
– 1/2″ section of 4″ dia PVC pipe

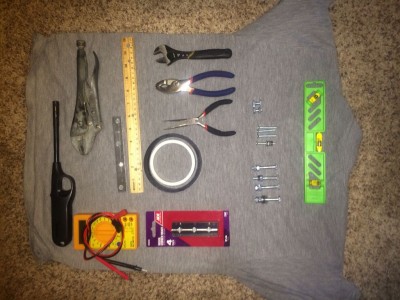
Tools:
– vice grips
– pliers (needle nose and regular)
– tin snips
– duct tape (duh)
– adjustable width pliers
– lighter
– nail
– rasp, file or screw driver (for widening holes)


Step 2: Widen Bolt Holes

Widen Crutch Holes

Widen Crutch Holes

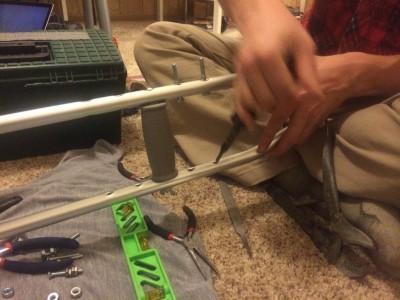
Because you didn’t buy the right hardware, open a beer and get to it. Using force and misusing any skinny tool you can get your hands on, widen the holes in your cheap aluminum hospital crutches. Try not to slice open your hand. You’ve been there before and it’s not pretty.

Step 3: Attach Corner Brackets And Cross Bracket

Attach Corner Brackets

Attach Corner Brackets

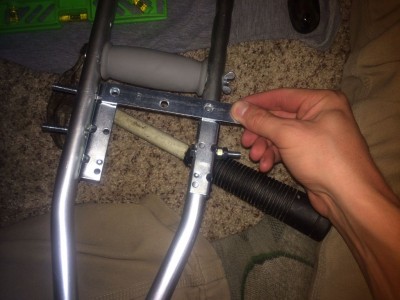
By some stroke of luck, the bolt holes align so put the pieces together (for once in your life).


Step 4: Sterilize Needle / Drill Holes In PVC Rings

Sterilize Needle Drill Holes In PVC Rings 01

Sterilize Needle Drill Holes In PVC Rings

Sterilize Needle Drill Holes In PVC Rings

Sterilize Needle Drill Holes In PVC Rings

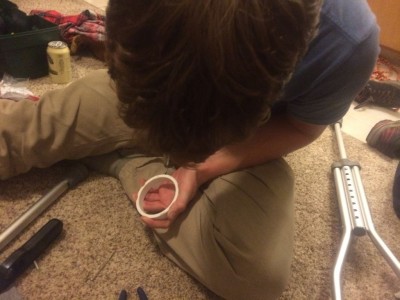
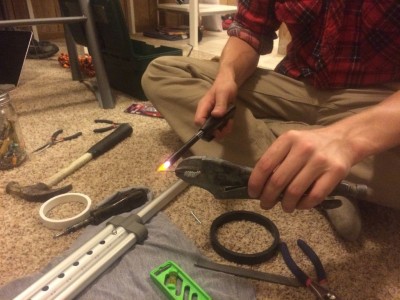
For lack of appropriate tools, you decide to melt holes into the sides of your cup holder and support rings. These are for the bolts that act as an axis. Use a lighter to heat a nail and force it through the rings. Make sure they are exactly opposed or the cup won’t swivel right.

Step 5: Bolt Everything Together

Bolt components together

Bolt components together

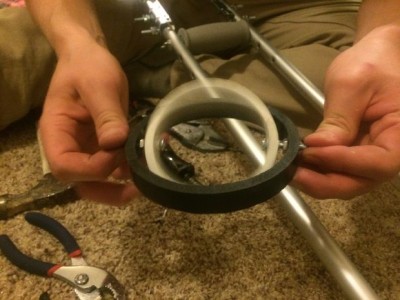
Tighten nuts around support ring (black) and to the cross plate. This is the one point of contact the crutch has with your coffee, so make sure it’s strong. Make sure there is enough play for the inner ring to spin freely.

Step 6: Enjoy Your Crutches Cup Holder

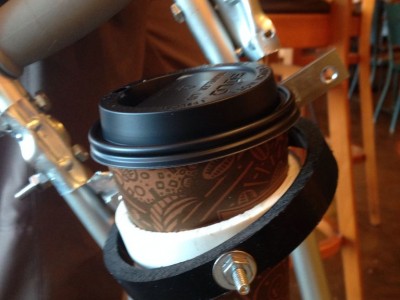
Enjoy your cup holder close up

Enjoy your cup holder close up

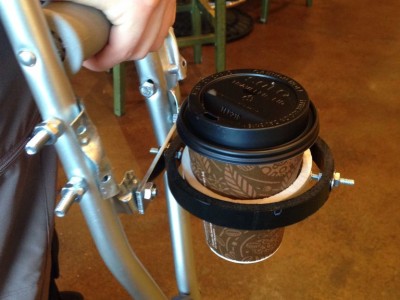
Enjoy your cup holder

Enjoy your cup holder

Make a duct tape net for the inner ring so it can hold your beer, or leave as is for tapered vessels like coffee cups and mugs.
Ta-da! Now go get sloshed.

DIY Lighter Aid

September 28, 2015 in Solution

This post was originally on www.instructables.com created by userĀ 

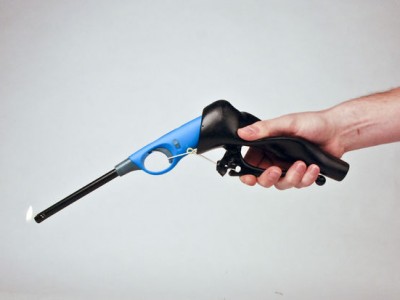
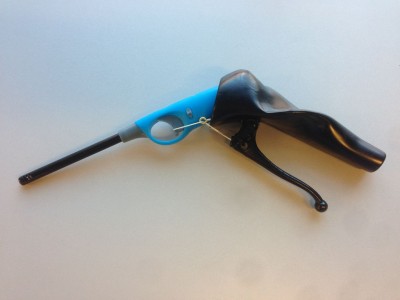
DIY Lighter Aid

DIY Lighter Aid

DIY Lighter Aid 01

DIY Lighter Aid in Use

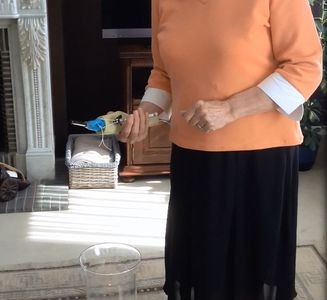
This product is specially made for Nicole. Nicole is a woman that loves atmosphere and coziness in her apartment. An important element is that she loves to light candles.

Currently she performs the operation of lighting candles with a lighter rod. As a result of osteoarthritis in her hands she has to use both hand to do this, for her, painfull operation. This is not an efficient operation and requires a lot of strength and agility . Moreover, this is very stressful for her body .

Nicole lives alone in her apartment and can not always count on the help of others.What Nicole wants is bringing coziness in her apartment by light independently and in a simple way light her candles.Thanks to the lighter aid this desire was fulfilled and Nicole is having a lot less problems.

The lighter ais has been fixed to an existing lighter rod in order to bring the advantages of both object together. The additional benefits of the aid are the thickened grip with a customized thumb support and the easy operation of the lighter by squeezing the hand.

Thanks to the lighter ais is is possible for Nicole to operate the lighter with one hand and with a limited force. There is already a simple security presence on the lighter so that is poses no danger to the grandchildren but that is still manageable for Nicole. Moreover Nicole preserves the length of the lighter, so that candles in a deep vase can be reached.

TEAM:

  • Client: Nicole
  • Design team: Seppe Naessens, Ward Declerq
  • Occupational therapist: Kjenta Furniere


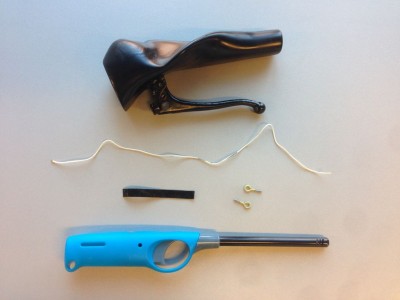
Step 1: Gather your materials and tools

Materials

  • Plasticine or clay
  • Lighter rod
  • 2 component casting silicone with stiffnes A30
  • 5 pieces wood
  • Low density polyutherane foam
  • Braided polyamide rope (rope with little stretch)
  • 2 Eyebolts
  • Putty
  • Bicycle brake lever
  • Paint

Tools

  • Drill
  • Sandpaper

Step 2: Personal Handprint

Personal Handprint

Personal Handprint

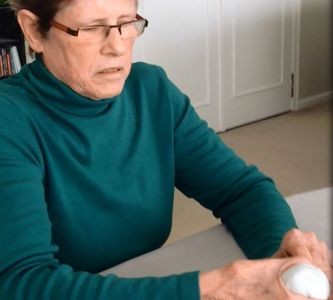
Use the plasticine or clay to make a handprint of the person who will use the lighter aid.

Model it so it looks like a handgrip. In our case and with special attention to Nicole’s condition we had to support the thumb as much as possible.

We tested this shape with ad foam model (because plasticine was too weak to support the thumb). But if you use clay you don’t need to make this foam model, because clay is strong enough to support essential parts of the hand.

Make a hole where your specific lighter rod can clamp in.

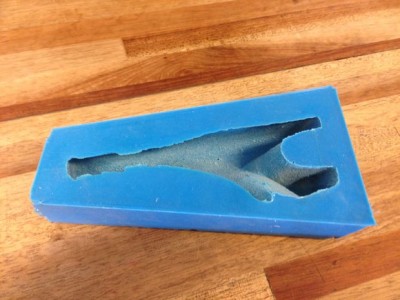
Step 3: Make silicone mold

Making the mold

Making the Mold

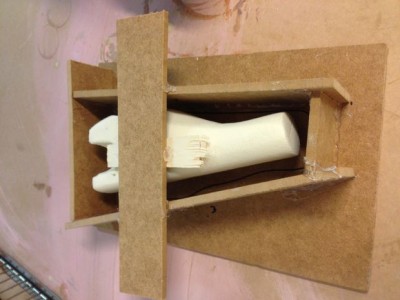
Use the 6 pieces of wood to make a mold. Make the mold as small as possible so you need a minimum of silicone.

Glue the handprinted silicone of clay model on the woodpiece on top. than will the mold with silicone untill the model is almost fully under. Let the silicone cure for 3hours.

Get the model out of the silicone. Most likely the model has to be broken to get it out.

Step 4: Casting

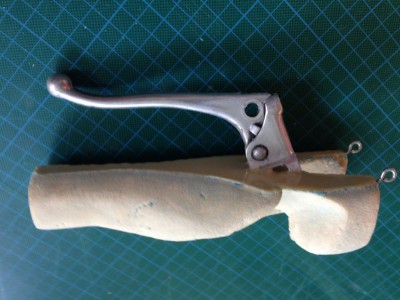
Casting

Casting

Casting Complete

Casting Complete

First spray the inside of the mold with release wax to get the model easely out of the mold.

Fill the silicone mold with foam. Let the foam cure for a while. During the curing you have to embed the bicycle brake into the foam. So the brake is attached to the model.

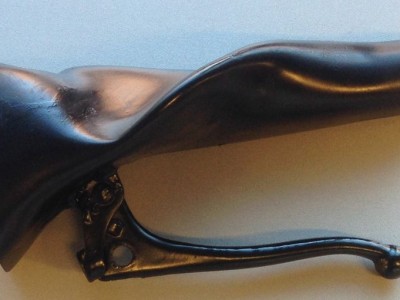
Step 5: Finish model

Finished Product

Finished Product

Sand the model to get a clear and good surface. Paint it in a color your client desires.


Step 6: Assemble

Assemble Components

Assemble Components

Finished assembly

Finished assembly


Step 7: How to use

Skip to toolbar