You are browsing the archive for Cracked It | crutches.

DIY padded crutch pads

October 10, 2016 in Solution
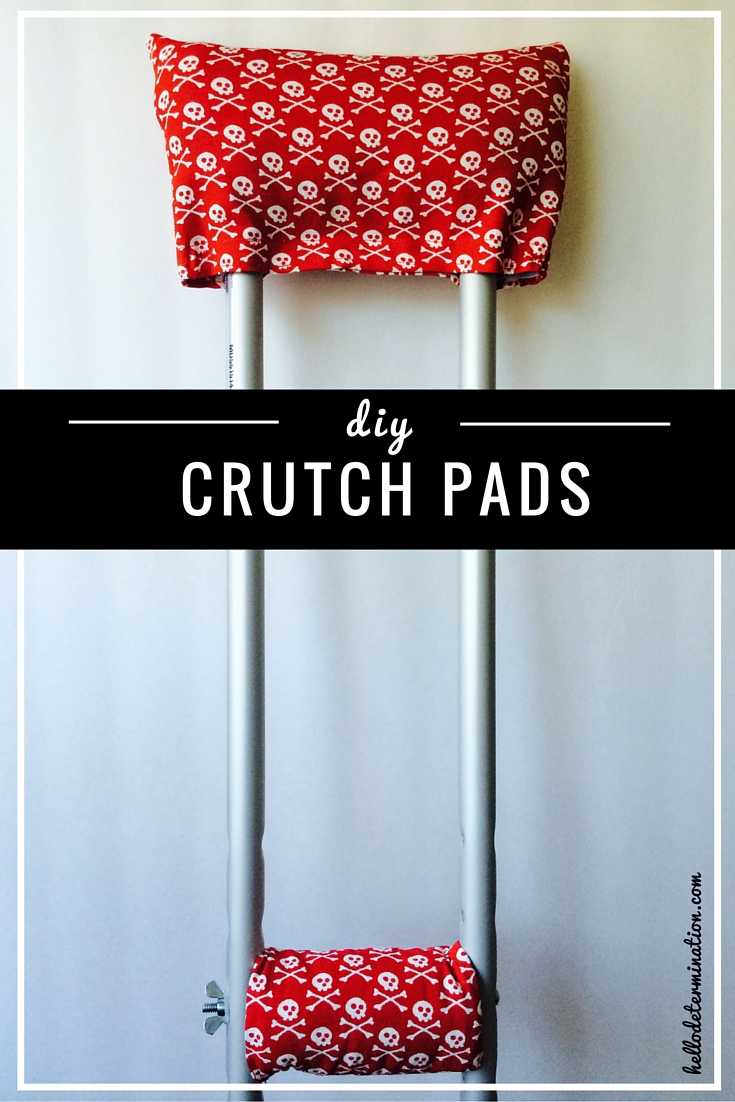
DIY-CRUTCH-PADS

WHAT YOUā€™LL NEED

  • Ā½ yard of fabric (fabric with some stretch works best)
  • Ā¾ to 1 inch thick foam (two 8 x 8 inch pieces, and two 6 Ā½ inch x 4 Ā½ inch pieces)
  • 8 inches of 5/8 to 1 inch wide Velcro (cut into two 4 inch pieces)
  • Duct tape
  • Needle and thread
  • For using non-stretch fabric: Elastic approximately Ā½ inch wide (cut into two 1 Ā½ inches pieces)

Cut the four pieces of foam as indicated above. The easiest way to secure them to the crutch tops is with duct tape. At first, I was worried that they might eventually come undone over time from all the friction, but theyā€™ve held up wonderfully after months of use. They donā€™t have to be perfect as you can see from my picture below, they just have to be secure.
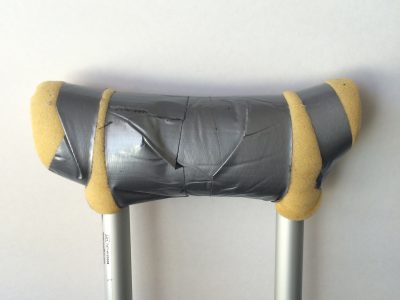
DIY-CRUTCH-PADS-FOAM

Cut the fabric. Cut your fabric making four 7 x 5 inch pieces for the handles. This measurement already includes seam allowance. For the fitted crutch top cut a 9 Ā½ x 12 inch rectangle. For either style, cut two pieces, one for each crutch.

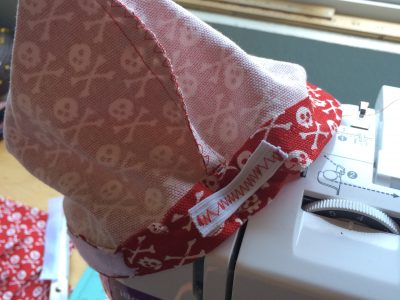
Construct the crutch tops by first laying the fabric with wrong side up then folding over the bottom edging approximately equal to the width of the Velcro. Place the Velcro in the middle of this edge then sew along the entire width of the edge to both hem the edge and secure the Velcro at the same time.

First sew the bottom edge then the inner edge of the Velcro, and do this for each piece of Velcro.

Then fold the entire piece in half with right sides together and sew along the side edges. Finish the raw edges with zigzag stitch or an overlock machine if you have one.

If using non-stretch fabric, you will need to add elastic on the sides if you want a more fitted look. If you donā€™t have a preference and could do without it, just sew Velcro across the entire edge. Simply stretch and sew the elastic to each side. Turn right side out and youā€™re done!

DIY-CRUTCH-PADS-RED-10

If using stretch fabric, simply cut and shape your pieces like the picture below, then proceed with adding the Velcro and sewing the side edges together.

To make the handle covers, place the two pieces right side together then sew along each long edge, basically making a tube. Turn right side out and insert foam.
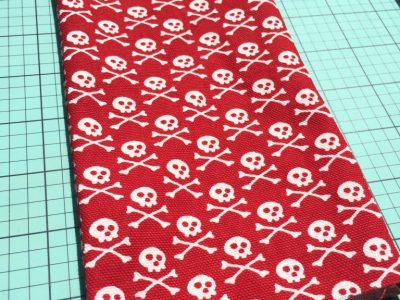
DIY-CRUTCH-PADS-RED-6-768x1024

Fold in half with raw edges meeting so that you can straight stitch along the edge to secure, then zigzag to finish the raw edges. Turn right side out. I like to sew along the edge of the tube, about 1 inch, to secure this seam down.

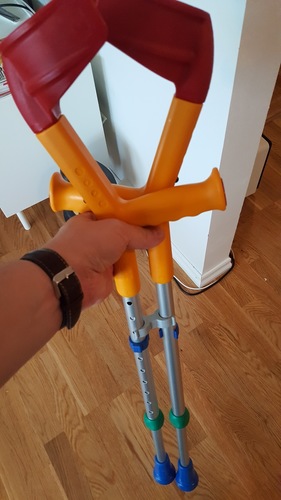
And youā€™re done! All you have left to do is place these lovelies onto your crutches like so.
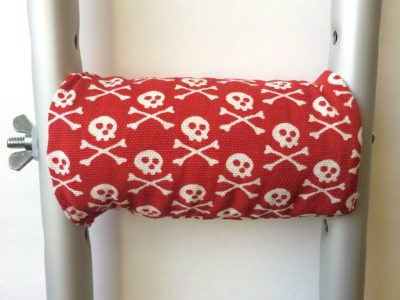
DIY-CRUTCH-PADS-RED-3-768x1024


Via Hellodetermination

Crutch Pockets

October 5, 2016 in Solution

Via Buzzfeed

Leave us a comment if you give this one a try, and remember to click the ‘This Solution Helped Me’ button at the top of the page.

Crutch Clip

September 29, 2016 in Solution

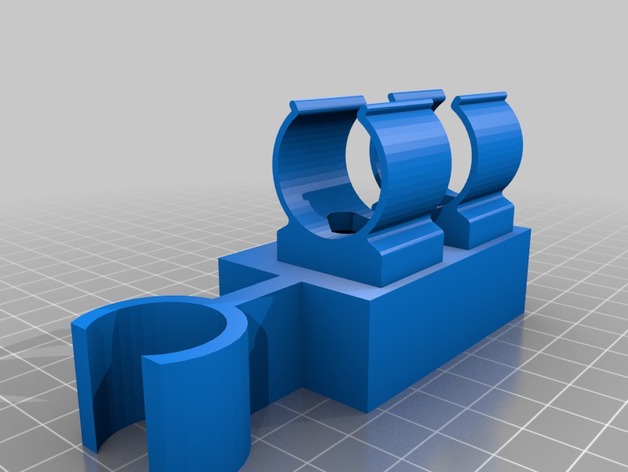
container_crutch-holder-3d-printing-92351

Via Pinshape

So small it will fit in your pocket! A 3D printable design for a crutch clip – that’s got to be worth testing!

Download the design files

Our sponsor charity DEMAND Design & Manufacture for Disability will be happy to help if you donā€™t have access to a 3D printer, just get in touch via their website.

Remember to click the ā€˜This Solution Helped Meā€™ button at the top of this page, or leave a comment letting us know how you got on with this solution!

Via Pinshape

Brake handle extender

September 29, 2016 in Solution

20150604_115220_preview_featured

Via Thingiverse

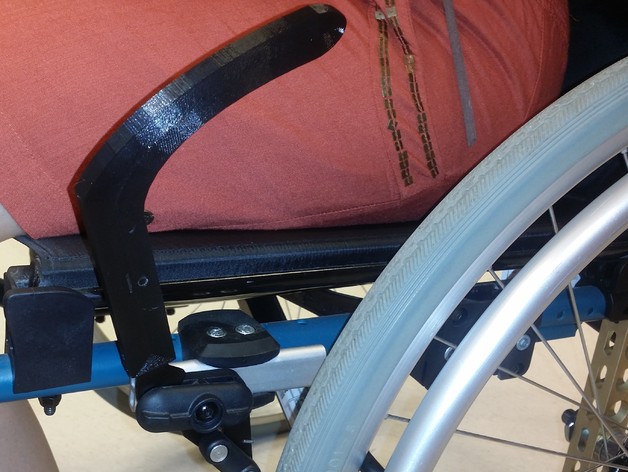
A handle extention to make your brake easier to operate.

Download the design files

Our sponsor charity DEMAND Design & Manufacture for Disability will be happy to help if you donā€™t have access to a 3D printer, just get in touch via their website.

Remember to click the ā€˜This Solution Helped Meā€™ button at the top of this page, or leave a comment letting us know how you got on with this solution!

Via Thingiverse

Sand feet for walker

September 29, 2016 in Solution

P1000147_preview_featured

Via Thingiverse

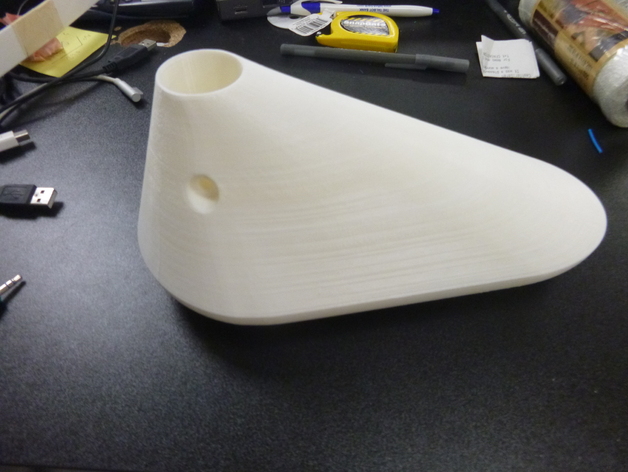
Skids for using a walking frame on soft ground or sand – Wow!

Download the design files

Our sponsor charity DEMAND Design & Manufacture for Disability will be happy to help if you donā€™t have access to a 3D printer, just get in touch via their website.

Remember to click the ā€˜This Solution Helped Meā€™ button at the top of this page, or leave a comment letting us know how you got on with this solution!

Via Thingiverse

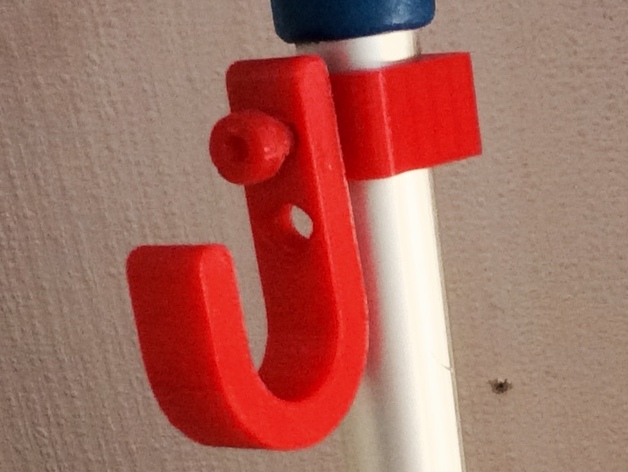
Bag hook

September 28, 2016 in Solution

Foto_18-10-15_19_33_45_preview_featured

Via Thingiverse

A simple hook which could attach to a crutch, wheelchair or walking frame – a great hands free solution!

Download the design files

Our sponsor charity DEMAND Design & Manufacture for Disability will be happy to help if you donā€™t have access to a 3D printer, just get in touch via their website.

Remember to click the ā€˜This Solution Helped Meā€™ button at the top of this page, or leave a comment letting us know how you got on with this solution!

Via Thingiverse

Torch holder

September 28, 2016 in Solution

torch_holder_walking_stick_preview_featured (1)

Via Thingiverse

A device to hold a torch (flashlight) when you’re walking with crutches, walking sticks or even a walking frame.

Download the design files

Our sponsor charity DEMAND Design & Manufacture for Disability will be happy to help if you donā€™t have access to a 3D printer, just get in touch via their website.

Remember to click the ā€˜This Solution Helped Meā€™ button at the top of this page, or leave a comment letting us know how you got on!

Via Thingiverse

Cup Holder for Crutches

September 28, 2015 in Solution

This post was originally on www.instructables.com created by userĀ 

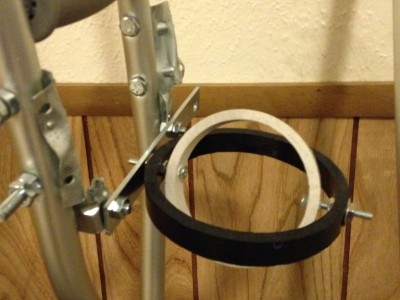
Crutch Cup Holder

Crutch Cup Holder

Those who have broken an ankle know how frustrating it is that you can’t carry anything in your hands while crutching. Just because you’re off your foot for six weeks doesn’t mean you can’t drink with the best of them! Use this mod to be more independent and wow your friends.

Step 1: Materials And Tools

Materials and Tools

Materials and Tools

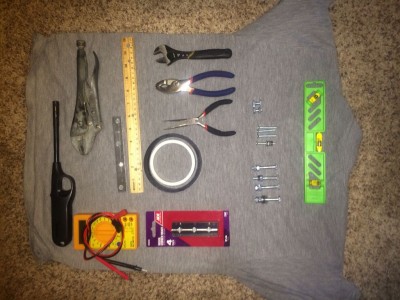
All of these materials I found at an ACE hardware in Salt Lake City.

Materials:
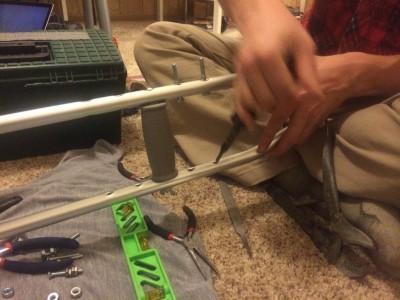
– a six-inch steel plate
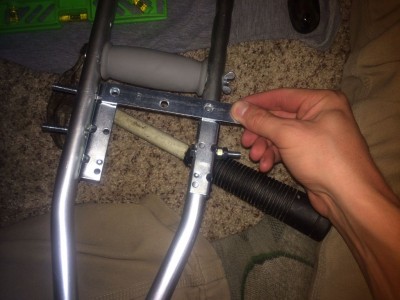
– corner brackets x 2
– 1/4″ hex bolts (1″ x 4, 1/2″ x 2)
– washers and nuts
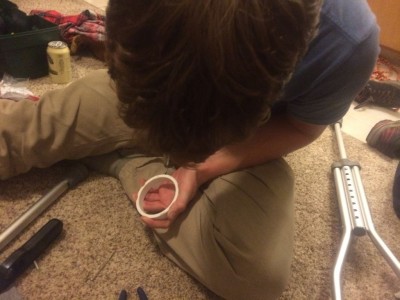
– 1/2″ section of 3″ dia PVC pipe
– 1/2″ section of 4″ dia PVC pipe

Tools:
– vice grips
– pliers (needle nose and regular)
– tin snips
– duct tape (duh)
– adjustable width pliers
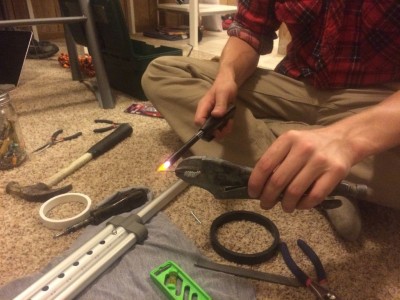
– lighter
– nail
– rasp, file or screw driver (for widening holes)


Step 2: Widen Bolt Holes

Widen Crutch Holes

Widen Crutch Holes

Because you didn’t buy the right hardware, open a beer and get to it. Using force and misusing any skinny tool you can get your hands on, widen the holes in your cheap aluminum hospital crutches. Try not to slice open your hand. You’ve been there before and it’s not pretty.

Step 3: Attach Corner Brackets And Cross Bracket

Attach Corner Brackets

Attach Corner Brackets

By some stroke of luck, the bolt holes align so put the pieces together (for once in your life).


Step 4: Sterilize Needle / Drill Holes In PVC Rings

Sterilize Needle Drill Holes In PVC Rings 01

Sterilize Needle Drill Holes In PVC Rings

Sterilize Needle Drill Holes In PVC Rings

Sterilize Needle Drill Holes In PVC Rings

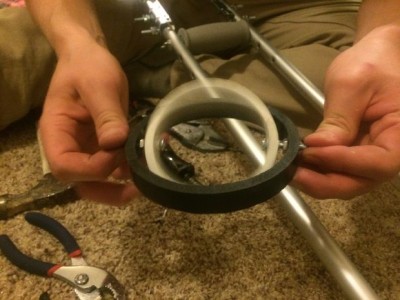
For lack of appropriate tools, you decide to melt holes into the sides of your cup holder and support rings. These are for the bolts that act as an axis. Use a lighter to heat a nail and force it through the rings. Make sure they are exactly opposed or the cup won’t swivel right.

Step 5: Bolt Everything Together

Bolt components together

Bolt components together

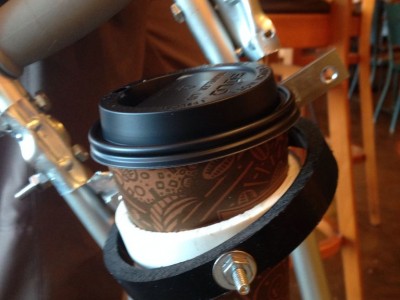
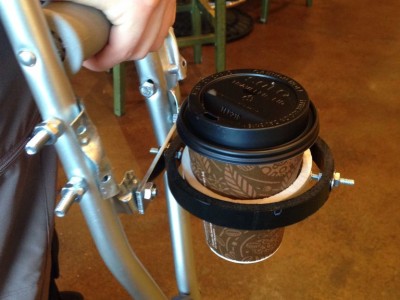
Tighten nuts around support ring (black) and to the cross plate. This is the one point of contact the crutch has with your coffee, so make sure it’s strong. Make sure there is enough play for the inner ring to spin freely.

Step 6: Enjoy Your Crutches Cup Holder

Enjoy your cup holder close up

Enjoy your cup holder close up

Enjoy your cup holder

Enjoy your cup holder

Make a duct tape net for the inner ring so it can hold your beer, or leave as is for tapered vessels like coffee cups and mugs.
Ta-da! Now go get sloshed.

Skip to toolbar