This post was originally on www.instructables.com created by user kayakdiver
Kayak Adaptation

This is my NEWEST Seat Design that plugs right into a stock Malibu Two!
This design will work perectly on both models of the Ocean Kayak, Inc. Malibu Two – original and XL, and can be modified to fit a wide variety of other models. The requisite is that there are scupper holes near the back of the seat pan area for the seat fixture to rest in.
This seat adaption is designed to provide the upper trunk support that, for instance, an incomplete quad, would need to keep his or her body centered over the kayak, thereby greatly reducing the possibility of a capsize. Paddlers with many levels of physical ability have found great comfort in using this design. You will see it being utilized in many of the photos on my web site.
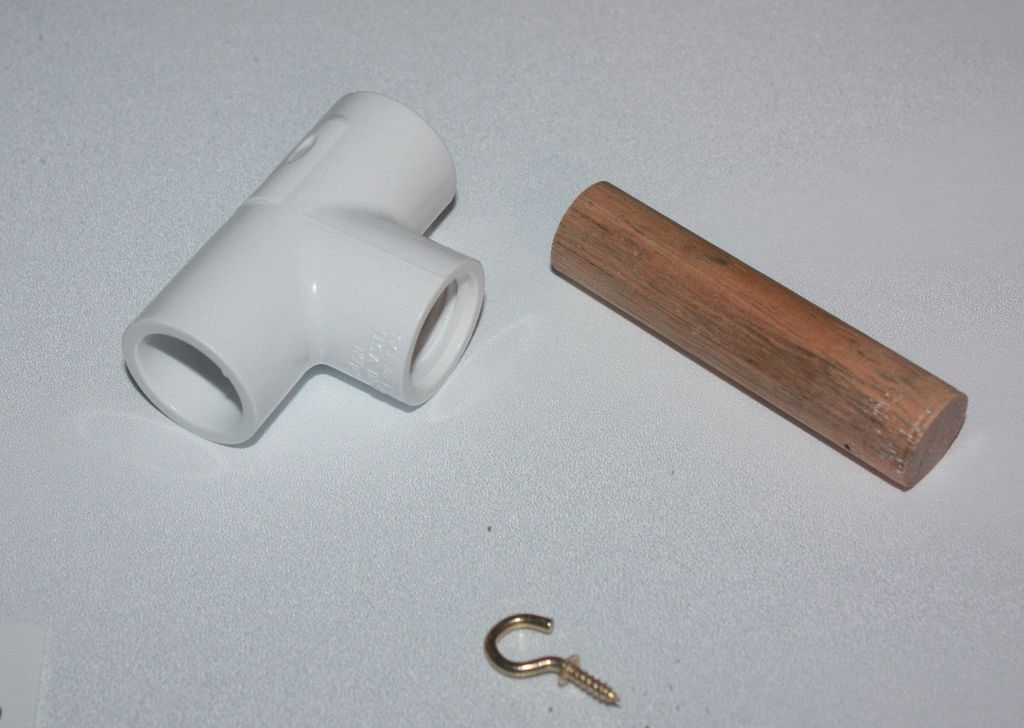
Step 1: ADAPTIVE KAYAKING SEAT FIXTURE – PARTS LIST
Seat Fixing
Seat Fixing Components
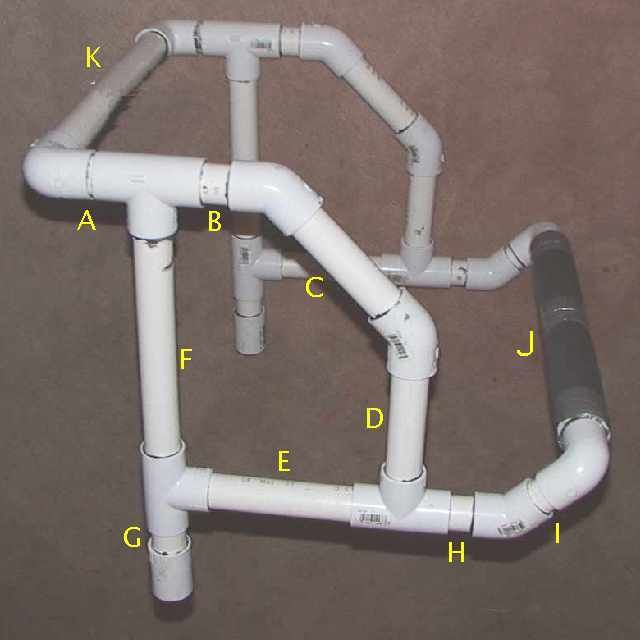
ADAPTIVE SEAT FIXTURE (LATEST DESIGN) – PARTS LIST
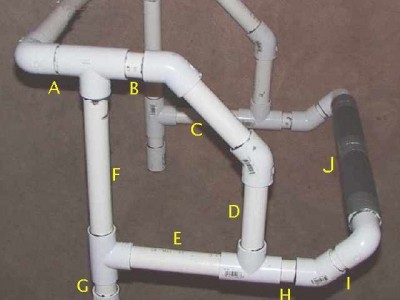
3/4″ PVC PIPE PIECES:
A 2 EA 6.0 CM
B 2 EA 5.5 CM
C 2 EA 15.0 CM
D 2 EA 12.0 CM
E 2 EA 16.0 CM
F 2 EA 23.0 CM
G 2 EA 9.0 CM
H 2 EA 9.0 CM
I 2 EA 6.0 CM
J 1 EA 44.0 CM
K 1 EA 40.0 CM
Referring to the first photo attached to this step…
These latest dimensions remove the gap at B and lower the height 1 inch.
H will appear ~3/4 inch longer than shown to compensate for shorter B and E.
PIPE FITTINGS:
4 EA 90 Degree Elbows
6 EA 45 Degree Elbows
6 EA T Fittings
2 EA Couplers – Use the long ones if you can find them!
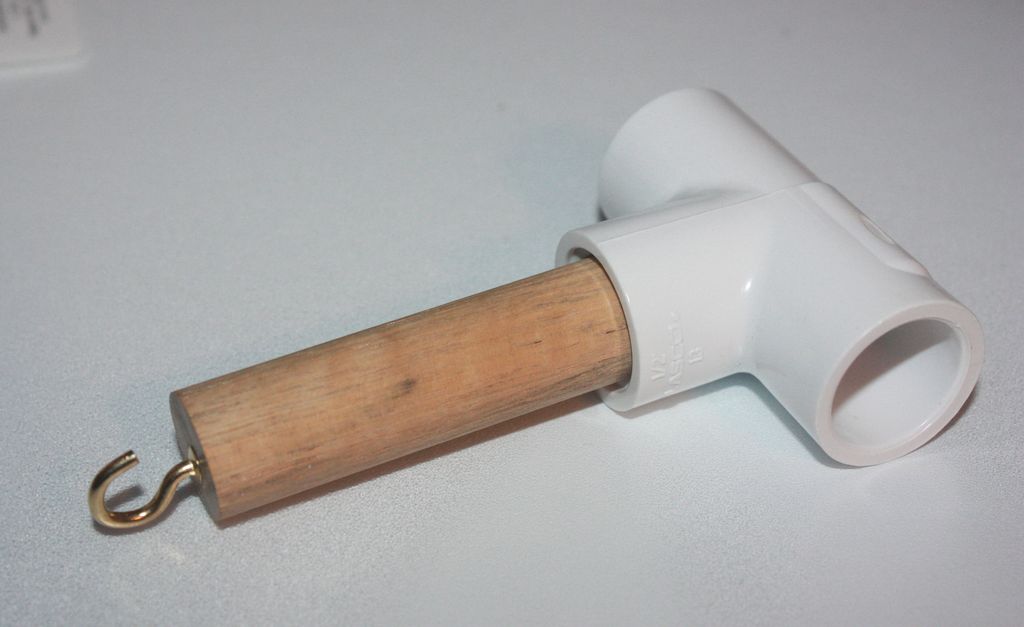
Step 2: ADAPTIVE SEAT FIXTURE – INSTRUCTIONS
Seat Fixing Components
Seat Fixings
INSTRUCTIONS
Cut all the pieces according to the Parts List in Step 1, ensuring the longest measurable length of each piece matches the dimensions given in the list.
Be sure to use a Primer on the joints just before applying the Glue and pushing the pieces together.
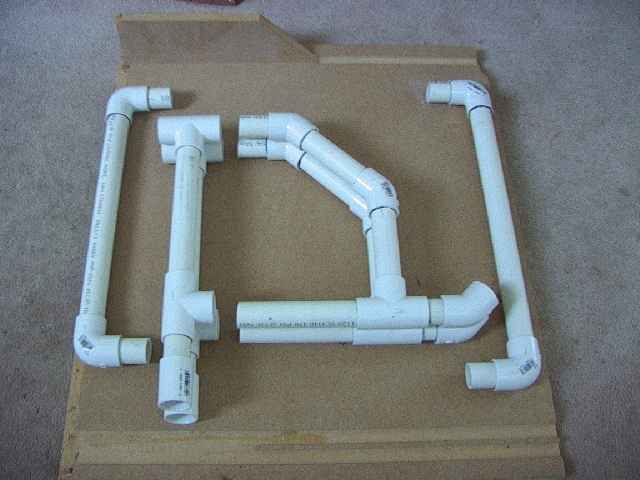
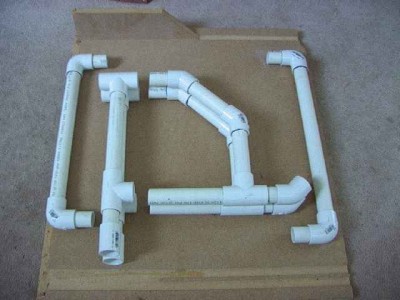
Build each of the sections of this design as shown in the second photo attached.
Pipe pieces K, C, and particularly J can be wrapped with a section of Hot Water Line Insulator as shown for J in the second photo.
Piece J is a critical part of the design. It effectively deepens the seat pocket to keep the paddler from slipping forward and out of the pocket.
Step 3: ADAPTIVE SEAT FIXTURE – NOTES
Kayak Adaptation Assembled
NOTES:
— It’s easiest to make the groups as shown below first, then fit them together.
— J is 4CM longer than K to spread the upper supports.
— J is wrapped with closed-cell foam hot-water-pipe insulation for padding.
— The lengths of E, H, and I are critical to properly position J.
— B, C, and D are joined by 45 degree Elbows.
— H and I are joined by a 45 degree Elbow.
— The fixture is held in place by the seat, and by the paddler’s legs over piece J.
— This design uses 2 fewer fitting pieces than my original design
and can be made with one 10-foot length of 3/4″ Schedule 40 PVC pipe.
— Pieces A can be lengthened for more of a reclining position.
— Pieces F and D can be adjusted equally to accommodate paddler height.
— DO NOT CHANGE the length of pieces E, H, and I, for use on a Malibu Two!
— Padding on C and the paddler’s PFD make for a nice snug fit in the fixture.
Step 4: USING THE ADAPTIVE KAYAKING SEAT FIXTURE

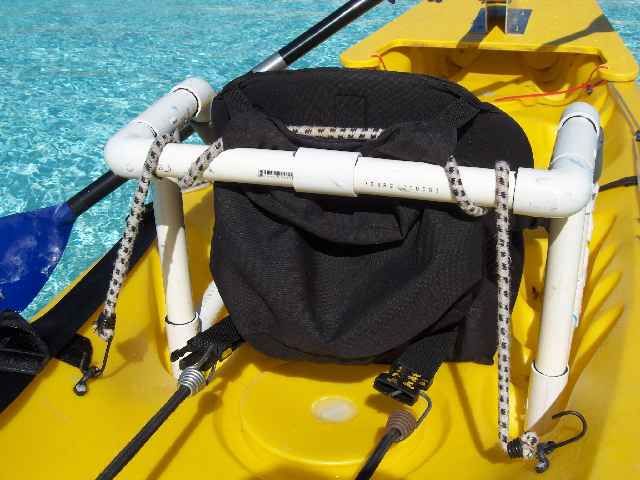
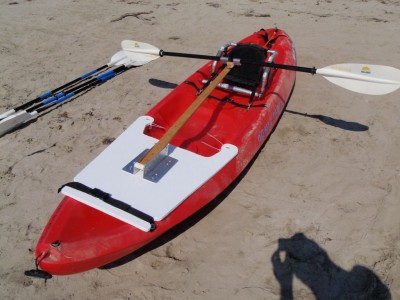
Kayak Adaptation Rear

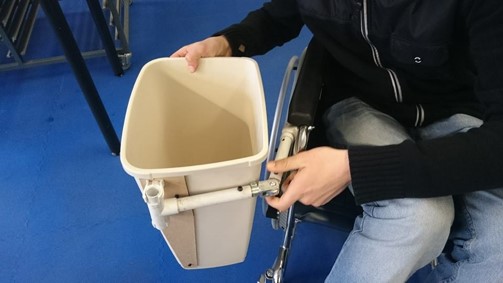
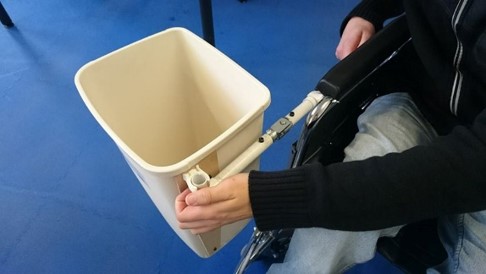
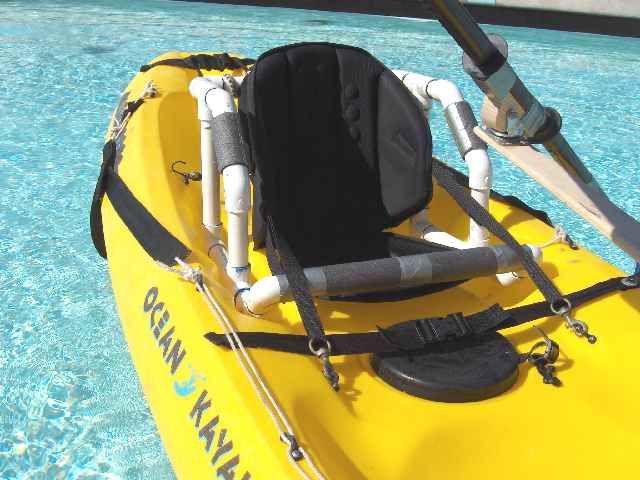
The Adaptive Seat Fixture is placed in the center seat postion of the kayak, guiding the rear vertical pieces into the scupper holes at the rear edge of the seat pan.
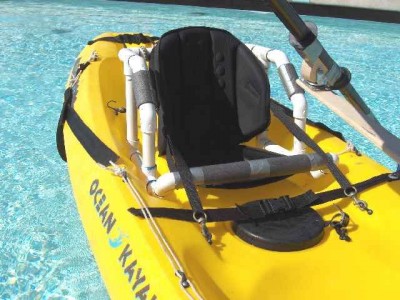
The Seat Adaption could be used without the addition of the seat-back as shown in the photos (black) below. The paddler’s PFD (assuming it’s a good Paddler’s Jacket) would provide for the padding needed to make use of it, and the paddlers legs would mostly hold the fixture in place.
Still, a much improved setup is created by adding a nice seat-back, such as the Surf-To-Summit model shown in the photos. Use a bungee cord to hold the back of the seat-back firmly into the fixture as shown in the first photo. Then, connect the forward straps of the seat-back to the factory installed eyelets provided for that purpose and cinch them up. When properly fitted, the seat-back and seat fixture will feel very tightly bound to the kayak with very little play in any direction.
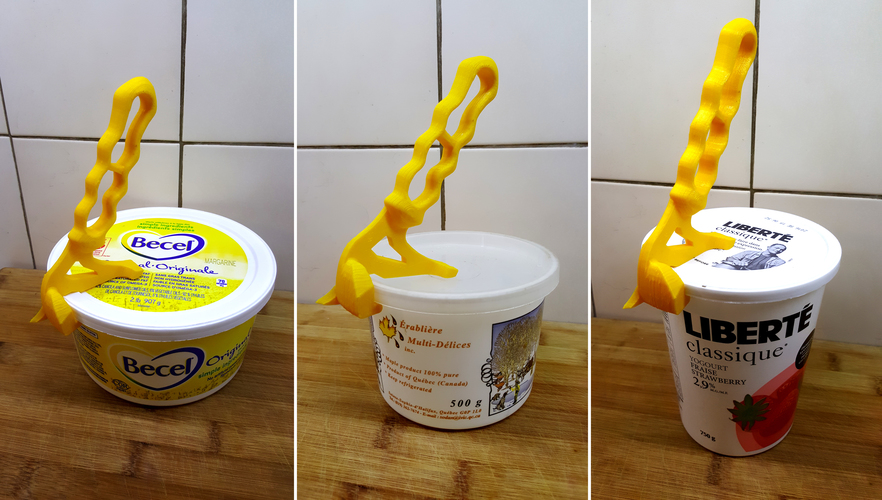 This handy 3D printable handle will help open those tricky pots of yoghurt, margarine, ice cream and more, why not give it a go!