Accessible Zipper Pull Up
September 28, 2015 in Solution
This post was originally on www.instructables.com created by user

Accessible Zipper Pull
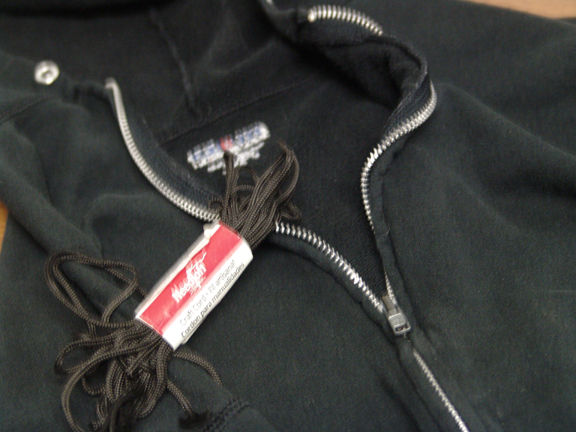
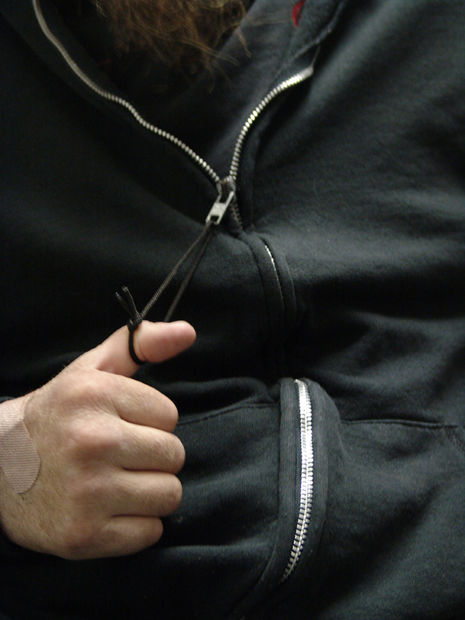
Many people with arthritis or other fine-motor difficulties have problems with zippers. Being unable to use a zipper makes it much harder to dress oneself independently. There are many instructables on this site that deal with making zippers easier to use – building up the zipper tab with Sugru, using a knotted cord as a zipper pull, making zipper fobs, inserting a key ring through the hole in the zipper tab, etc.
This is an easy-to-make zipper puller that will work with most zippers. It is small enough that it can be carried in a pocket or a purse. We have actually used these as a craft project for some of our senior events. The puller can be made with or without the handle. The length of the puller can be adjusted by using a longer dowel.
For example, many ladies dresses have a zipper in the back. This is difficult or impossible for many people to use independently (arthritis, shoulder problems, etc.) – for that matter, I know many women without disabilities that have a hard time getting to the inaccessible zipper. As an example of how the inability to reach a zipper can amplify things – consider a woman who can not reach the zipper by herself. She lives alone. Because she can’t reach the zipper, she can’t wear her favorite dress, which might mean that she stay home instead going to a party – thus negatively impacting her social life – all because of a tiny $0.05 piece of metal. I have worked with women in this exact situation – as well as with old men who couldn’t get their fly up and stayed in for that reason.
Step 1: Materials & Tools
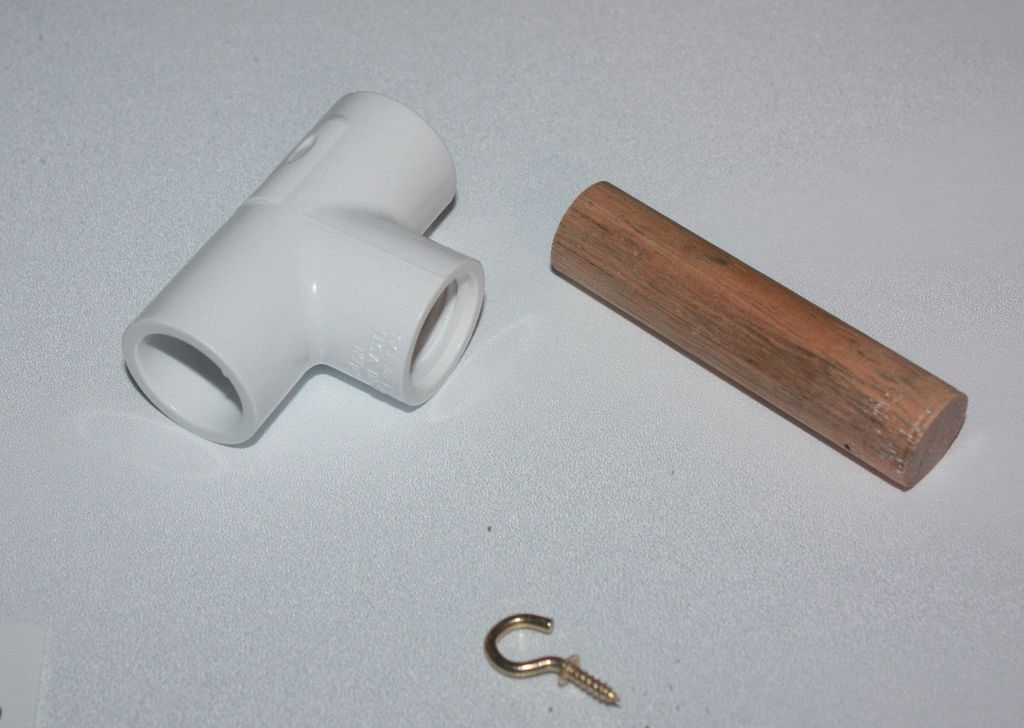
Accessible Zipper Components
Materials needed:
Cup hooks (hardware store)
dowel (hardware store)
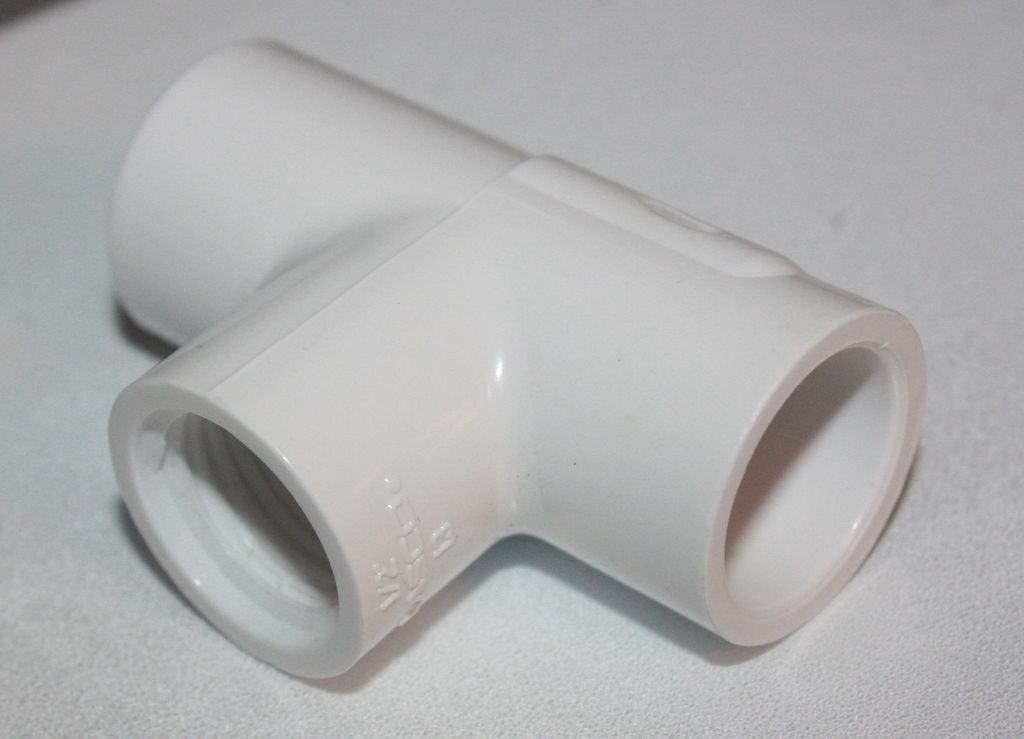
PVC T joint (with at least one side threaded)
Tools:
Sandpaper
Saw
drill
For a basic one, I use a 1/2″ tee joint and a 3/4″ dowel. Test fit in the hardware store before buying.
Step 2: Cut, Sand, Drill
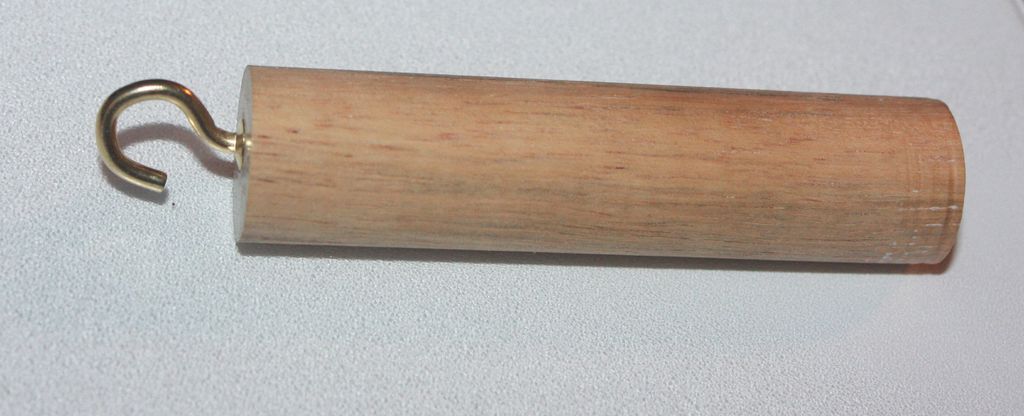
Cut, Sand, Drill
Cut the dowel to about 3″ for a standard zipper pull, or about 18″ for a ladies dress zipper puller.
Sand to remove rough edges.
Drill a small pilot hole in one end, screw the cup hook into the hole in the end.
This is the most basic version of the zipper puller (no handle).
Step 3: Add the Handle
Handle
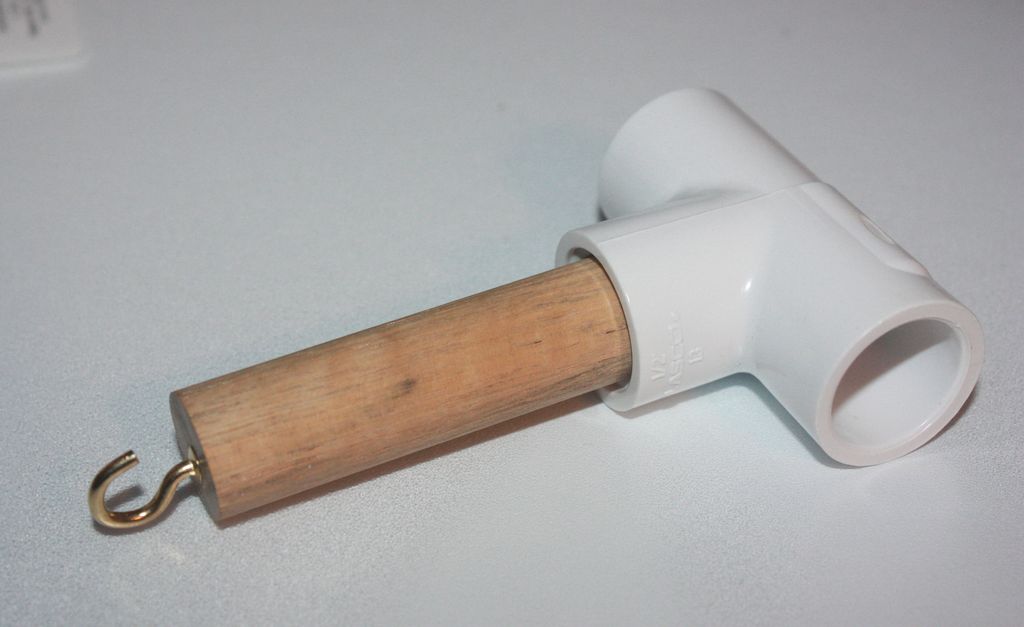
Accessible Zipper Pull Assembled
A T-handle makes it easy the puller easy to grip.
You want to get a PVC T-joint that has the threaded end slightly smaller than the diameter of the dowel. Shove the dowel into the T-joint and screw it into the threads by hand. The pine and oak are both soft enough that the thread will cut slightly into the wood. It holds very well without additional means. If you are concerned with it pulling out smear the threads with a strong general adhesive (E6000 or similar) before screwing the dowel into the PVC, but I’ve not needed it.
Don’t use this to hang from the ceiling – but for pulling zippers the fit should be enough.
If more grip is needed, wrap the body of the puller and the T-joint with PVC.