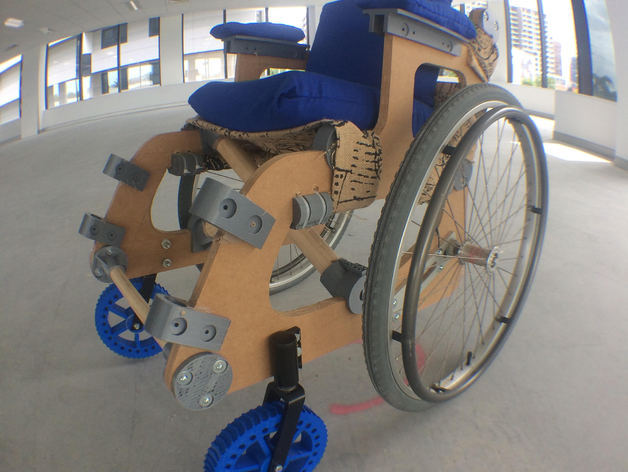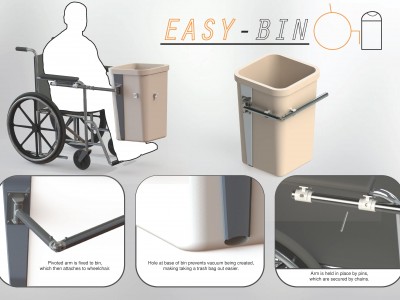
An aid to assist wheelchair users when taking out the bin
The Easy-bin wheelchair aid is an simple but effective solution to taking the trash out for people in wheelchairs. It allows the user to take the trash out while still having full control of the wheelchair and being able to navigate tight spaces with ease.
Research has shown us that wheelchair users who live fairly independently find it hard to take out the rubbish. This is because you need two hands to push a wheel chair so it is hard to push it whilst carrying a bin or bag, plus few people want to rest their rubbish on their laps. We were able to speak to man living in America, who makes a variety of YouTube videos showing his daily struggles, about how he takes out his trash. He was able to give us insight on how to develop a product which solves this issue.
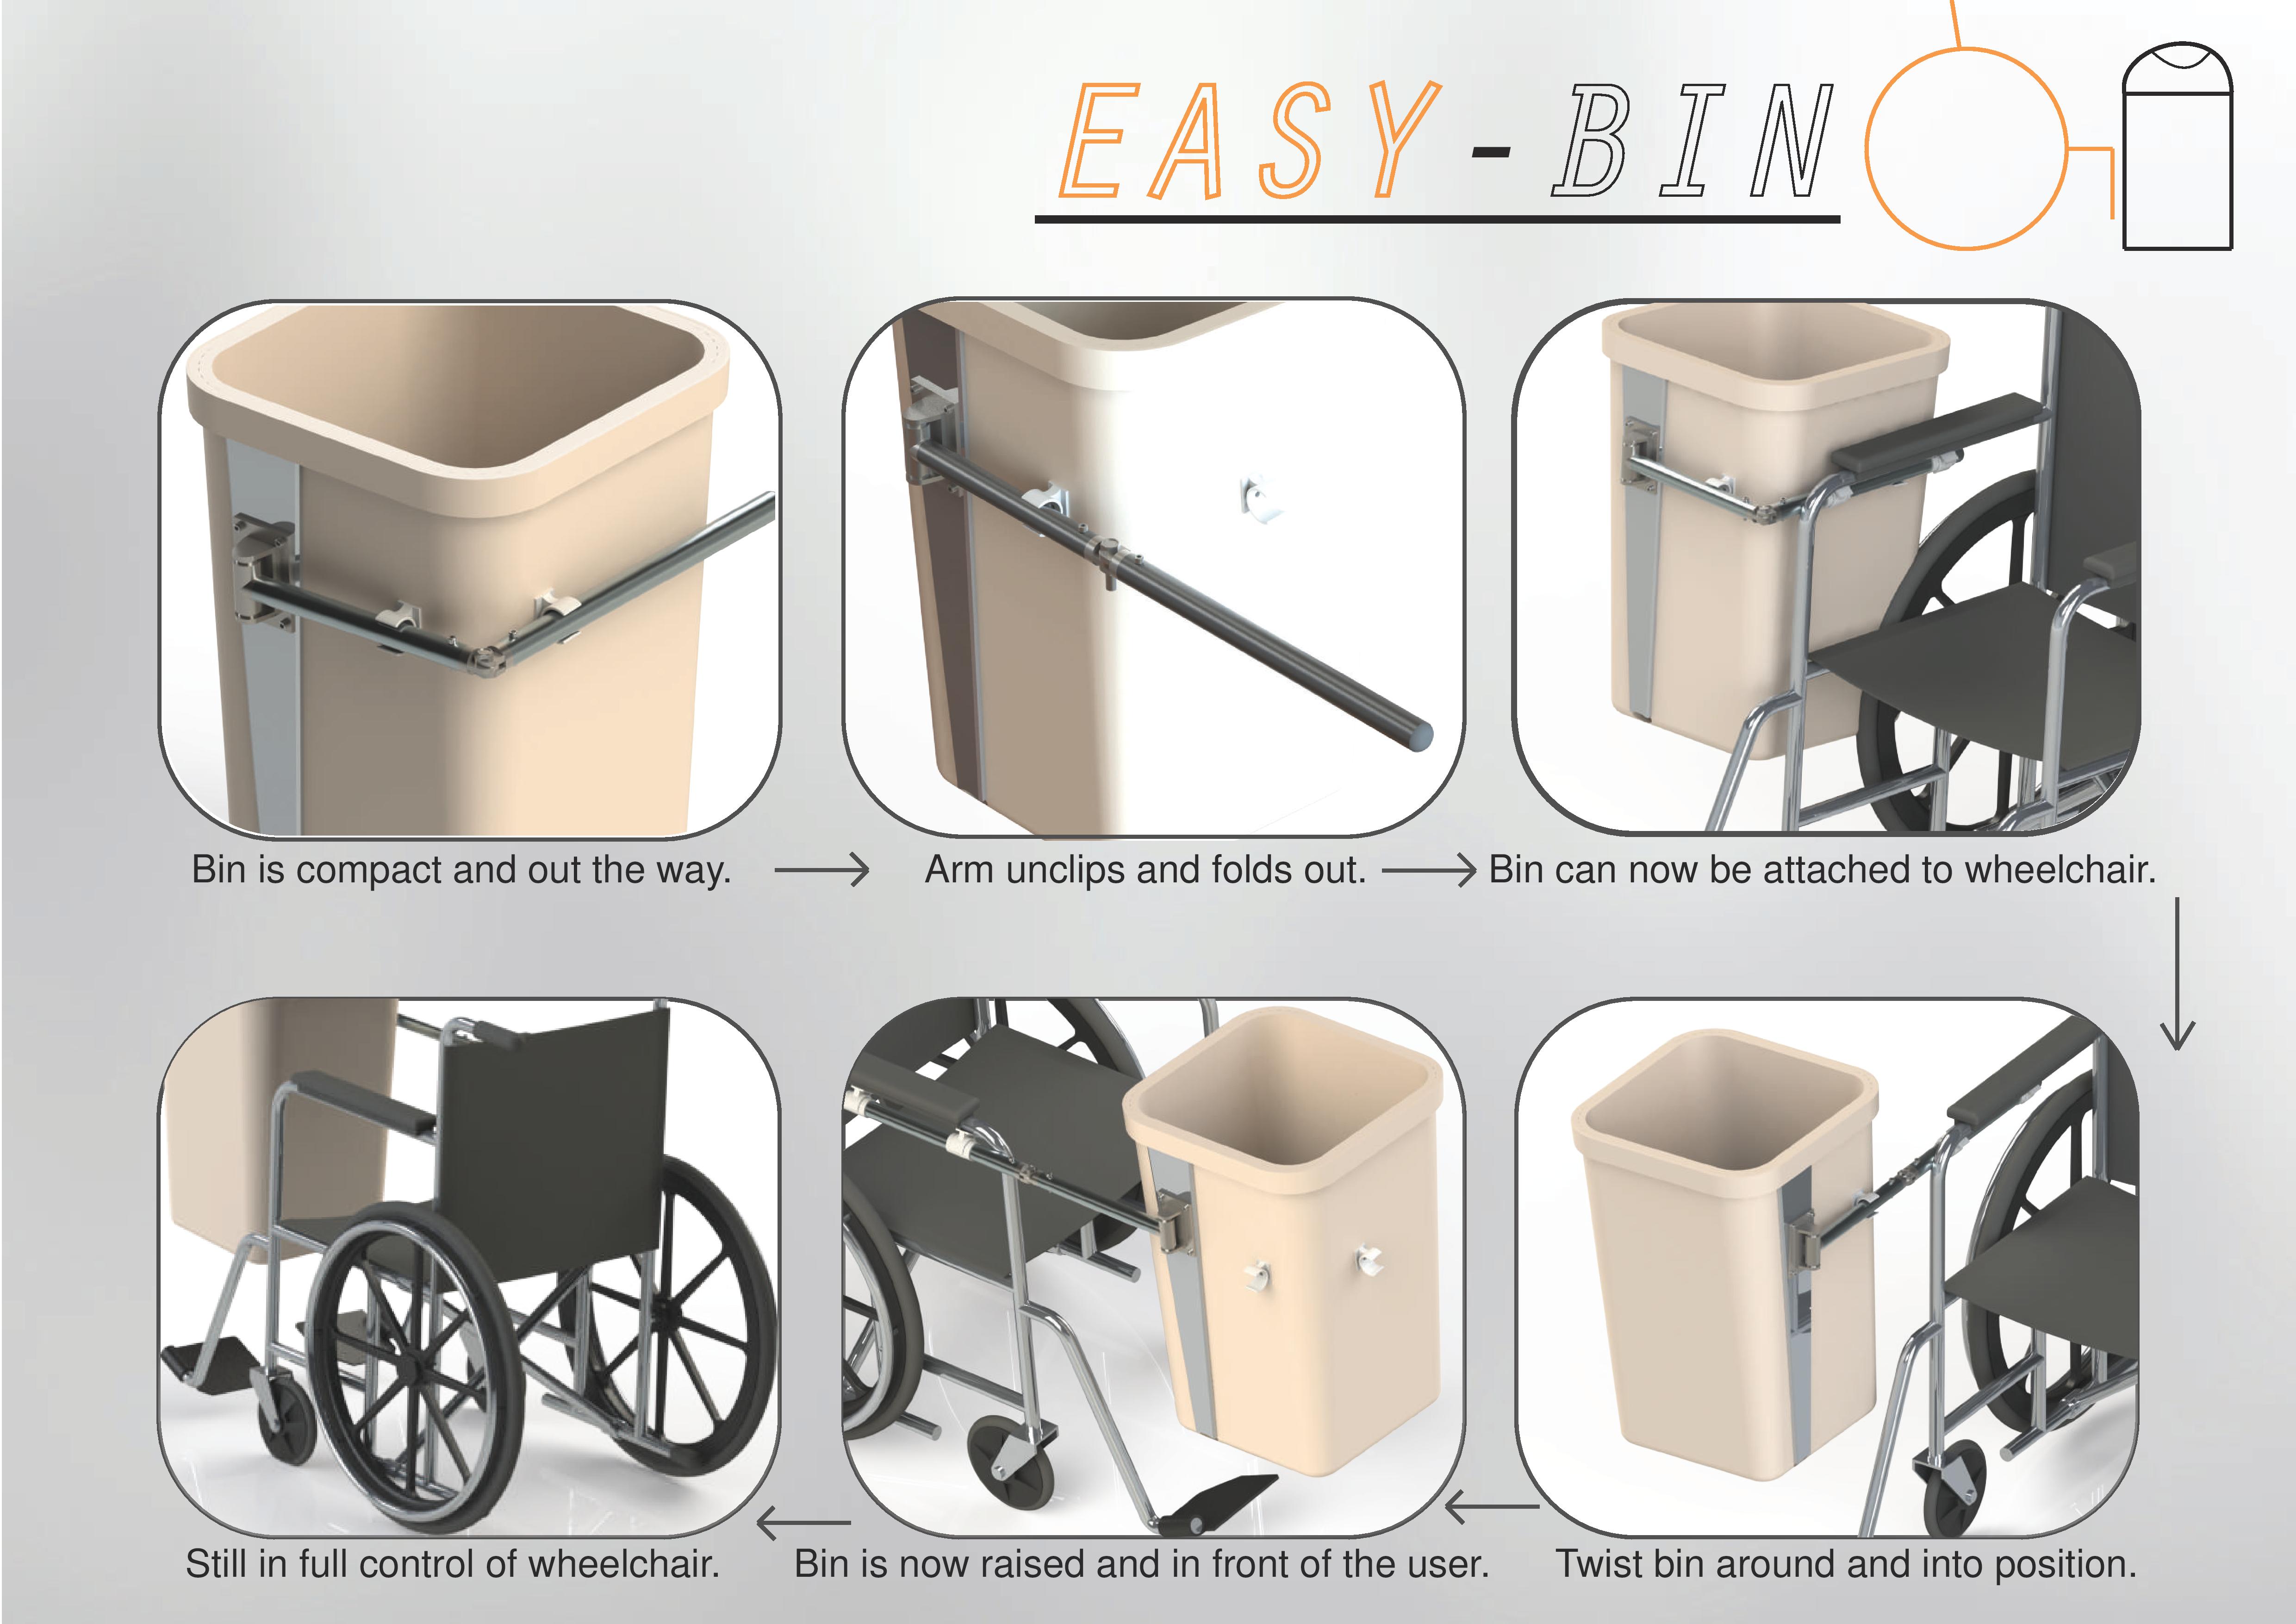
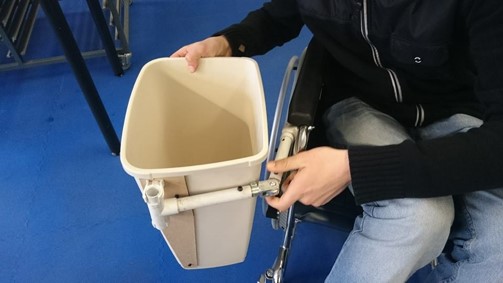
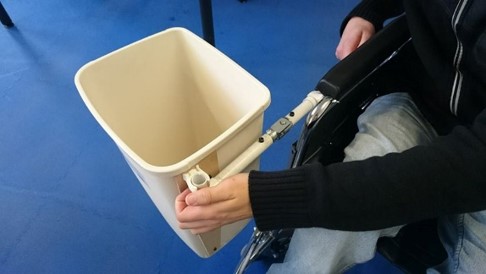
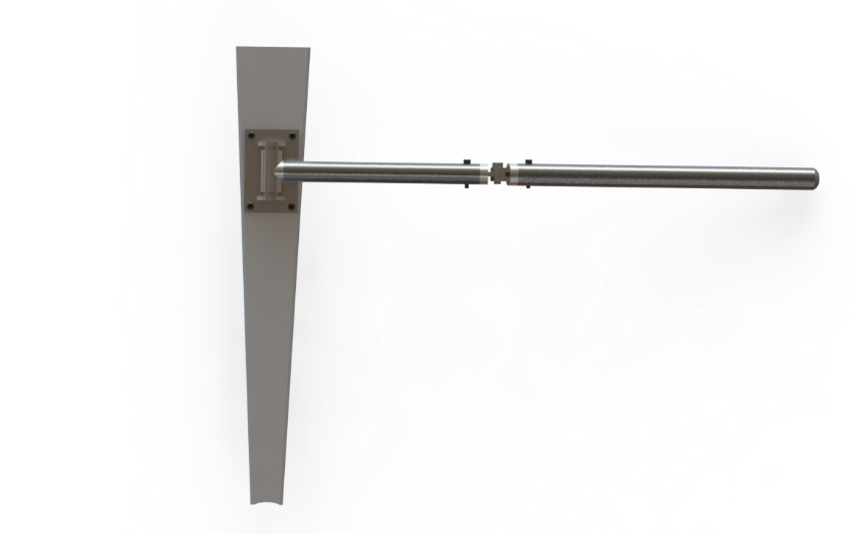
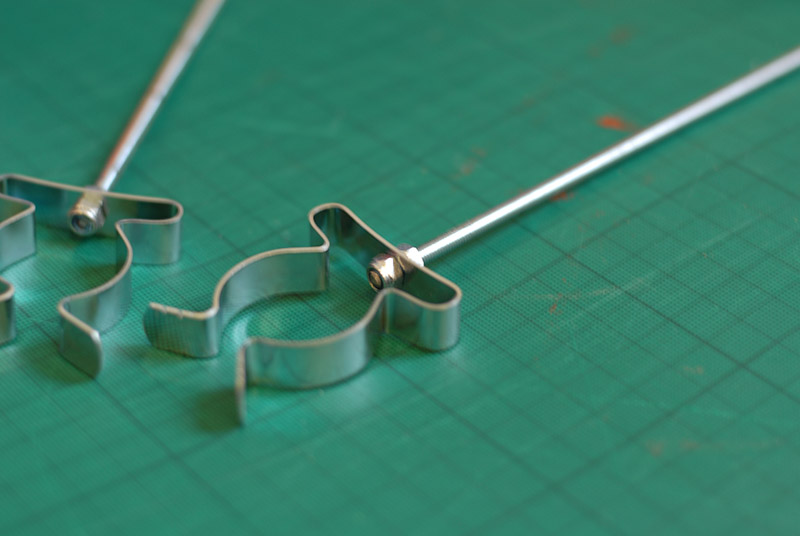
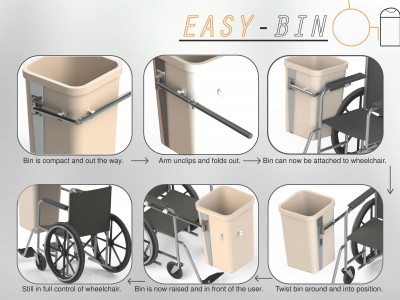
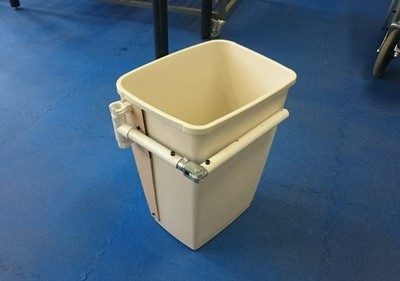
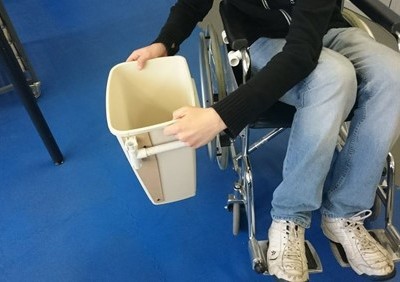
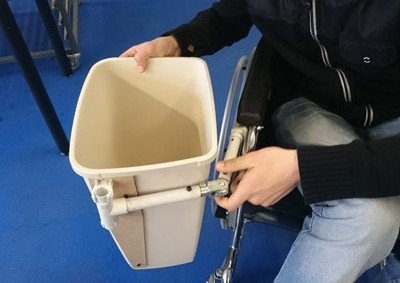
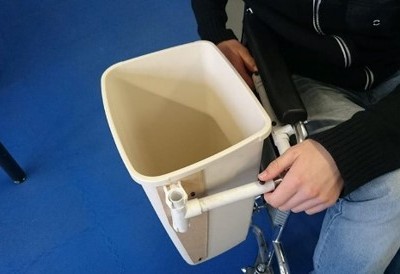
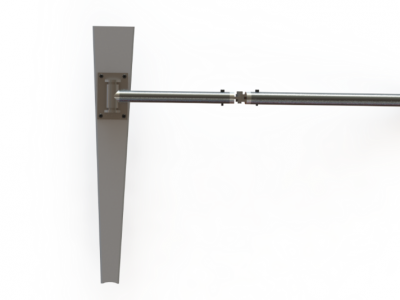
The final solution we have come up with is a combination of arms and hinges which are permanently attached to a dustbin and then lifted up and attached to a wheelchair. The arm has the ability to fold up against the bin and clip into place, this keeps the product compact and out of the way. When the user wants to take out the trash all they do is simply go to the dustbin, unclip the first arm, lift the bin up and slot the arm into the attachments on the wheelchair, they can then twist the bin around in front of their legs.
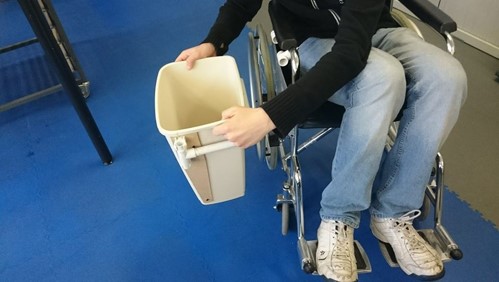
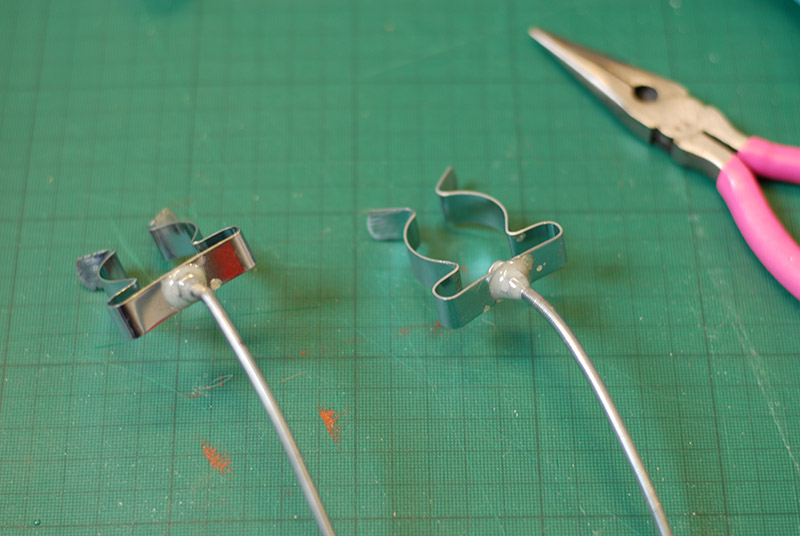
To test the product we made a model and once was made we acquired our wheelchair and began to test our final outcome. The process of utilising our product starts off with the user travelling towards the bin lifting it up and clipping the bar in the clips attached to the wheelchair. Connecting the bar to the clips wasn’t a smooth process when we tested it but it was a simple process. Baring in mind we intend to make the actual product out of a metal such as aluminium because metals tend to have a more polished surface finish, so there would be less friction between the bar and the clip. Therefore connecting the pieces together should be a smother process.
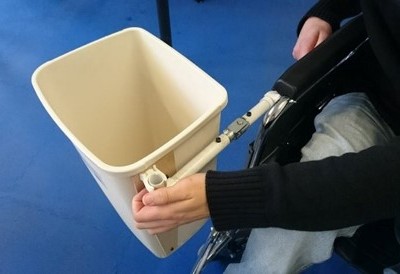
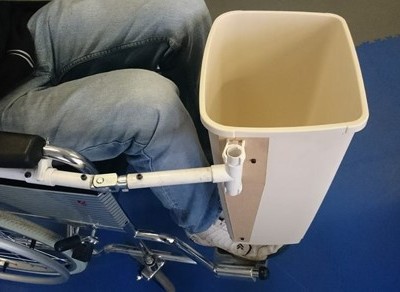
Finally we tested if you could utilize the wheelchair with our model attached. Because the bin can placed in front of the user it doesn’t cause much of an obstruction. We discovered the wheelchair was still usable with our attachment on and the performance of the wheelchair seemed the same as before which is dependent of the users physicality.
Manufacture:
This product uses material and components that are easy obtainable from any hardware or DIY store. This means that actually making the product is simple because it mostly involves attaching components in various ways.
For a dustbin with dimensions of: 600mm x 400mm x 400mm
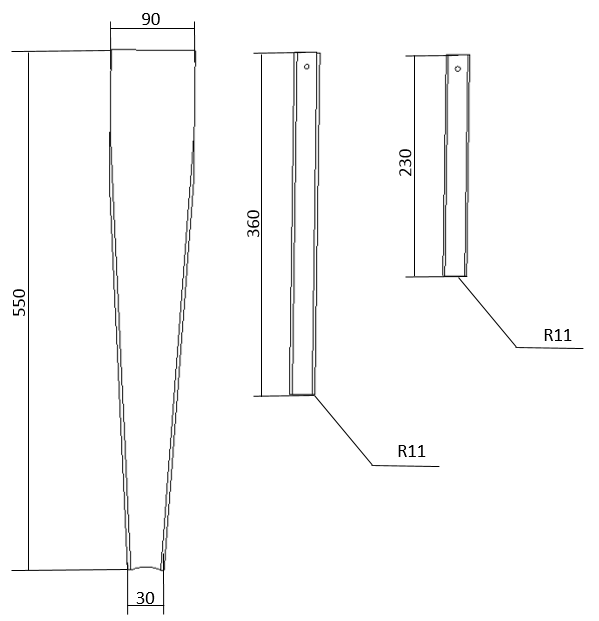
The size of the product is very dependent on the size of the dustbin and wheelchair being used. These three components are the most varied and would need to be adjusted. The rest of the components would be bought in as standard parts.
More information about the manufacture and component parts can be found in the report below.
Report


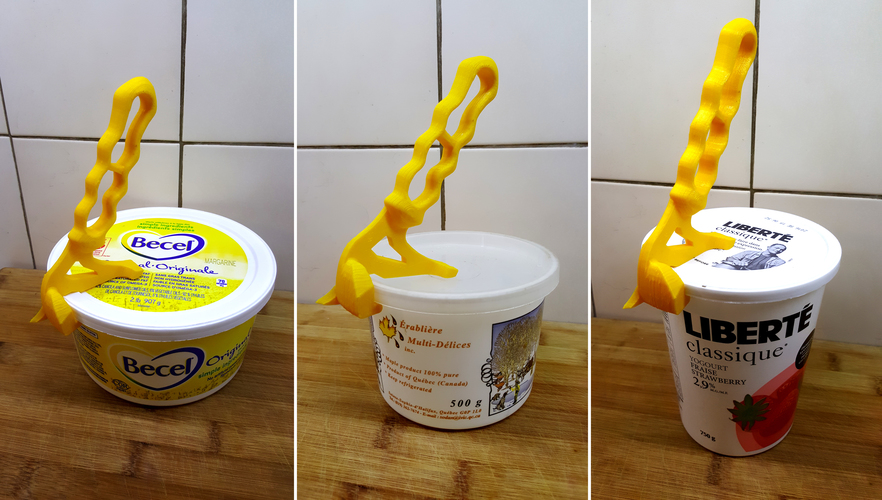 This handy 3D printable handle will help open those tricky pots of yoghurt, margarine, ice cream and more, why not give it a go!