You are browsing the archive for Cracked It | personal care.

Hack your nail clippers with Sugru

January 20, 2017 in Solution

Fixperts Benchmark Residency – Nail Clippers grip Sugru hack from Fixperts on Vimeo.

With thanks to@MayaAlvarado1

Be sure to click the ‘This Solution Helped Me’ button if you give this a try!

3D printed Nail varnish helper

December 9, 2016 in Solution

Nail_varnish_holder_cracked-it


This 3D printed aid could be the perfect solution for someone with limited grip or dexterity, limb difference or anyone that finds it difficult to paint their nails! For help with 3D printing, get in touch with our sponsors DEMAND Design & Manufacture for Disability.

Download the 3D printable fileĀ 

Remember to click the ‘This Solution Helped Me button at the top of this page if this solution helped you.

Zip Grip

September 29, 2016 in Solution

container_zip-grip-zipper-pull-3d-printing-97976

Via Pinshape

The zip grip! For getting a handle on tiny zips, put this design to the test!

Download the design files

Our sponsor charity DEMAND Design & Manufacture for Disability will be happy to help if you donā€™t have access to a 3D printer, just get in touch via their website.

Remember to click the ā€˜This Solution Helped Meā€™ button at the top of this page, or leave a comment letting us know how you got on with this solution!

Via Pinshape

Tap lever

September 29, 2016 in Solution

container_flow-the-universal-tap-adapter-3d-printing-100507

Via Pinshape

A slick looking design, 3D print your own tap lever today and give it a test!

Download the design files

Our sponsor charity DEMAND Design & Manufacture for Disability will be happy to help if you donā€™t have access to a 3D printer, just get in touch via their website.

Remember to click the ā€˜This Solution Helped Meā€™ button at the top of this page, or leave a comment letting us know how you got on with this solution!

Via Pinshape

3D printed soap dispenser

September 29, 2016 in Solution

container_wheeler-liquid-soap-container-3d-printing-92780

Via Pinshape

Fill the tray with liquid soap and roll your hand or a sponge over the top to apply, no bottle squeezing required!

Download the design files

Our sponsor charity DEMAND Design & Manufacture for Disability will be happy to help if you donā€™t have access to a 3D printer, just get in touch via their website.

Remember to click the ā€˜This Solution Helped Meā€™ button at the top of this page, or leave a comment letting us know how you got on with this solution!

Via Pinshape

Multi purpose gripping aid

September 28, 2016 in Solution

IMG_1994_preview_featured

Via Thingiverse

A utensil holder that can be used for cutlery, paintbrushes and pens, what else can you think of?!

Download the design files

Our sponsor charity DEMAND Design & Manufacture for Disability will be happy to help if you donā€™t have access to a 3D printer, just get in touch via their website.

Remember to click the ā€˜This Solution Helped Meā€™ button at the top of this page, or leave a comment letting us know how you got on with this solution!

Via Thingiverse

Toothbrush holder

September 28, 2016 in Solution

DSC_0116_preview_featured

Via Thingiverse

A simple holder to keep your toothbrush still and steady while applying toothpaste.

Download the design files

Our sponsor charity DEMAND Design & Manufacture for Disability will be happy to help if you donā€™t have access to a 3D printer, just get in touch via their website.

Remember to click the ā€˜This Solution Helped Meā€™ button at the top of this page, or leave a comment letting us know how you got on with this solution!

Via Thingiverse

DIY Assistive Spray Bottle

June 3, 2016 in Solution

You will need:

  • Trigger action spray bottle
  • Pair of plastic salad tongs (will make 2 assistive handles)
  • Junior hacksaw
  • Hot glue gun
  • Zip ties
  • Scissors

To make an easy-to-spray handle:

  • Use the hacksaw to cut the looped handle from the salad tongs & sand any sharp edges
  • Apply hot glue to the trigger handle & fix the new loop handle on, wait a few moments for the glue to cool
  • Thread the zip tie through the loop handle and tighten, cut off the excess
  • Enjoy your new easy-to-spray bottle!

Let us know how your DIY handle turns out by leaving a comment or sharing a photo on Twitter! Find us at @Cracked_it_org

Wireless Night Time Dementia Alarm

February 22, 2016 in Solution


This post is in response the Cracked-it challenge posted

The challenge was to create:

A wireless alarm system that alerted her when one of her residential dementia patients gets out of bed during the night and wanders around, potentialy hurting themselves


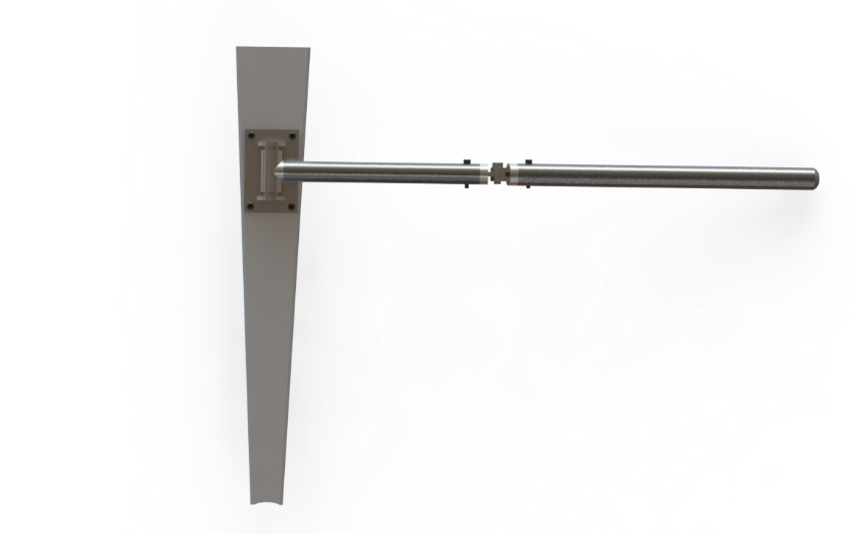
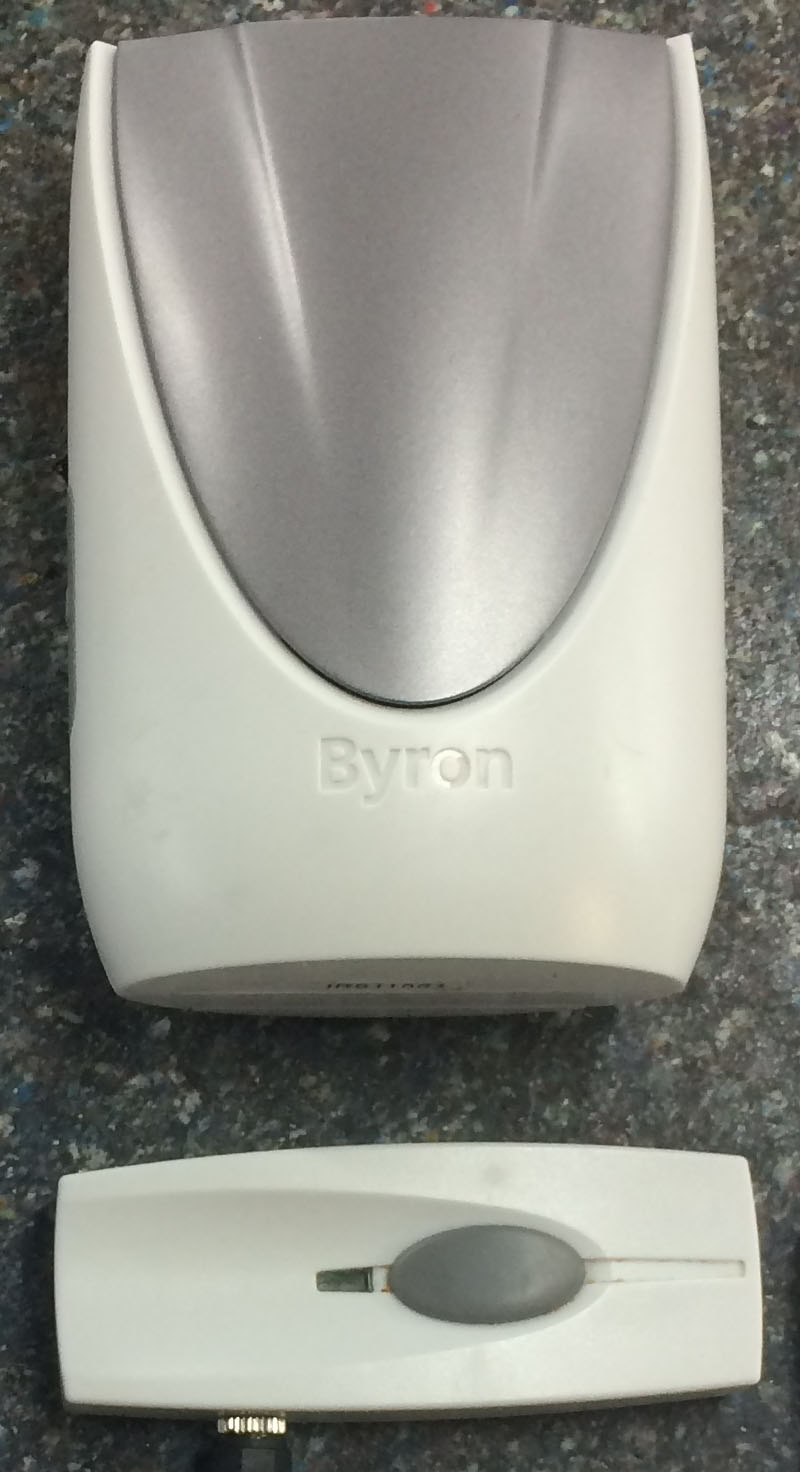
The existing product currently being used in the care home is the AidAlert shown below:

AideAlert Sensor

Instead of designing and manufacturing a new product we decided to try and adapt the existing one, historically we have worked with wireless doorbells, utilizing their wireless system for other purposes, our idea was to do the same with this project.


Step One – Existing product analysis and reverse engineering

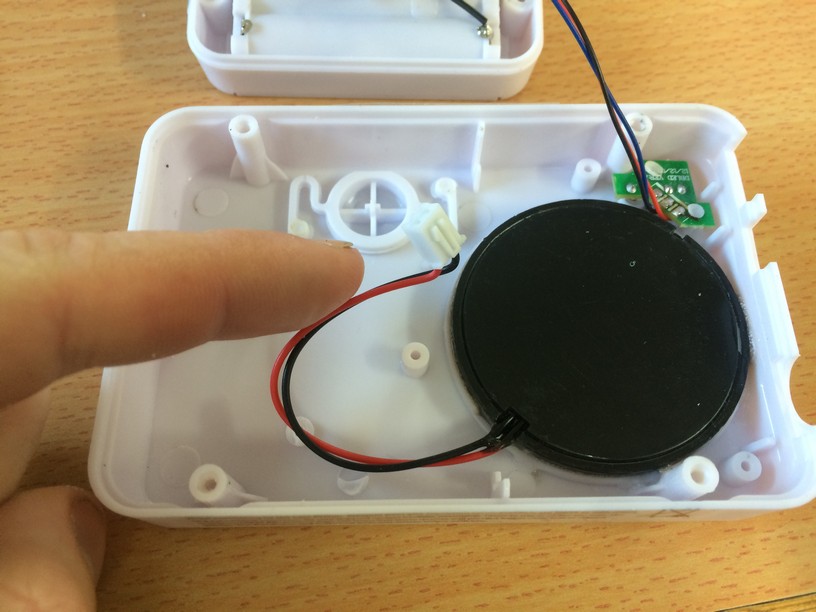
In order to use the existing product as a starting point for our new system we needed to first understand exactly how it worked, in order to do this we opened up the alarm box housing the have a look in side.

Image00003

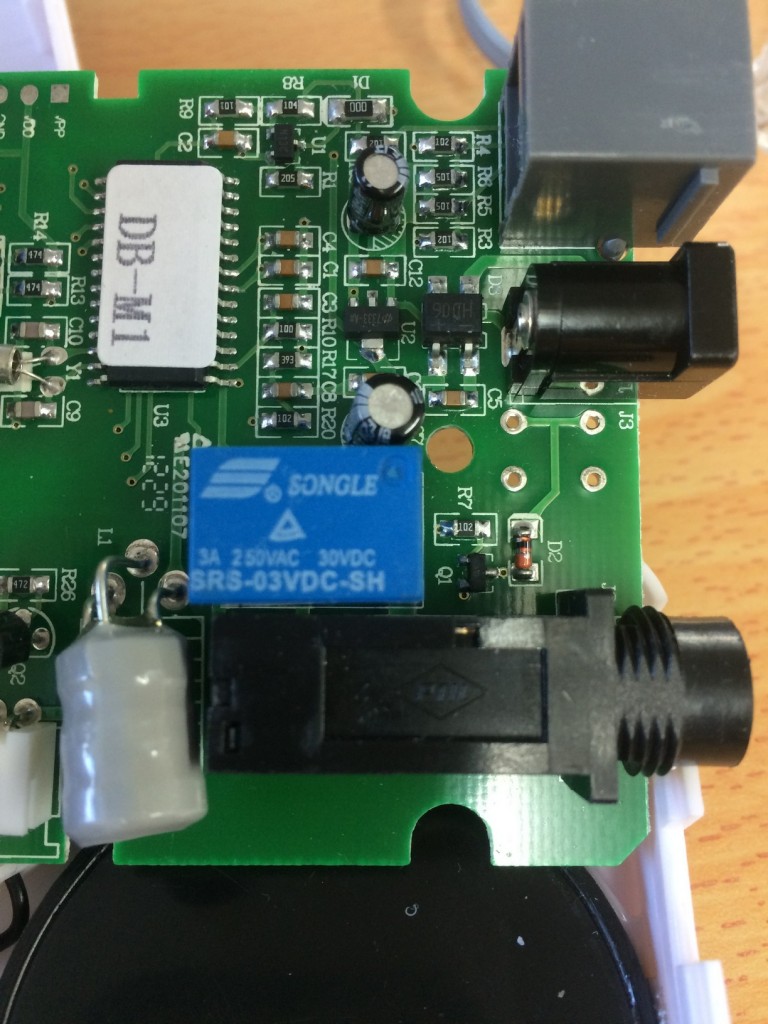
By exploring inside the casing we were able to identify a suitable output that we could use to trigger a wireless doorbell, let me explain; in the image above you can see a blue box, this is an electrical device called a relay, a relay is an electric switch that is turn on and off using a very small current. In this case the relay is connected to the jack plug socket (the black rectangular component shown in the image above).

We noticed that as we pressed on the pressure pad and activated the alarm box, the relay switch would click on. Meaning that when the alarm was activated the jack socket output was turned on, this action in turn could be used to activate a wireless doorbell to alert the nurses.

Step Two – Disconnecting the Speaker

Image00001

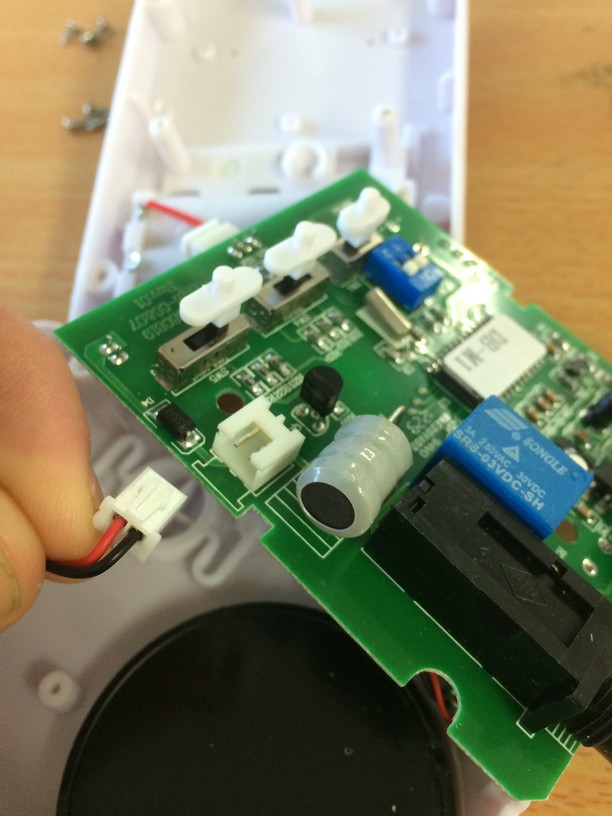
Due to the fact that the alarm in the speaker box was scaring the patients, we needed to disconnect the speaker from the PCB, demonstrated in the image above. This allowed us to still use the original alarm box and pressure sensor without the original alarm sound.

Image00002


Step Three – The Door Bell

TheDoorbell

So the plan as it stood was the utilise the spare output on the alarm box and wire it into the doorbell remote shown above, the nurse would then have the speaker with her, or in earshot in the office. Shown below is how we went about wiring the two products together to achieve a working solution.


Hacking the Door Bell Remote

Image00002

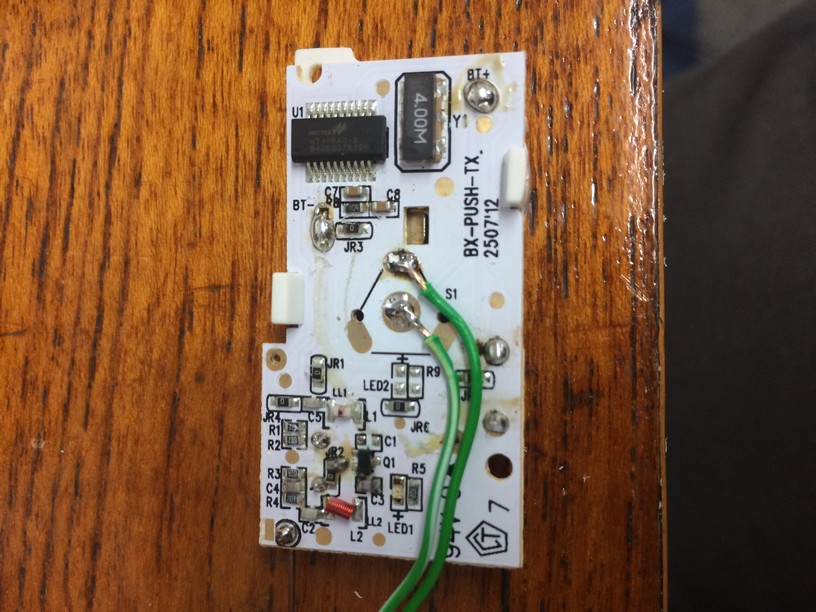
In order to use the door bell remote control we needed to find the main switch on the circuit board and ‘short’ it, this meant attaching two wires as show above that allowed us to complete the switch circuit using the output from the alarm box. A female jack plug connection block was then soldered to the end of the two wires and fitted into place inside the doorbell remote control. In order for the connection block to fit, a dremel was used to removed excess material, the image below shows the connection block in place, prior to being wired up.

Image00001

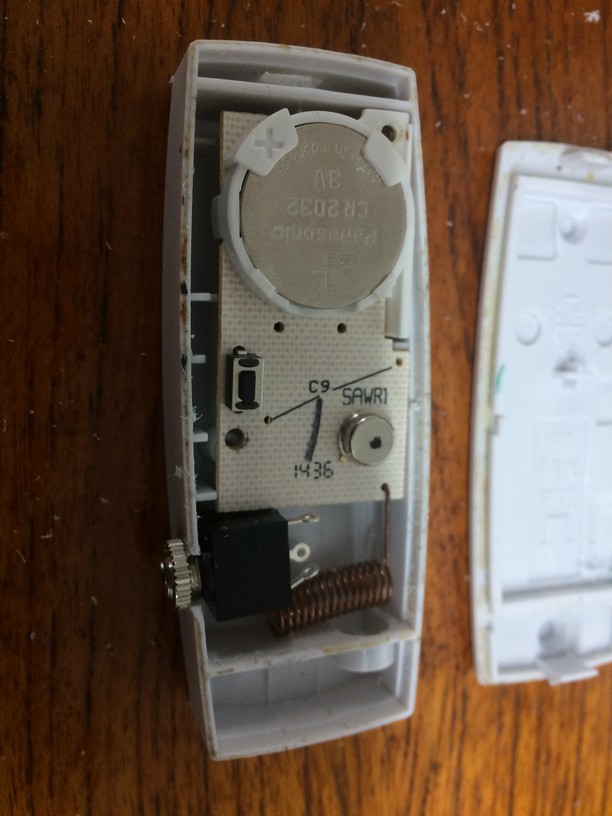
Once the connection block was in place the case on the remote was closed back up and ready for action, the next stage was to make up a cable to connect the remote to the alarm box. This cable consisted of one end having a 3.5mm jack plug and the other having aĀ 1/4 jack plug, shown below:

Image00001

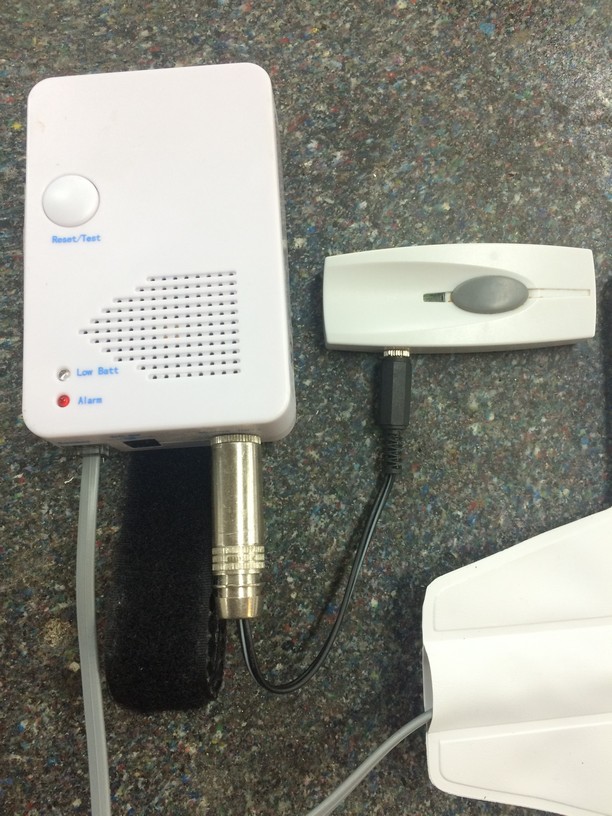
So the build was complete, when the alarm was triggered via the pressure pad the large jack plug activated the switch on the remote which in turn activated the door bell speaker box.

Easy-Bin Wheelchair Aid

November 25, 2015 in Solution

Easy-Bin Presentation BoardEasy-Bin Story Board

An aid to assist wheelchair users when taking out the bin

The Easy-bin wheelchair aid is an simple but effective solution to taking the trash out for people in wheelchairs. It allows the user to take the trash out while still having full control of the wheelchair and being able to navigate tight spaces with ease.

Research has shown usĀ that wheelchair users who live fairly independently find it hard to take out the rubbish.Ā  This is because you need two hands to push a wheel chair so it is hard to push it whilst carrying a bin or bag, plus few people want to rest their rubbish on their laps. We were able to speak to man living in America, who makes a variety of YouTube videos showing his daily struggles, about how he takes out his trash. He was able to give us insight on how to develop a product which solves this issue.

The final solution we have come up with is a combination of arms and hinges which are permanently attached to a dustbin and then lifted up and attached to a wheelchair. The arm has the ability to fold up against the bin and clip into place, this keeps the product compact and out of the way. When the user wants to take out the trash all they do is simply go to the dustbin, unclip the first arm, lift the bin up and slot the arm into the attachments on the wheelchair, they can then twist the bin around in front of their legs.

To test the product we made a model and once was made we acquired our wheelchair and began to test our final outcome. The process of utilising our product starts off with the user travelling towards the bin lifting it up and clipping the bar in the clips attached to the wheelchair. Connecting the bar to the clips wasnā€™t a smooth process when we tested it but it was a simple process. Baring in mind we intend to make the actual product out of a metal such as aluminium because metals tend to have a more polished surface finish, so there would be less friction between the bar and the clip. Therefore connecting the pieces together should be a smother process.

Picture1 Picture2 Picture3 Ā Picture4Picture5 Picture6

Finally we tested if you could utilize the wheelchair with our model attached. Because the bin can placed in front of the user it doesnā€™t cause much of an obstruction. We discovered the wheelchair was still usable with our attachment on and the performance of the wheelchair seemed the same as before which is dependent of the users physicality.

Manufacture:

This product uses material and components that are easy obtainable from any hardware or DIY store. This means that actually making the product is simple because it mostly involves attaching components in various ways.

For a dustbin with dimensions of: 600mm x 400mm x 400mm

Picture7Ā Picture1

The size of the product is very dependent on the size of the dustbin and wheelchair being used. These three components are the most varied and would need to be adjusted. The rest of the components would be bought in as standard parts.

More information about the manufacture and component parts can be found in the report below.

Report

Skip to toolbar