You are browsing the archive for Cracked It | adaptation.

iPad grid

June 23, 2017 in Solution

image

This grid is designer to be used with an iPad and AAC (augmentative and alternative communication) software.

Remember to click ‘This Solution Helped Me’ if you give this a try!

Download the digital file for CNC manufacture

Via Tikkun Olam Makers

Zocus assistive camera lens adjuster

June 21, 2017 in Solution

Zocus camera

Originally posted here

Download the digital files for 3D printing

For assembly instructions follow the tutorial on Instructables

Remember to click the “This Solution Helped Me” button at the top of this page if you give this a try!

Hack your nail clippers with Sugru

January 20, 2017 in Solution

Fixperts Benchmark Residency – Nail Clippers grip Sugru hack from Fixperts on Vimeo.

With thanks to@MayaAlvarado1

Be sure to click the ‘This Solution Helped Me’ button if you give this a try!

DIY Battery Interrupter

September 29, 2016 in Post, Solution

battery_interrupt03__large

Via DIYability

Materials required

  • Thin copper sheet
  • Thin cardboard
  • 1/8″ (3.5mm) mono audio jack
  • Hook up wire (22 gauge)
  • Wire cutters/strippers
  • Soldering iron, solder and helping hand soldering stand

Step 1

img_5455__medium

Using scissors cut two small squares of copper. It is probably best to use older scissors to not dull your good pair. Cut an identical square from a small piece of cardboard the thickness of a postcard or cereal box top is preferred.

Step 2

img_5459__medium

Using double sided tape, put the copper squares on either side of the cardboard. Trim the final square to make edges even.

Step 3

battery_interrupt22__medium

Cut two wires about six inches in length. Strip 1/4″ of plastic from wire on each end.

Using helping hands position the copper clad and wire. Only the stripped part of the wire should be touching the copper.

Gently touch the soldering iron to the stripped wire to heat it. Touch solder to stripped wire. Solder should melt and cover wire and copper.

Flip the copper piece over and prepare second wire. Solder second wire to backside of copper clad.

Final product should have a small solder joint connecting the wires and copper clad on each side. The wires should not wiggle on the copper.

Put the battery interrupt into a battery operated toy. The positive end ( + ) will touch one side of the copper clad, the other side of copper clad will touch the toy’s battery connector.

Turn the toy’s switch ON, with the copper clad in place the toy should not operate. Touch the two wires to activate the toy. Did it work? If so, congrats! If not, double check that the battery interrupt has one side touching the battery and the other side touching the battery holder.

Step 4

battery_interrupt36__medium

Take the 1/8″ (3.5mm) female switch jack, identify the tabs that will be connected. This particular switch jack has 3 tabs, we will connect a wire to two of them, the tabs on either side, skipping the middle tab.

To connect, bend the wire into a hook and thread it through a tab on the switch jack.

Use helping hands to hold switch jack and wire. With the tabs tightly hooked, fasten the switch and the wire to the helping hands. The wire should be pulled tight so the wire is touching the side of the tab.

Solder the wire and tab together.

After finished with the first wire and tab flip the jack and solder the second tab and wire.

With both wires soldered to the switch jack, the solder pads should be small and the wires should not wiggle. (the middle tab is unused with this particular jack)

Via DIYability

Remember to click the ‘This Helped Me’ button at the top of this page if you give this hack a try!

Accessible Games Controllers

September 14, 2016 in Solution

Via Hackaday

img_7421-small

This controller has been designed to replace a traditional mouse and keyboard. It’s 3D printed and completely customisable so each button can be placed on a lap board or wherever is convenient for the gamer.

Here’s the files you’ll need to get making!

D-pad

Quad button

Thumbstick

Single Button

Controller mount

Remember to click the ‘This Helped Me’ button at the top of the page if you give this a go!

Via Hackaday

Adapted Radio Flyer Cyclone

June 10, 2016 in Solution

2014 Radio Flyer 005

Via A Worthy Journey

This is a simple way to make the Cyclone from Radio Flyer more accessible for little ones who aren’t able to keep their feet steady on the footplate.

This family contacted Radio Flyer, who were happy to help, but this modification would work just as well with some thin MDF or acrylic sheet cut to shape.

The modified part from Radio Flyer fixes on with velcro straps, and provides extra support to keep little legs in place.

Read more here

DIY Assistive Spray Bottle

June 3, 2016 in Solution

You will need:

  • Trigger action spray bottle
  • Pair of plastic salad tongs (will make 2 assistive handles)
  • Junior hacksaw
  • Hot glue gun
  • Zip ties
  • Scissors

To make an easy-to-spray handle:

  • Use the hacksaw to cut the looped handle from the salad tongs & sand any sharp edges
  • Apply hot glue to the trigger handle & fix the new loop handle on, wait a few moments for the glue to cool
  • Thread the zip tie through the loop handle and tighten, cut off the excess
  • Enjoy your new easy-to-spray bottle!

Let us know how your DIY handle turns out by leaving a comment or sharing a photo on Twitter! Find us at @Cracked_it_org

Adapted Pen/Marker Holder

September 25, 2015 in Solution

This post was originally on www.instructables.com created by user shadowwynd

Adapted Pen/Marker Holder

Adapted Pen/Marker Holder

Many disabilities such as cerebral palsy make it hard to grip a pen, pencil, or marker.  Some people can grab a pen in their fist and draw that way, but others lack the ability to keep their hand in a vertical configuration.  This means that can only hold a pen sideways; hence they can not use it.  This device is something we have used with several students.  It adapts to hold pens, markers, pencils, and even small paint brushes.  The student can then draw on paper.

These instructions will show a couple ways to make this, my preferred way (wood) and then a couple cheaper ways out of PVC for those with less money or tools.

Step 1: Supplies & Tools

supplies and Tools

supplies and Tools

Supplies (Preferred way):
1  x  36″ dowel (I often use 1″ or  7/8″, based on individual)  (oak or pine, will make 5-6 holders) ($4)
Electrical tape or rubber tape
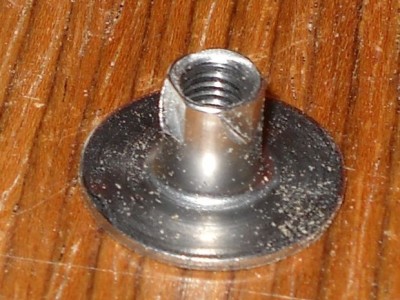
Hurricane Nuts ($5 for 50)  (or t-nuts with the smaller holes for screws)
1″ Plastic headed thumbscrews (# 91185A554 @ Mcmaster-Carr) ($7.49 for 10)
Glue (Gorilla glue, E6000, etc.)
Spade bits
Sandpaper
Steel wire

Supplies (cheap way #1):
1/2″ , 3/4″, or 1″ PVC pipe
“T” connectors
1/4-20 1″ bolt    or 1/4-20 1″ Thumbscrew
Electrical tape

Supplies (cheap way #2):
1/2″ , 3/4″, or 1″ PVC pipe
“T” connectors
1/4-20 wingnut
1/4-20 1″ bolt    or 1/4-20 1″ Thumbscrew
Electrical tape
Duct Tape

Tools:  (Preferred way)
Drill press
Drum sander
Saw
Dremel
Pliers or ClampTite

Tools: (Cheap way #1)
PVC cutter or saw
1/4-20 screw tap
Drill

Tools: (Cheap way #2)
PVC cutter or saw
Dremel or File
Drill

Step 2: Cut wood to size, shape

Cut wood to size, shape

Cut wood to size, shape

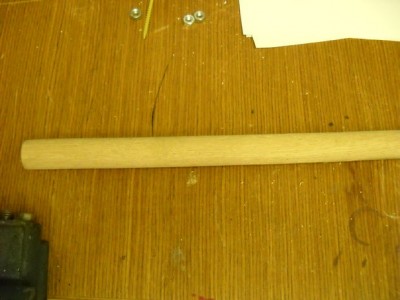
Cut the dowels into 6″ or so lengths for adults.  Children need about 4.5″, some adults prefer a smaller one that can fit in a hand, some want a longer one, etc.  You can always cut a longer one shorter if the need arises.  For teenagers upwards, I often make a combination of 6″ and 6.5″.

A table saw or chop saw is good for this step; lacking those tools I used a handsaw.

Using the sander, bevel one end of each cylinder so that it is rounded / domelike.  This end may be in someone’s hand, so no corners or sharp edges.  Slightly bevel the other end enough to remove sharp edges.

Step 3: Drill hole for marker / pen

Drill hole for marker / pen

Drill hole for marker / pen

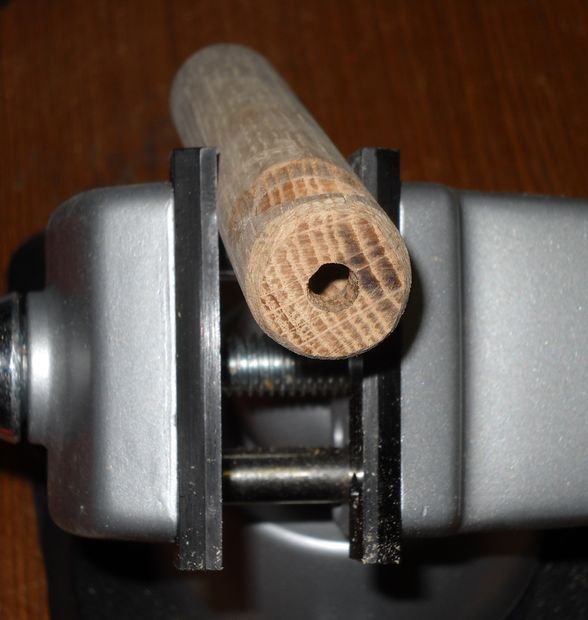
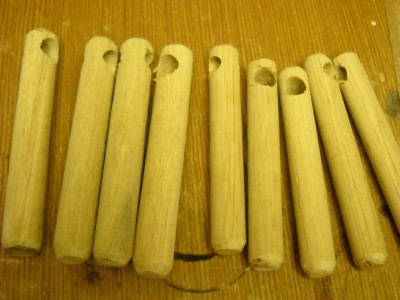
I used a spade bit  in the drill press to bore a hole through each dowel.  I used 3/4″ for the 1″ dowels, and 5/8″ for the 7/8″ dowels.   You do need to leave enough wood on either side that you still have some structural integrity.  Obviously, the larger hole can accommodate bigger markers (such as whiteboard markers).  Too big and the wood breaks; too small and many pens won’t fit.

I normally make the outer radius of the hole about 1/4″ from the end of the cylinder.

Using the drum sander, I bevel each side of the hole to remove rough edges.

Sand all sides with sandpaper to remove any splinters.

Step 4: Drill hole for nut

Drill hole for nut

Drill hole for nut

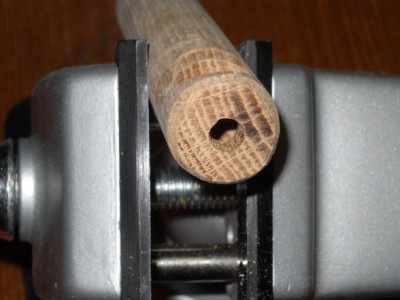
Drill a hole through the end of each dowel (on the axis of the dowel, in the center, on the end closest to the big hole).  This is for the T-nuts / insert nuts / hurricane nuts.  It often helps to predrill a pilot hole.

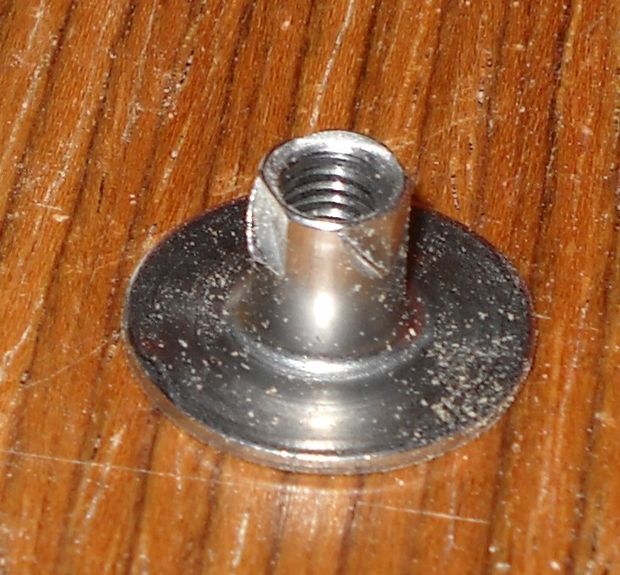
Step 5: Add hurricane nuts

Add hurricane nuts

Add hurricane nuts

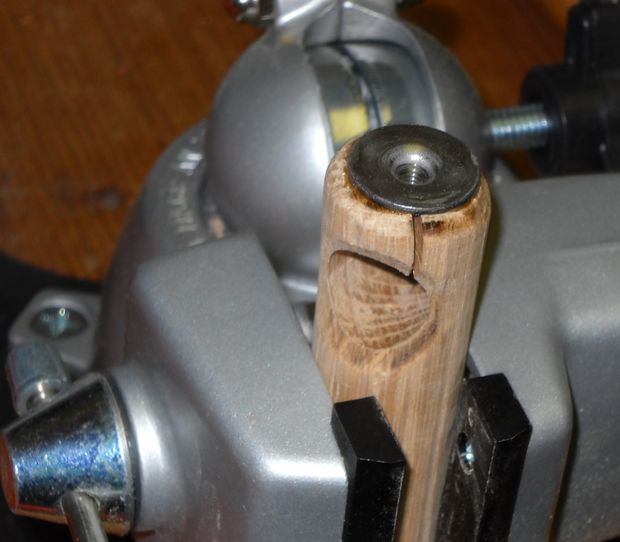
Smear glue on the hurricane nut, then tap the shaft of the nut into the hole with a hammer.

The force from the thumbscrew is directed outwards.

The proper nut to use in this case is the insert nut.  I don’t have good luck with these and end up destroying most of them trying to get them in.  In this design, we also don’t have much wiggle room and the insert nuts take up more space, which then requires a longer thumbscrew.

T-nuts are intended to be used the other direction – the load pulls against the threads, which pushes the flange against the material.  They aren’t designed to be pushed against.   A hammer-in style T-nut will pop right out again when the thumbscrew is tightened.  I sometimes use the T-nuts that are screwed in to the material using little bitty screws (like these), but the little bitty screws are easy to lose in a shop, are hard to drive, sometimes pop out of holes if predrilled, etc.   The hurricane nuts seem to hold very well.

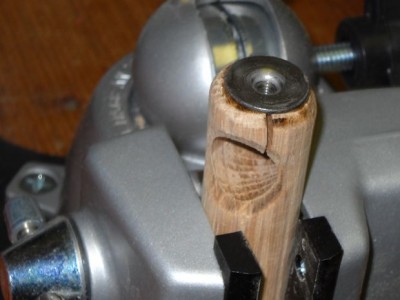
The problem with the hurricane nuts is that they tend to split the wood.  So far I have had pine, oak, and poplar split on me.  Sometimes the thicker 1″ cylinders arrive OK, but the smaller pieces split every time.

To remedy this, I cut a small channel around the top with the dremel.  I put a couple of loops of steel wire in the channel, then twist it with pliers or use the ClampTite tool to tighten the loops.  This prevents further expansion of the wood.

Sand everything.

Step 6: Grip and Thumbscrew
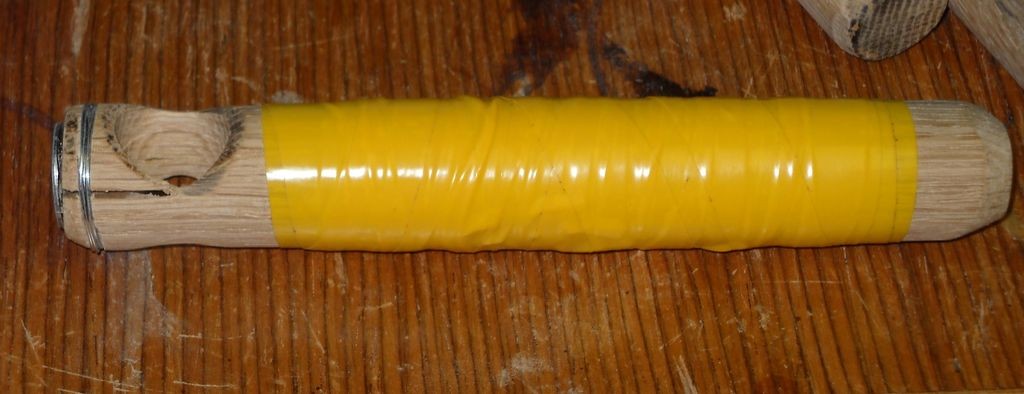
grip

grip

Wrap electrical tape or rubber tape.  This gives it a grip that is easier to hold than slick wood.

Insert the thumbscrew into the hurricane nut. For these, I distinguish dowel sizes by thumbscrew color.
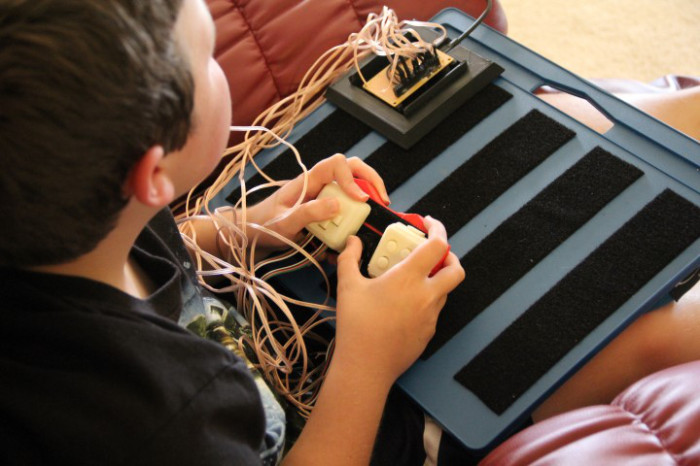
Step 7: Usage

Adapted Pen/Marker Holder

Using it

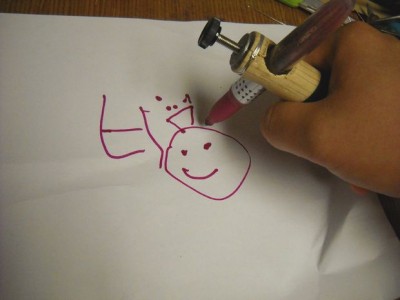
Put a pen/marker in the large hole, tighten the thumbscrew to secure it.

Draw on paper.


Skip to toolbar