You are browsing the archive for Cracked It | disability.

Torch holder

September 28, 2016 in Solution

torch_holder_walking_stick_preview_featured (1)

Via Thingiverse

A device to hold a torch (flashlight) when you’re walking with crutches, walking sticks or even a walking frame.

Download the design files

Our sponsor charity DEMAND Design & Manufacture for Disability will be happy to help if you don’t have access to a 3D printer, just get in touch via their website.

Remember to click the ‘This Solution Helped Me’ button at the top of this page, or leave a comment letting us know how you got on!

Via Thingiverse

Yoghurt pot opener

September 22, 2016 in Solution

Via Pinshape

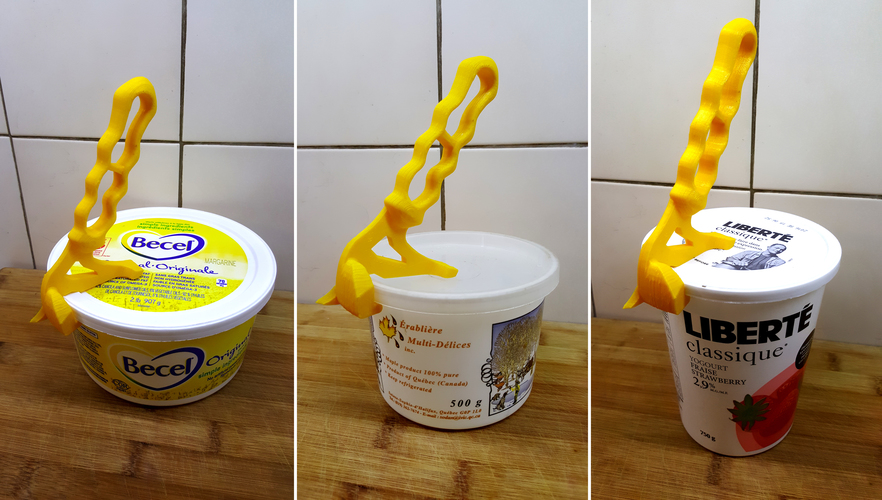
container_handy-tool-to-open-plastic-containers-contest-3d-printing-97149This handy 3D printable handle will help open those tricky pots of yoghurt, margarine, ice cream and more, why not give it a go!

Download the 3D CAD file

Remember to click the ‘This Helped Me’ button at the top of this page, or leave a comment letting us know how you got on!

Via Pinshape

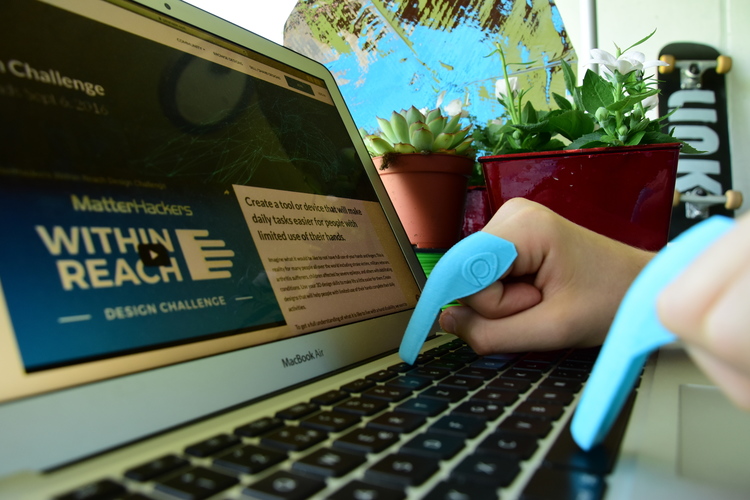
Keyboard and button helper

August 31, 2016 in Post, Solution

Via Pinshape


container_use-easily-your-keyboard-3d-printing-92885

A nifty 3D printing project with great potential to help people with dexterity issues. Head over to Pinshape to download the 3D printing files, which are available in 4 sizes to suit different hands!

Don’t forget to click the ‘This Helped Me’ button at the top of the page if you give this a try.


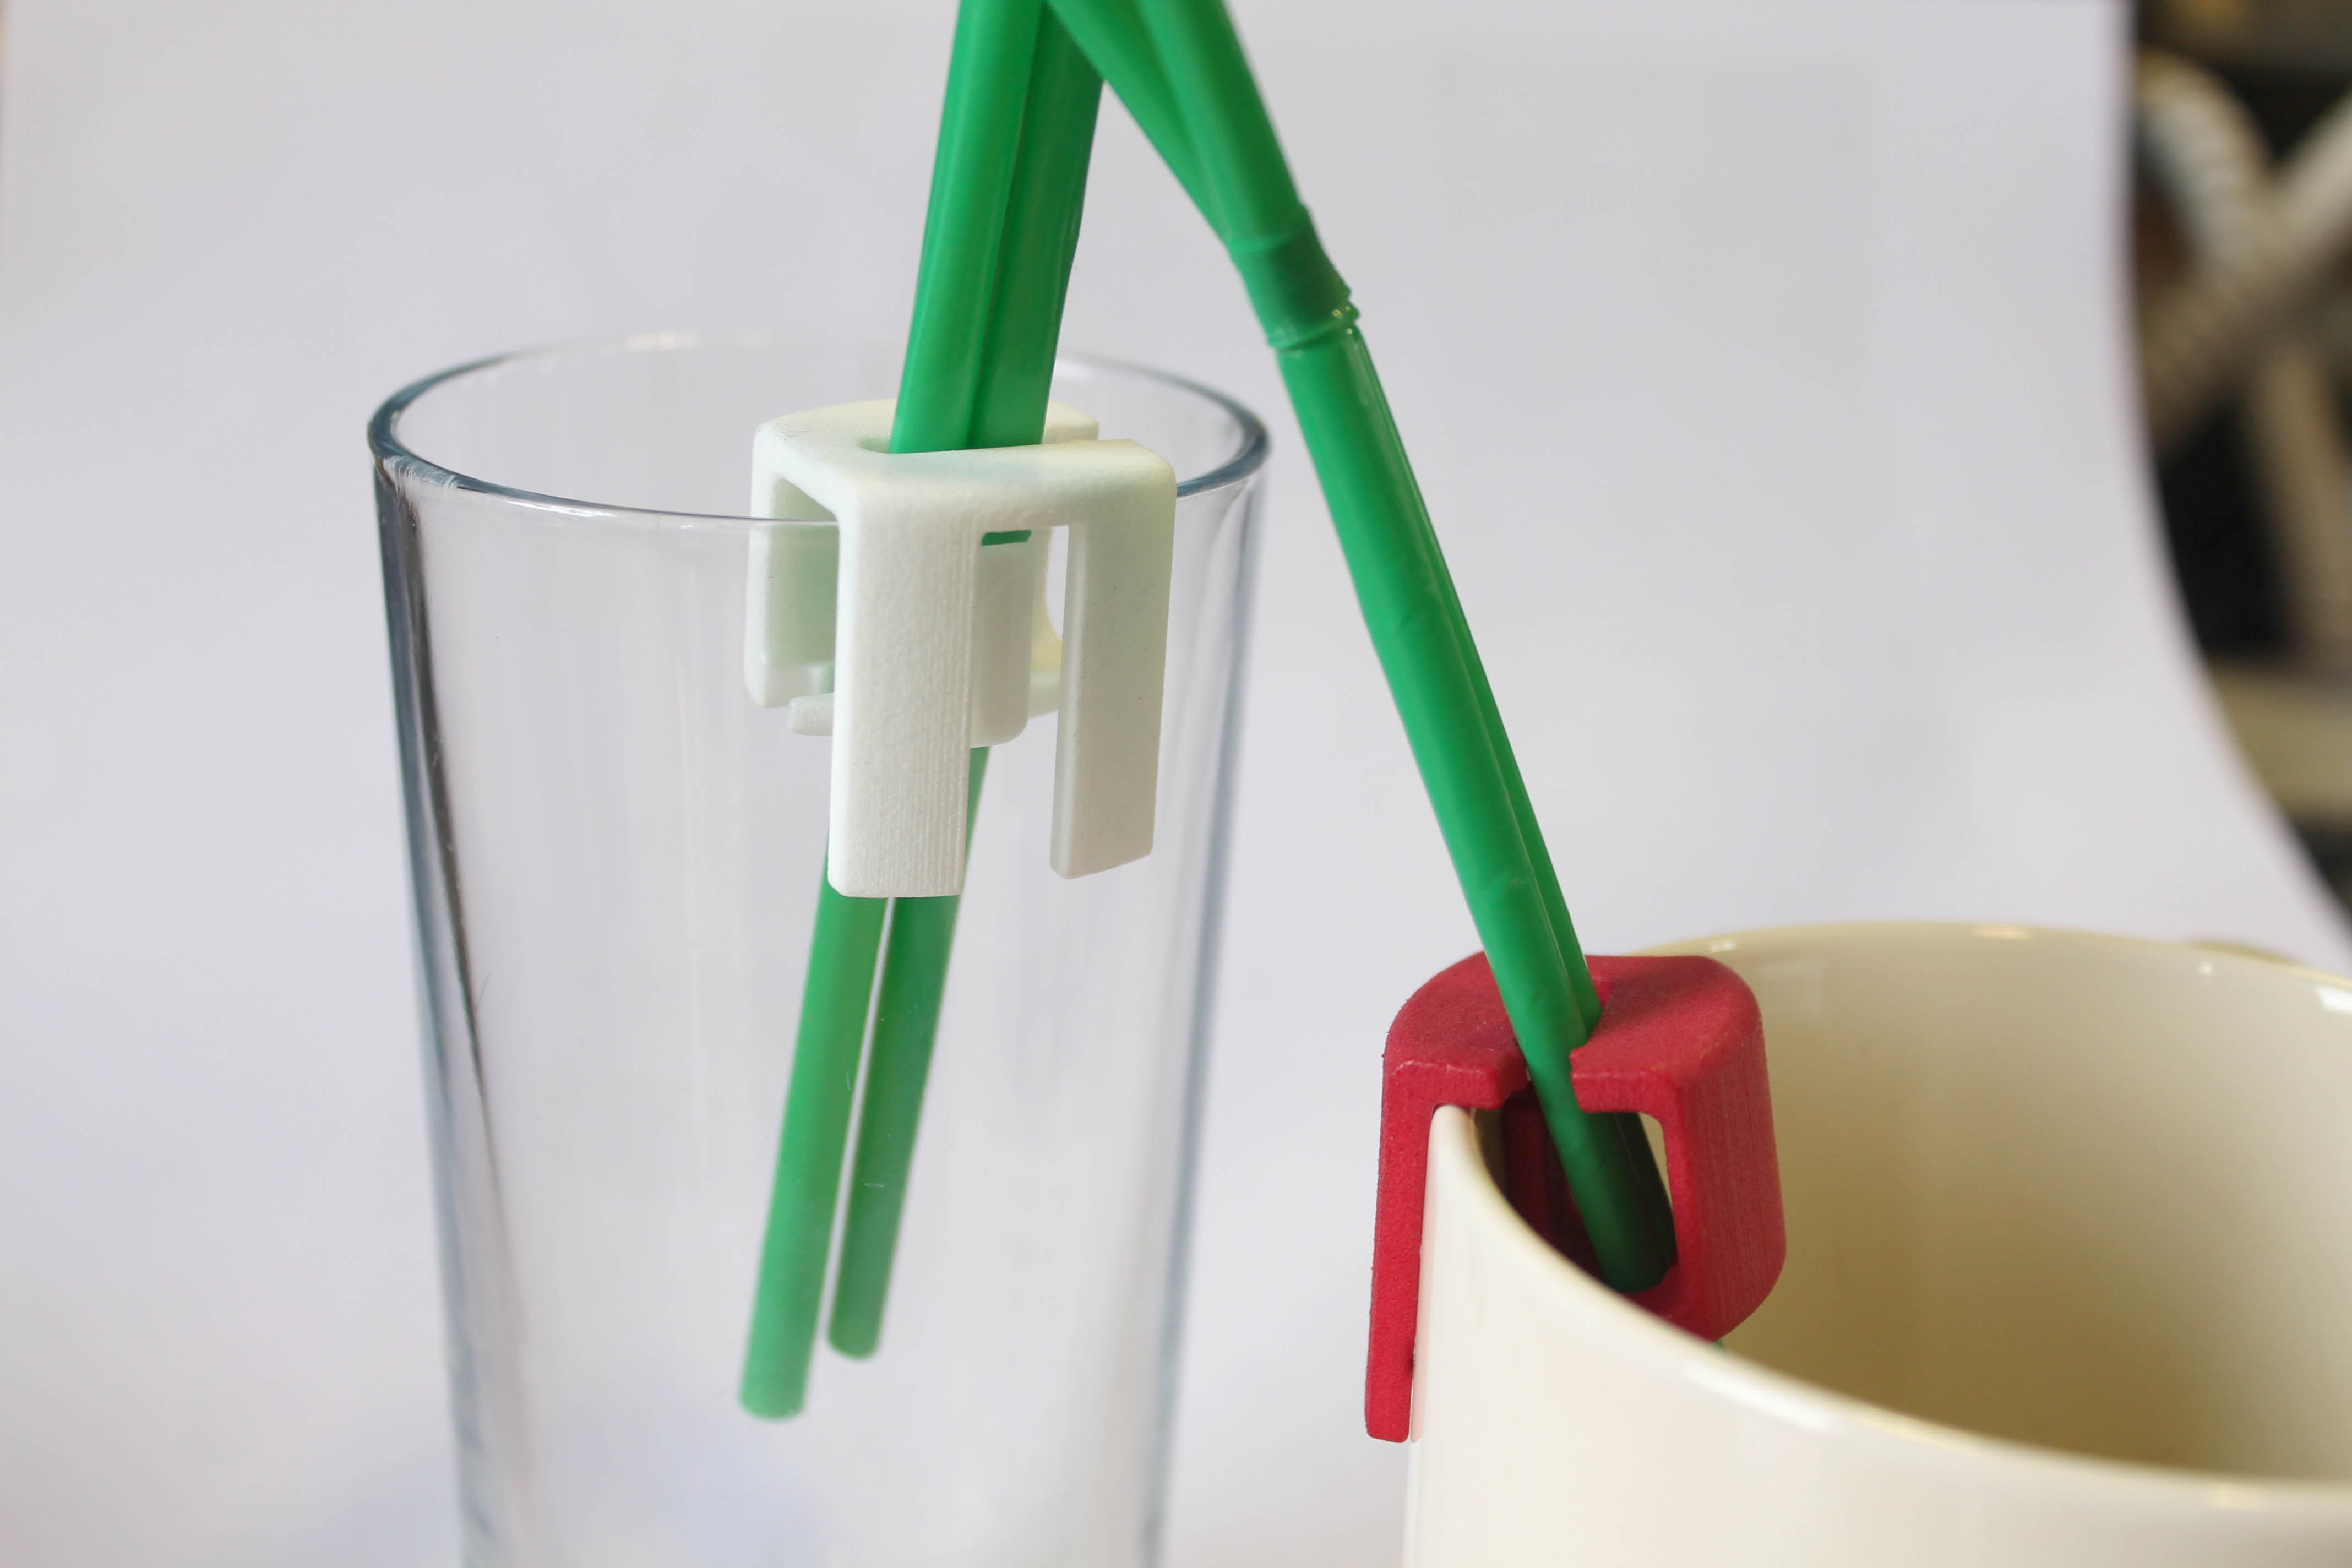
Double drinking straw holder

August 1, 2016 in Solution

Straw_1

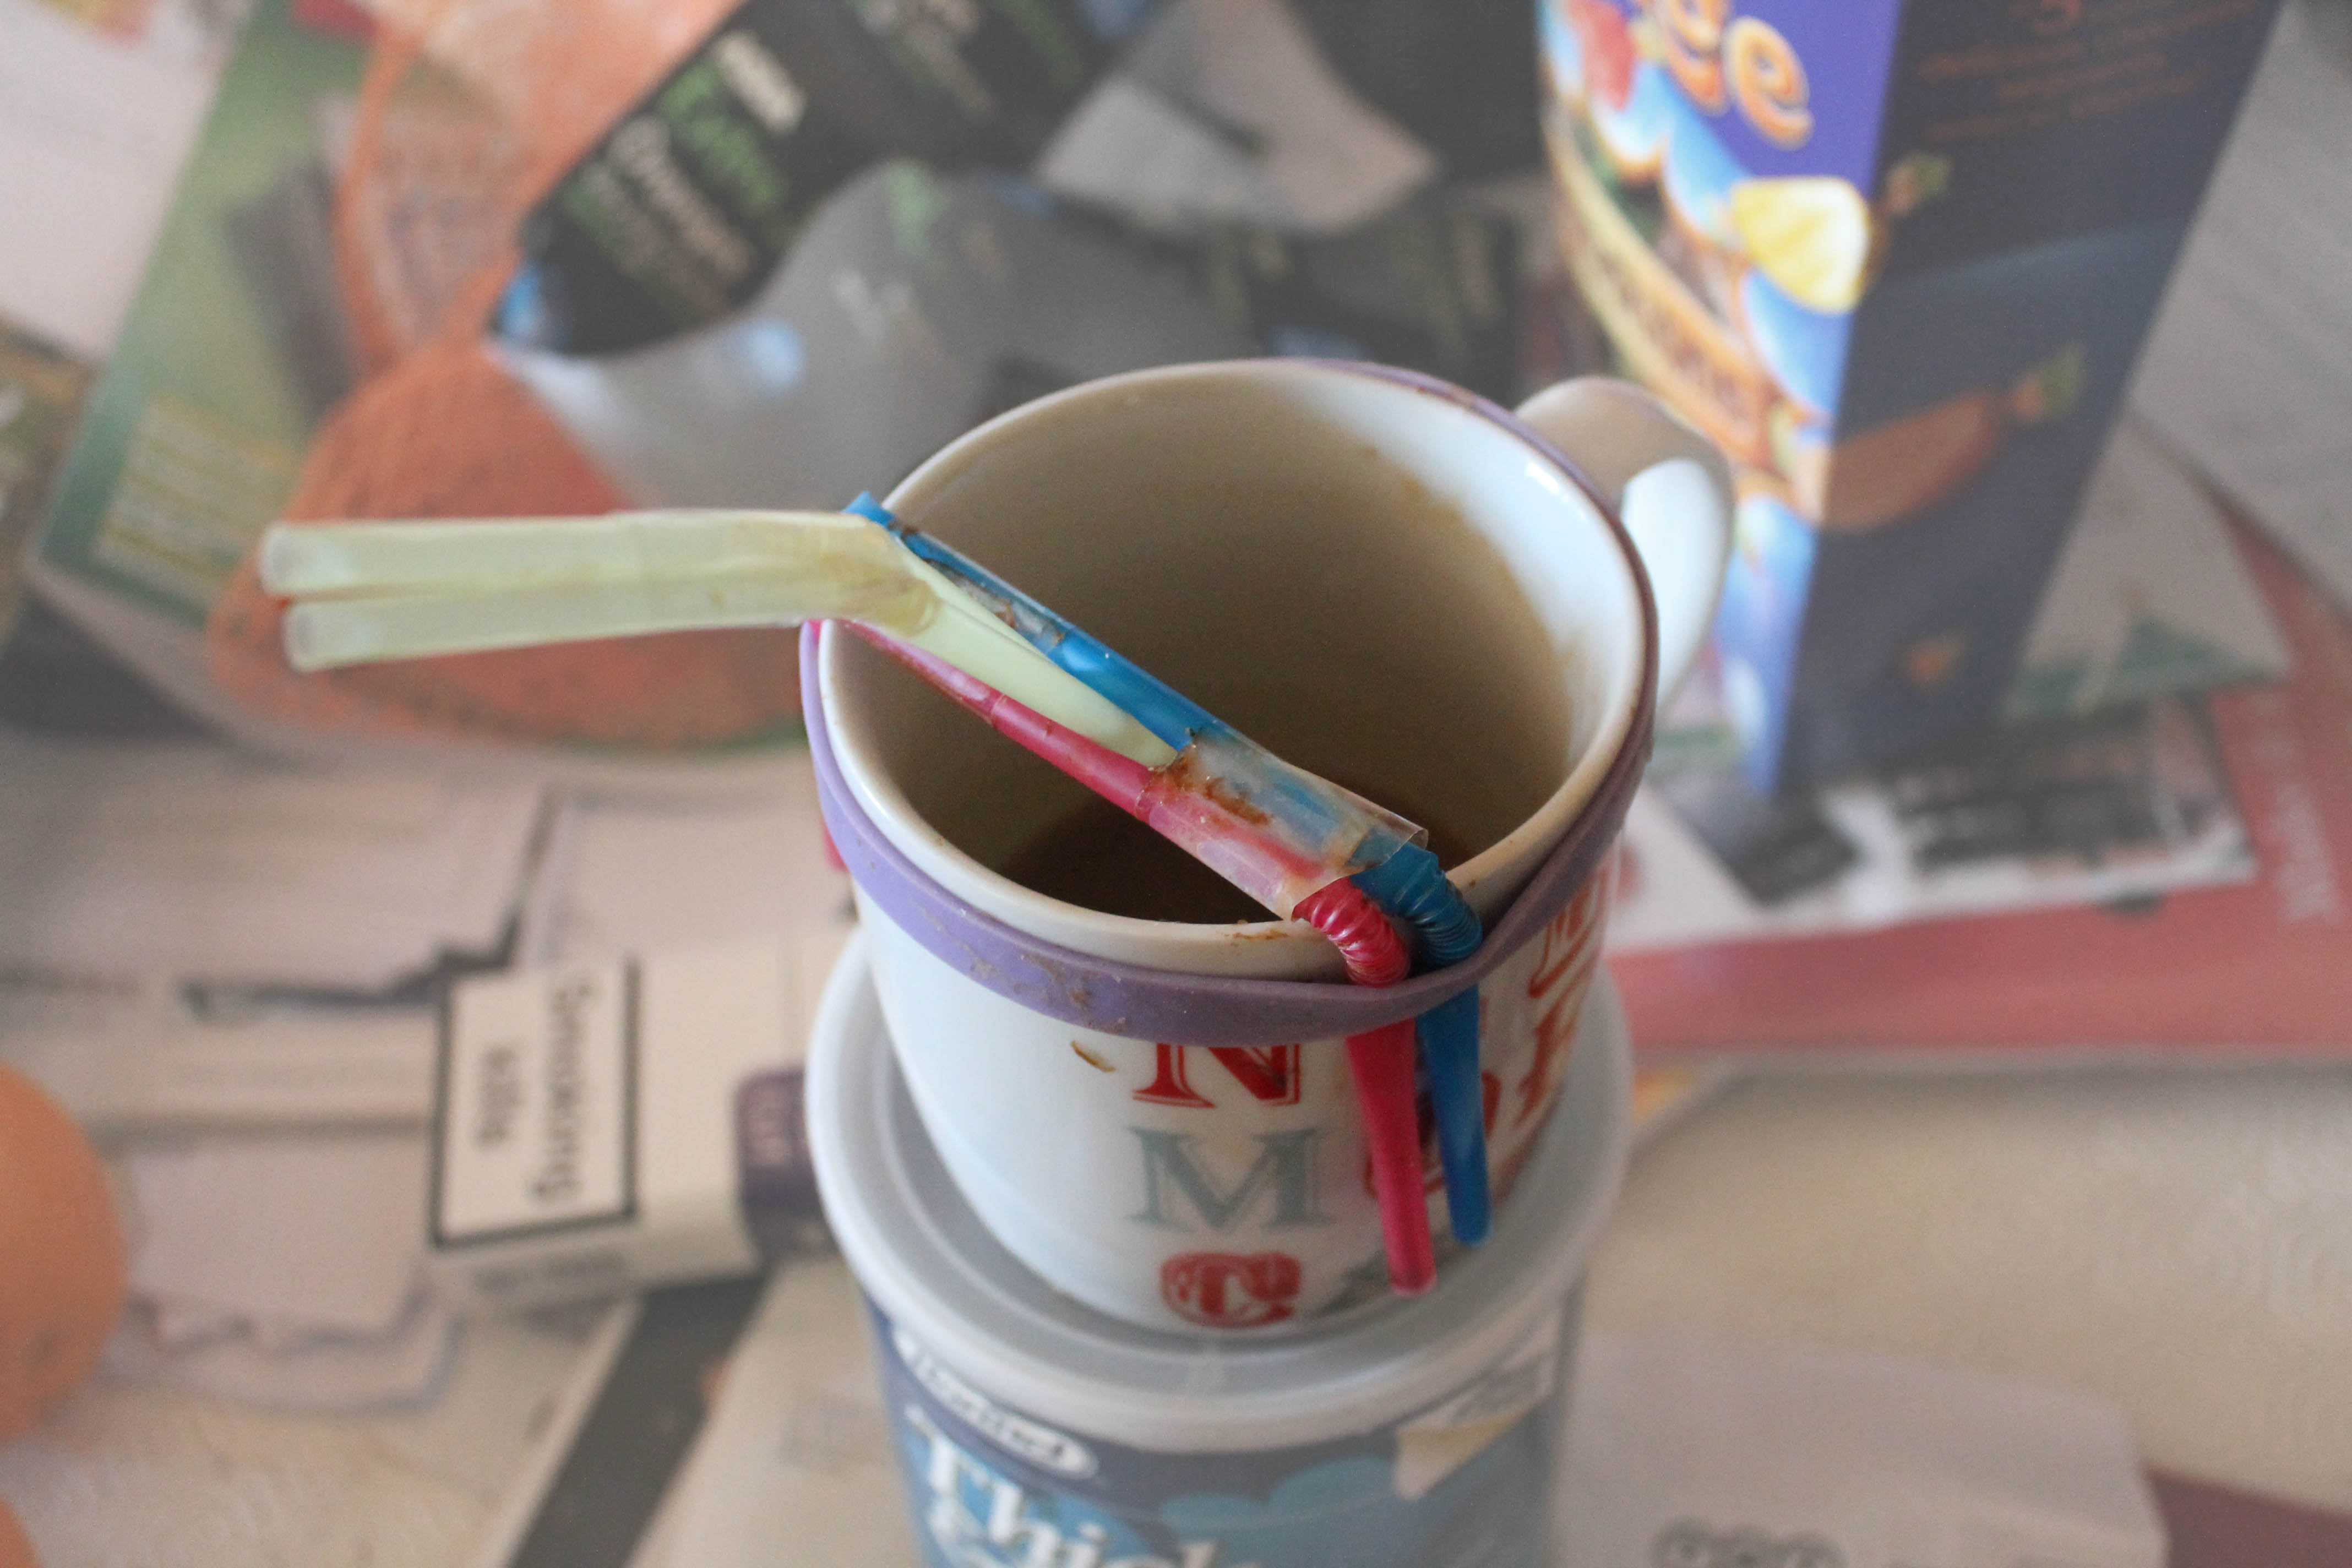
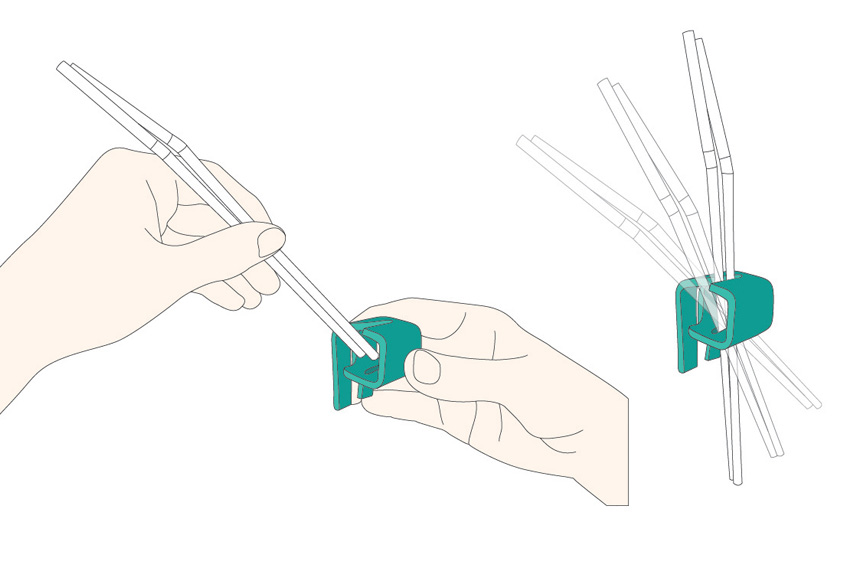
A nifty product to hold two straws on the side of any mug or glass. The straw holder was initially designed for Wendy who has MS and needs to use two straws to drink. Her husband had made a support from tape and a rubber band which did the job beautifully but was difficult to assemble and also unhygienic.

Straws_2

Straws_3

Here’s the final design, you can download the CAD file amd make your own using a 3D printer! Find a 3D printer at your local makerspace, alternatively contact DEMAND Design & Manufacture for Disability for help getting or making this straw holder.

Download the 3D CAD file here.

Make sure to post a picture if you make your own, we’d love to hear your feedback!

Adapted Radio Flyer Cyclone

June 10, 2016 in Solution

2014 Radio Flyer 005

Via A Worthy Journey

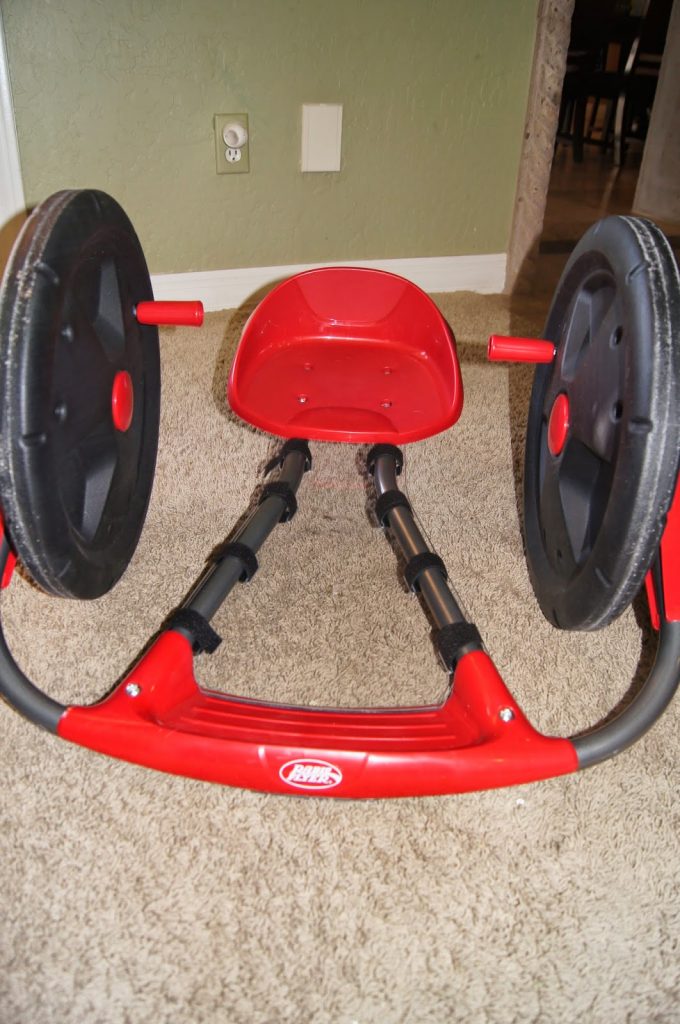
This is a simple way to make the Cyclone from Radio Flyer more accessible for little ones who aren’t able to keep their feet steady on the footplate.

This family contacted Radio Flyer, who were happy to help, but this modification would work just as well with some thin MDF or acrylic sheet cut to shape.

The modified part from Radio Flyer fixes on with velcro straps, and provides extra support to keep little legs in place.

Read more here

DIY Assistive Spray Bottle

June 3, 2016 in Solution

You will need:

  • Trigger action spray bottle
  • Pair of plastic salad tongs (will make 2 assistive handles)
  • Junior hacksaw
  • Hot glue gun
  • Zip ties
  • Scissors

To make an easy-to-spray handle:

  • Use the hacksaw to cut the looped handle from the salad tongs & sand any sharp edges
  • Apply hot glue to the trigger handle & fix the new loop handle on, wait a few moments for the glue to cool
  • Thread the zip tie through the loop handle and tighten, cut off the excess
  • Enjoy your new easy-to-spray bottle!

Let us know how your DIY handle turns out by leaving a comment or sharing a photo on Twitter! Find us at @Cracked_it_org

Easy-Bin Wheelchair Aid

November 25, 2015 in Solution

Easy-Bin Presentation BoardEasy-Bin Story Board

An aid to assist wheelchair users when taking out the bin

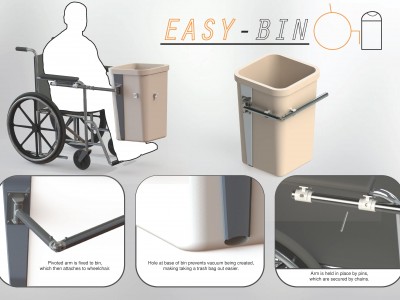
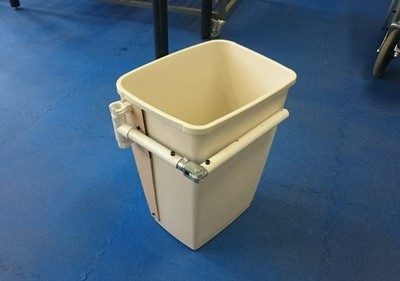
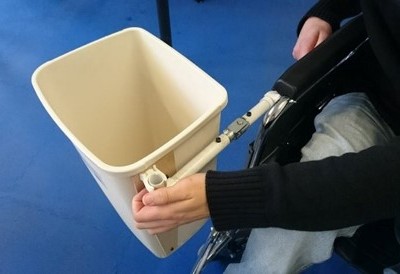
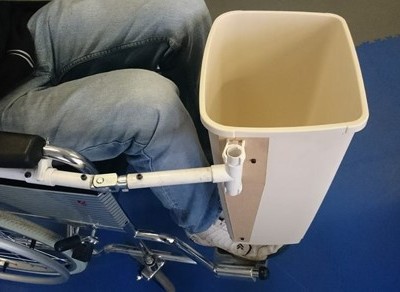
The Easy-bin wheelchair aid is an simple but effective solution to taking the trash out for people in wheelchairs. It allows the user to take the trash out while still having full control of the wheelchair and being able to navigate tight spaces with ease.

Research has shown us that wheelchair users who live fairly independently find it hard to take out the rubbish.  This is because you need two hands to push a wheel chair so it is hard to push it whilst carrying a bin or bag, plus few people want to rest their rubbish on their laps. We were able to speak to man living in America, who makes a variety of YouTube videos showing his daily struggles, about how he takes out his trash. He was able to give us insight on how to develop a product which solves this issue.

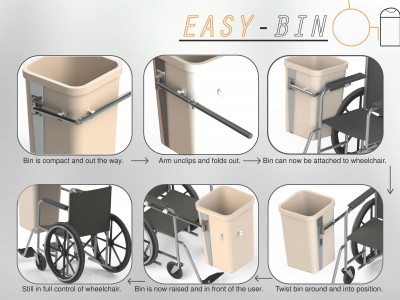
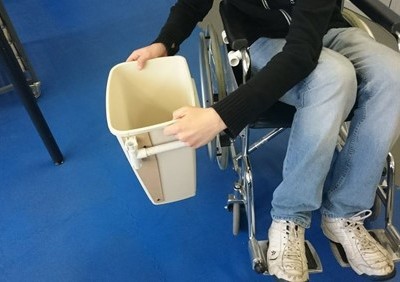
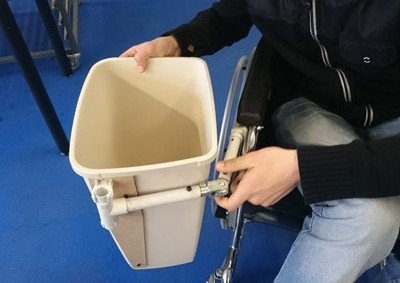
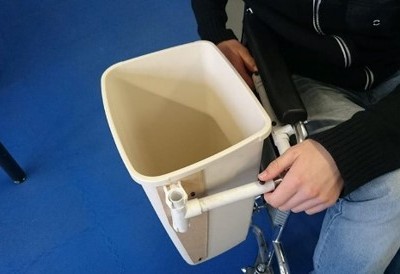
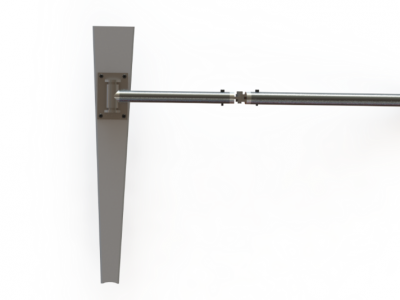
The final solution we have come up with is a combination of arms and hinges which are permanently attached to a dustbin and then lifted up and attached to a wheelchair. The arm has the ability to fold up against the bin and clip into place, this keeps the product compact and out of the way. When the user wants to take out the trash all they do is simply go to the dustbin, unclip the first arm, lift the bin up and slot the arm into the attachments on the wheelchair, they can then twist the bin around in front of their legs.

To test the product we made a model and once was made we acquired our wheelchair and began to test our final outcome. The process of utilising our product starts off with the user travelling towards the bin lifting it up and clipping the bar in the clips attached to the wheelchair. Connecting the bar to the clips wasn’t a smooth process when we tested it but it was a simple process. Baring in mind we intend to make the actual product out of a metal such as aluminium because metals tend to have a more polished surface finish, so there would be less friction between the bar and the clip. Therefore connecting the pieces together should be a smother process.

Picture1 Picture2 Picture3  Picture4Picture5 Picture6

Finally we tested if you could utilize the wheelchair with our model attached. Because the bin can placed in front of the user it doesn’t cause much of an obstruction. We discovered the wheelchair was still usable with our attachment on and the performance of the wheelchair seemed the same as before which is dependent of the users physicality.

Manufacture:

This product uses material and components that are easy obtainable from any hardware or DIY store. This means that actually making the product is simple because it mostly involves attaching components in various ways.

For a dustbin with dimensions of: 600mm x 400mm x 400mm

Picture7 Picture1

The size of the product is very dependent on the size of the dustbin and wheelchair being used. These three components are the most varied and would need to be adjusted. The rest of the components would be bought in as standard parts.

More information about the manufacture and component parts can be found in the report below.

Report

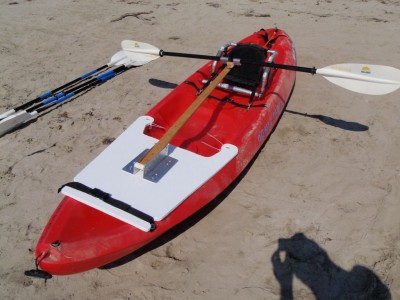
ADAPTIVE SEAT FIXTURE FOR KAYAKING

September 28, 2015 in Solution

This post was originally on www.instructables.com created by user 

Kayak Adaptation

Kayak Adaptation

This is my NEWEST Seat Design that plugs right into a stock Malibu Two!

This design will work perectly on both models of the Ocean Kayak, Inc. Malibu Two – original and XL, and can be modified to fit a wide variety of other models. The requisite is that there are scupper holes near the back of the seat pan area for the seat fixture to rest in.

This seat adaption is designed to provide the upper trunk support that, for instance, an incomplete quad, would need to keep his or her body centered over the kayak, thereby greatly reducing the possibility of a capsize. Paddlers with many levels of physical ability have found great comfort in using this design. You will see it being utilized in many of the photos on my web site.

Step 1: ADAPTIVE KAYAKING SEAT FIXTURE – PARTS LIST
Seat Fixing
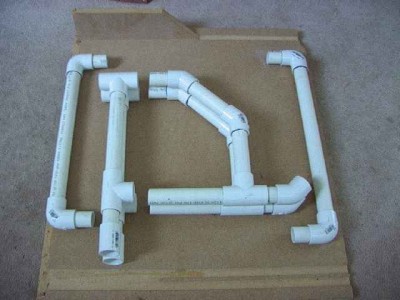
Seat Fixing

Seat Fixing Components

Seat Fixing Components


ADAPTIVE SEAT FIXTURE (LATEST DESIGN) – PARTS LIST

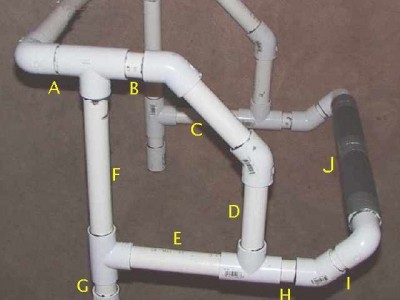
3/4″ PVC PIPE PIECES:

A  2 EA     6.0 CM
B  2 EA     5.5 CM
C  2 EA    15.0 CM
D  2 EA    12.0 CM
E  2 EA    16.0 CM
F  2 EA     23.0 CM
G  2 EA     9.0 CM
H  2 EA     9.0 CM
I   2 EA      6.0 CM
J  1 EA    44.0 CM
K  1 EA    40.0 CM

Referring to the first photo attached to this step…
These latest dimensions remove the gap at B and lower the height 1 inch.
H will appear ~3/4 inch longer than shown to compensate for shorter B and E.

PIPE FITTINGS:

4 EA   90 Degree Elbows
6 EA   45 Degree Elbows
6 EA   T Fittings
2 EA   Couplers – Use the long ones if you can find them!


Step 2: ADAPTIVE SEAT FIXTURE – INSTRUCTIONS

Seat Fixing Components

Seat Fixing Components

Seat Fixing

Seat Fixings

INSTRUCTIONS

Cut all the pieces according to the Parts List in Step 1, ensuring the longest measurable length of each piece matches the dimensions given in the list.

Be sure to use a Primer on the joints just before applying the Glue and pushing the pieces together.

Build each of the sections of this design as shown in the second photo attached.

Pipe pieces K, C, and particularly J can be wrapped with a section of Hot Water Line Insulator as shown for J in the second photo.

Piece J is a critical part of the design. It effectively deepens the seat pocket to keep the paddler from slipping forward and out of the pocket.

Step 3: ADAPTIVE SEAT FIXTURE – NOTES
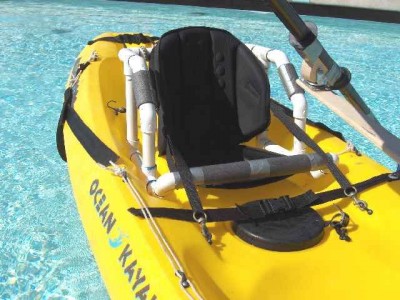
Kayak Adaptation

Kayak Adaptation Assembled

NOTES:

— It’s easiest to make the groups as shown below first, then fit them together.

— J is 4CM longer than K to spread the upper supports.

— J is wrapped with closed-cell foam hot-water-pipe insulation for padding.

— The lengths of E, H, and I are critical to properly position J.

— B, C, and D are joined by 45 degree Elbows.

— H and I are joined by a 45 degree Elbow.

— The fixture is held in place by the seat, and by the paddler’s legs over piece J.

— This design uses 2 fewer fitting pieces than my original design
and can be made with one 10-foot length of 3/4″ Schedule 40 PVC pipe.

— Pieces A can be lengthened for more of a reclining position.

— Pieces F and D can be adjusted equally to accommodate paddler height.

— DO NOT CHANGE the length of pieces E, H, and I, for use on a Malibu Two!

— Padding on C and the paddler’s PFD make for a nice snug fit in the fixture.


Step 4: USING THE ADAPTIVE KAYAKING SEAT FIXTURE
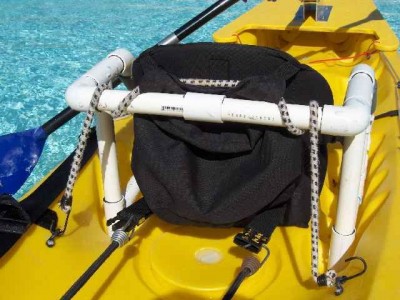
Kayak Adaptation Rear

Kayak Adaptation Rear

The Adaptive Seat Fixture is placed in the center seat postion of the kayak, guiding the rear vertical pieces into the scupper holes at the rear edge of the seat pan.

The Seat Adaption could be used without the addition of the seat-back as shown in the photos (black) below. The paddler’s PFD (assuming it’s a good Paddler’s Jacket) would provide for the padding needed to make use of it, and the paddlers legs would mostly hold the fixture in place.

Still, a much improved setup is created by adding a nice seat-back, such as the Surf-To-Summit model shown in the photos. Use a bungee cord to hold the back of the seat-back firmly into the fixture as shown in the first photo. Then, connect the forward straps of the seat-back to the factory installed eyelets provided for that purpose and cinch them up. When properly fitted, the seat-back and seat fixture will feel very tightly bound to the kayak with very little play in any direction.
Skip to toolbar