Lap Desk Stabilizing Pad
September 25, 2015 in Solution
This post was originally on www.instructables.com created by user
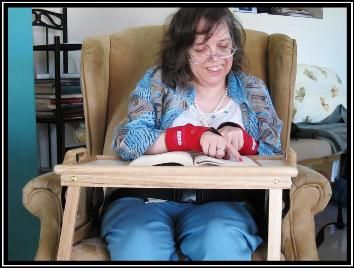
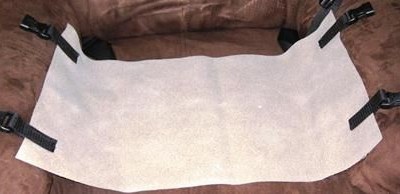
A stabilizer is added to a commercially available lap tray to provide a stable work surface and encourage upright posture. For individuals with disabilities it is often difficult to sit on a couch or in a recliner and read a book or magazine or write. With the lap desk stabilizing pad, the user sits on a piece of material with 4 buckles attached. The lap desk is buckled to the material to prevent the tray from tipping.
Advantages
- Portable
- Stable – does not tip over
- Improved upright positioning
Step 1: Materials
- 1 Lap Tray (sample styles shown)
- · 1 Bottom Piece: 24” x 12” rugged material (denim or upholstery)
- · 4 – 3/4” fastex buckles
- · 8 pieces of 3/4” strap material cut to 7” lengths
- · 4 – # 1/4-20 x 1” machine screws with lock nuts (length may change based on the lap tray purchased)
- · 8 washers
- · 4 – #10 lock nuts
NOTE: This was fabricated for an average adult. Size of the bottom piece may need to be modified to accommodate smaller or larger individuals.
Step 2: Sew a hem around the bottom piece
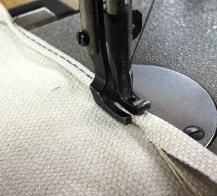
Sew a hem around the bottom piece to keep it from fraying. Iron on tape could also be used as a substitute.
Step 3: Prepare strap material
Melt the edges of the strap material with a heat source (heat gun preferred) to prevent fraying. Take 4 of the pieces, fold them in half, and thread through one side of the fastex buckle (doesn’t matter which side as long as they are all the same)
Step 4: Sew the straps to the material
Sew the 4 pieces from step 4 to the material.
Step 5: Preparing remaining straps
Take the remaining 4 straps, fold in half, and thread through the other half of the fastex buckle . Make a hole in the strap material for the bolt to go through.
Step 6: Attach straps to lap table
Drill a hole in each corner of the lap tray where you would like to attach the straps. Location should coincide with the location of the matching side of the buckle on the bottom piece. Attach the straps from to the tray using the 1/4” machine screws, washers, and nuts.
Step 7: Instructions for use
1. Set the bottom piece on the seat surface of the recliner, couch, or chair.
2. Have the user sit on the material. Be sure the material is not bunched or they are not seated on a buckle.
3. Place the tray over the user’s lap
4. Snap the buckles together to hold the tray in place


