DIY dog lead system helping disabled people
September 24, 2015 in Solution
This is repost from www.instructables.com by user Korneel De Viaene
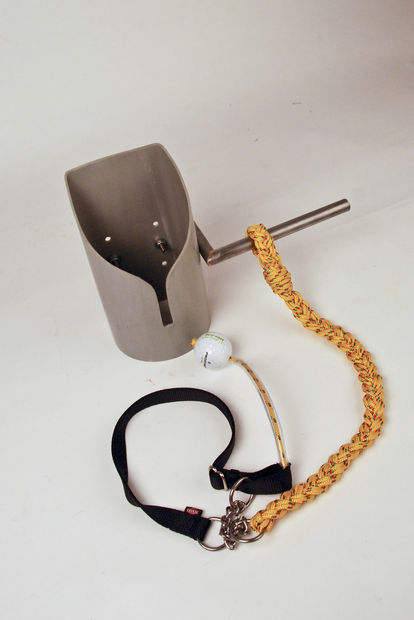
This DIY leash system allows trained dogs to put on and take off their leash without human help
Introduction
Trained dogs are a great asset to people with a disability who need help in their daily life. Their dog allows them to live more independently. unfortunately they are not able to do all actions by themselves.
Sometimes there is still help needed for simple handling’s that occur every day. For example, the attaching and detaching of the dog to the wheelchair. Nowadays, there are hands needed to fix the leash to the dog and the wheelchair. This DIY leash system allows trained dogs to put on and take off their leash without human help.
The goal of this project is facilitate the life of people who have a minimal hand function, or even no hand function at all.
The video shows the different steps that the dog should follow to attach and detach himself using the leash system when going out with his owner. Of course the dogs needs to be trained to be able to perform these specific actions. In the video you can see Yuti and his trainer Elke that give a demonstration of the product.
Step 1: Tools and materials
Tools and Materials
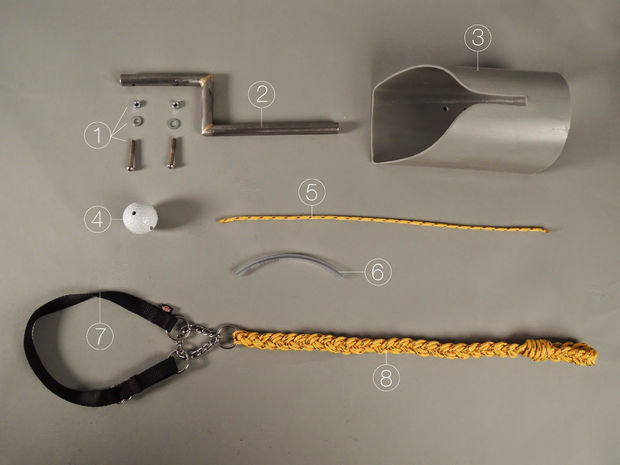
Materials
- two bolts (M6), two nuts and two washings
- iron bar
- PVC tube (inner diameter 12 cm)
- golf ball
- solid rope
- small, transparent PVC tube ( inner diameter 0,5 cm)
- double slip collar
- idem 6
Tools
- hot air blower
- piece of wood
- iron saw
- drill
- glue
- file and sandpaper
- needle and thread
- brazing tool and tin
Step 2: Making V-box: deforming PVC tube
Making V-box: deforming PVC tube
The form of the V-bow allows the dog to insert the ball into the box correctly.It doesn’t matter in from which direction he is approaching the box, the ball will always end up in the slot.
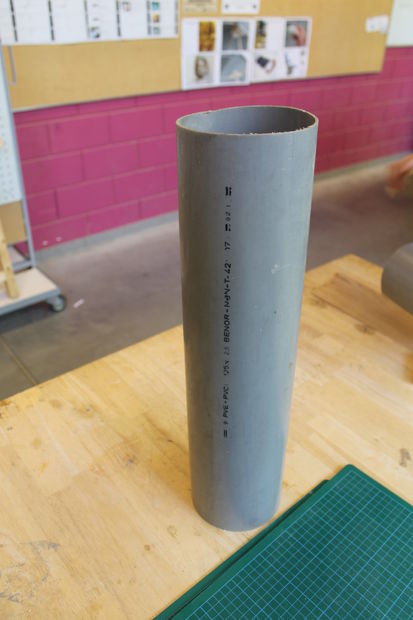
You start from a standard PVC tube with an inner diameter of 12 cm. Cut it to a length of 22 cm.Then take a hot air blower to heat the tube so it can easily be deformed. Then apply a wooden plank with dimensions 10cm x 30cm and insert it in the PVC tube. Apply pressure until the back of the tube is flattened.
The back of the should be flattened because this side will be next to the legs of the person in the wheelchair. Comfort and volume reduction are the main reasons for the deformation of the tube.
Step 3: Making V-box: Slope and slot

Marking out the V slot
From several tests, we concluded that the suitable slope towards the slot should be 45°. The slot is necessary to attach the collar to the wheelchair so that the dog can independently put on and take off his leash and collar.
The width of the slot depends on the outer diameter of small, transparent tube that will be shown in step 6. Here we use a width of 1 cm. Make sure that the slot is deep enough: here it is 7,5 cm. Don’t forget to round the corners so that the rope containing the golf ball is guided smoothly into the slot. Finish it with a file and sandpaper in order to remove chips so that neither the dog or his owner can hurt himself.
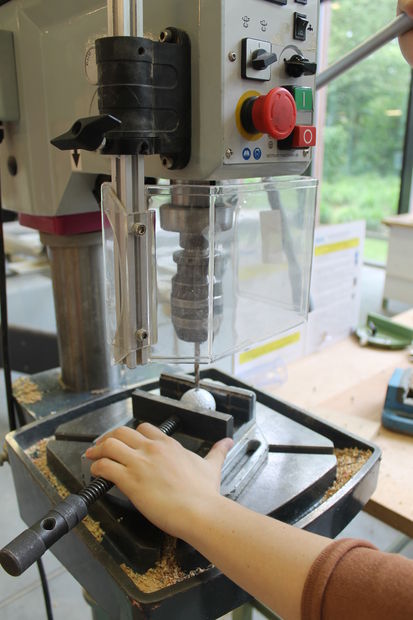
Step 4: Making V-box: Fixing holes
Drilling the fix holes in the v-box
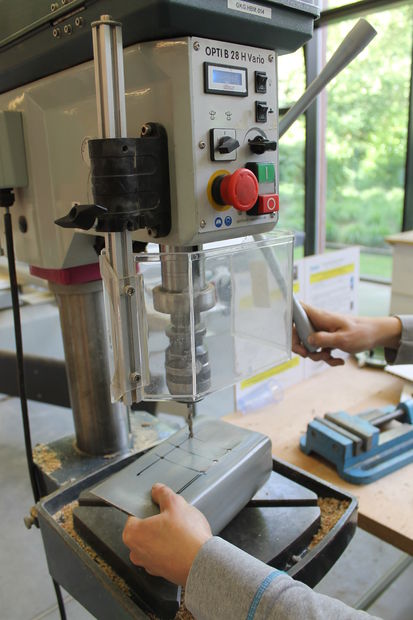
In order to fix an iron bar to the V-box, some holes need to be drilled. We drilled 6 holes with the same diameter of the bolts (6mm). These holes are at the same position as the wholes that will be drilled in the iron bar. Here the horizontal distance between two holes is 6 cm. We made six holes so that the user can chose the most comfortable position of the box.
Step 5: Fixation bar

The fixing bar
To create a fixation bar, you need an steel bar, an steel saw, a drill and brazing or welding tools along with tin.
First cut the steel bar in 3 pieces, each time at an angle of 45°.
- the first part measures 12,5 cm
- the second part measures 9 cm
- the third part measures 20 cm
Each time the longest distance was measured.
Connect the parts using the brazer or welding technique. Be carefull: cool the bar with cold water before touching it with bare hands. Drill two holes in the piece that measures 12,5 cm in order to attach it to the V-box using the bolts, nuts and washers. The next step is inserting the bar into the tube under the armrest. Clamp the bar with a bolt shown on the last picture. Finish the bar with a file and sandpaper to achieve a clean result.
The tube under the armrest is a standard part that can easily be bought and attached to any electric wheelchair.This fixation method is just an suggestion. There exist several ways to connect this part to a wheelchair, depending on the type of wheelchair.
Step 6: Collar and detaching system
collar and detaching system
The ball that will be attached to the collar first needs a hole through which a rope can be put. The rope has a length of 15 cm, but this dimension will vary from dog to dog. Make a firm knot at the end of the rope to fix the rope to the ball. Then apply a small PVC tube to protect the rope en to prevent that it will twist and weave when the dog wants to grab it. It is important that the rope is connected to the collar firmly. We sewed the rope on the fabric collar.
Step 7: Making lead

Making Lead
To prevent the rope from fraying, we melted the ends of each rope before we started braiding.
Cut 3 ropes at a length of 160 cm to become a leash with a length of 70cm. Leashes that are normally used for assistant dogs are always more or less 70cm.
Fold the 3 ropes in two, around the ring on the collar. We start braiding around the ring, because this connection should be as light as possible to make the system function properly.
The technique that is applied is the classic braiding technique, which is very easy, only you shoud use two ropes at a time in stead of one. In this way a double braid is created.
The last step is to apply a little bit of glue at the end of the braid. Fold the braid and use one of the six ropes to twist around the little loop. This loop can be used to attach the leash to the wheelchair, for example by putting it over a hook.


Leave a reply
You must be logged in to post a comment.