Adapted Outdoor Plant Watering Wand Holder
September 24, 2015 in Solution
This post was originally on www.instructables.com created by user
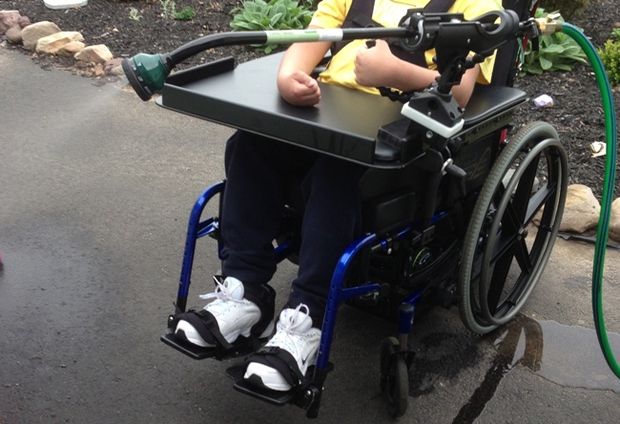
Plant Watering Wand Holder in action
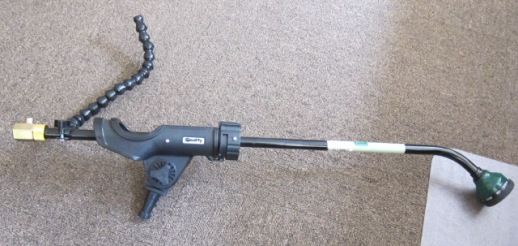
Plant Watering Wand Holder
For people with significant disabilities outdoor gardening tasks can be very difficult. A traditional 36″ outdoor plant watering wand (the kind that attaches to a hose) was attached to a fishing pole holder with a universal clamp that can be attached to any wheelchair or other mobility device. A handle was added to enable those with limited motion to independently position the wand to water an outdoor garden and potted plants.
Step 1: Materials
Fabrication of wand holder:
- Fishing pole holder. We used the Scotty Powerlock Rod Holder purchased from Amazon.com
- 36″ plant watering wand
- Part A: Cut one donut using 1/2″ thick plastic OD = 2″ ID = 1 – 1/4″ 2”
- Part B: Cut one donut using 1/8″ plastic OD = 1 – 3/4” ID = 3/4″
- Part C: Cut one donut using 1/2″ thick plastic OD = 1- 3/4” ID = 3/4″c
- (7) #12 X 1/2” screws
- Rubber grommet OD = 1 – 5/8″ ID = 3/4” Inside Diameter
Handle to control the direction:
- 18 links of 1/2” Loc-line and one flat mount Loc-line www.modularhose.compart# 59896
- 1/2” conduit clamp
- (1) 1/4″ – 20 x 1 – 1/2″ bolt with clamping knob
- (1) 1/4″ – 20 x 3/4″ bolt with lock nut
Clamp to mount to a wheelchair:
- Manfrotto super clamp
- (1) 1/4″ – 20 x 1-1/2″ flat head bolt
- (4) #12 x 1/2″ screws
- 1 piece 4 – 1/2″ x 2 – 1/2″ x 1/2″ plastic
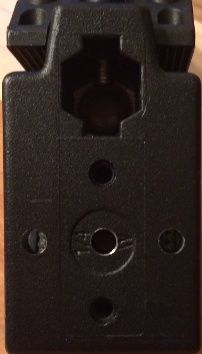
Step 2: Preparing the spacers
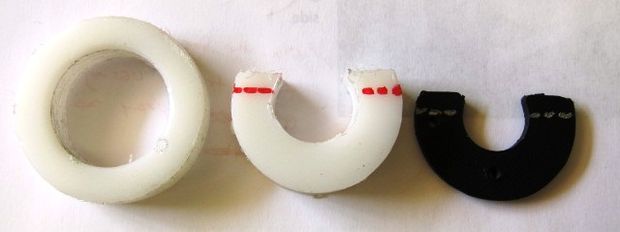
Preparing the spacers
Take Parts B and C and cut them as shown. Discard the smaller piece. These partial donuts will later be screwed into the rod holder to keep the watering wand in position.
Step 3: Attach the spacer to the fishing pole holder
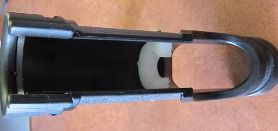
Attach the spacer to the fishing pole holder
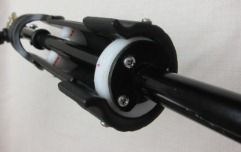
Take the larger half of the modified Part C and screw it into the fishing pole holder about 4 3/4” back from the front using (2) of the screws. This will be one part that will secure the sprayer inside the rod holder
Step 4: Attach Part A to watering wand
Step 4: Attach Part A to watering wand
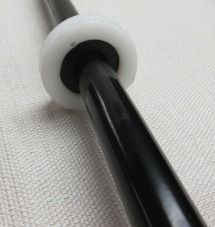
Cut a slit in the rubber grommet. Take the cut rubber grommet and place it around the watering wand approximately 13” from the hose attachment side. Place Part A around the rubber grommet. It fit snuggly. This piece will stabilize the sprayer and the rubber grommet will stop the watering wand from sliding out of the rod holder.
Step 5: Mounting watering wand to the fishing rod holder
Mounting watering wand to the fishing rod holder
Place the watering wand into the fishing pole holder. The arm of the sprayer should snap into the half circle (modified part C from step 3). Part A around the grommet should fit just right inside the front of the fishing pole holder. Attach part B to part A using 2 screws as shown.
Secure part A through the walls of the pole holder using 3 screws.
Step 6: Building and attaching the handle
Step 6: Building and attaching the handle
Attaching the bracket
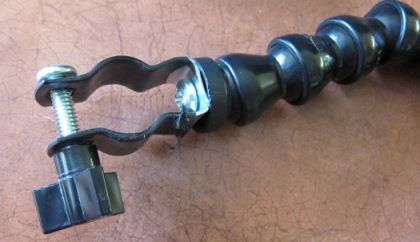
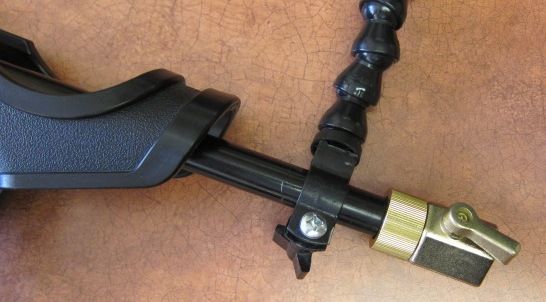
Bolt the flat mount Loc-line to the conduit clip using the 3/4” bolt with lock nut.
Attach the locline links to the flat mount. Attach the handle to the hose end of the watering wand using the 1-1/2” bolt with clamping knob.
Step 7: Building and attaching the mount
Building and attaching the mount
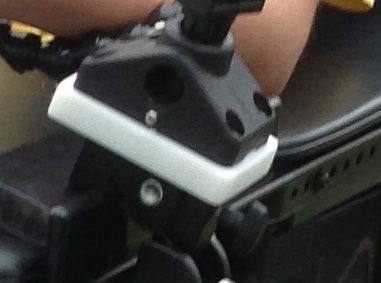
Building and attaching the mount
Take your piece of 4 – 1/2″ x 2 – 1/2″ x 1/2″ plastic. Round the edges and sand smooth.
Locate the 1/4″ threaded insert on the Manfrotto super clamp. Center the piece of plastic over the Manfrotto clamp. Drill a 1/4″ hole in the plastic to line up with the threaded insert in the clamp. Countersink the hold to receive the flat head bolt.
Insert the bolt through the plastic and attached to the clamp.
Attach the base of the rod holder to the plastic using the 4 #12 x 1/2″ screws.
Step 8: Thanks
![]()


Leave a reply
You must be logged in to post a comment.