DIY Lighter Aid
September 28, 2015 in Solution
This post was originally on www.instructables.com created by user

DIY Lighter Aid

DIY Lighter Aid in Use
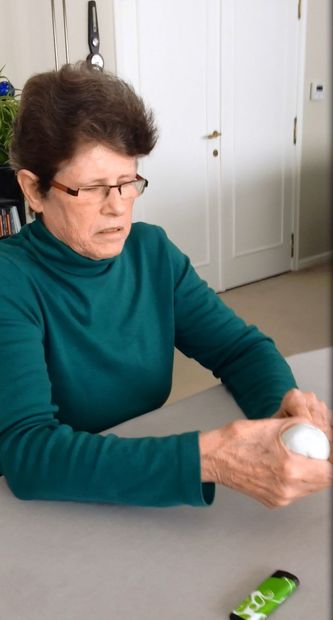
This product is specially made for Nicole. Nicole is a woman that loves atmosphere and coziness in her apartment. An important element is that she loves to light candles.
Currently she performs the operation of lighting candles with a lighter rod. As a result of osteoarthritis in her hands she has to use both hand to do this, for her, painfull operation. This is not an efficient operation and requires a lot of strength and agility . Moreover, this is very stressful for her body .
Nicole lives alone in her apartment and can not always count on the help of others.What Nicole wants is bringing coziness in her apartment by light independently and in a simple way light her candles.Thanks to the lighter aid this desire was fulfilled and Nicole is having a lot less problems.
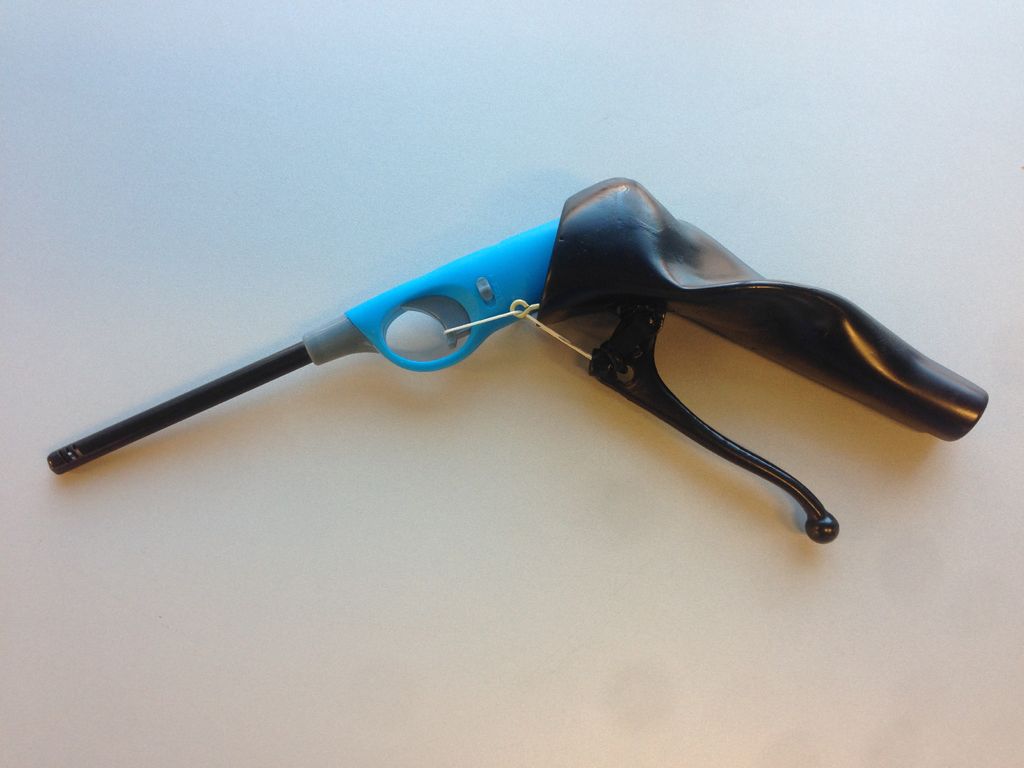
The lighter ais has been fixed to an existing lighter rod in order to bring the advantages of both object together. The additional benefits of the aid are the thickened grip with a customized thumb support and the easy operation of the lighter by squeezing the hand.
Thanks to the lighter ais is is possible for Nicole to operate the lighter with one hand and with a limited force. There is already a simple security presence on the lighter so that is poses no danger to the grandchildren but that is still manageable for Nicole. Moreover Nicole preserves the length of the lighter, so that candles in a deep vase can be reached.
TEAM:
- Client: Nicole
- Design team: Seppe Naessens, Ward Declerq
- Occupational therapist: Kjenta Furniere
Step 1: Gather your materials and tools
Materials
- Plasticine or clay
- Lighter rod
- 2 component casting silicone with stiffnes A30
- 5 pieces wood
- Low density polyutherane foam
- Braided polyamide rope (rope with little stretch)
- 2 Eyebolts
- Putty
- Bicycle brake lever
- Paint
Tools
- Drill
- Sandpaper
Step 2: Personal Handprint
Personal Handprint
Use the plasticine or clay to make a handprint of the person who will use the lighter aid.
Model it so it looks like a handgrip. In our case and with special attention to Nicole’s condition we had to support the thumb as much as possible.
We tested this shape with ad foam model (because plasticine was too weak to support the thumb). But if you use clay you don’t need to make this foam model, because clay is strong enough to support essential parts of the hand.
Make a hole where your specific lighter rod can clamp in.
Step 3: Make silicone mold
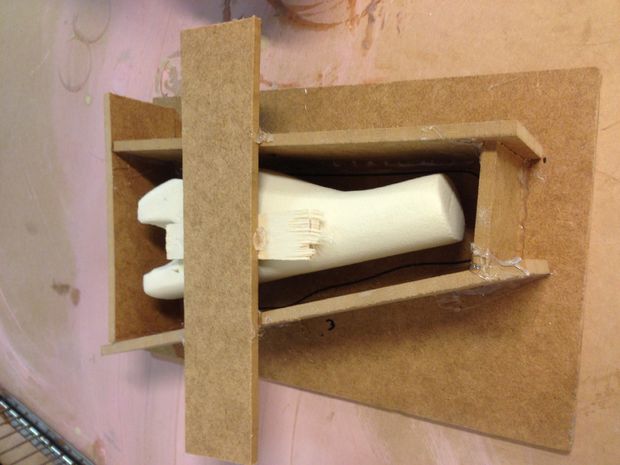
Making the Mold
Use the 6 pieces of wood to make a mold. Make the mold as small as possible so you need a minimum of silicone.
Glue the handprinted silicone of clay model on the woodpiece on top. than will the mold with silicone untill the model is almost fully under. Let the silicone cure for 3hours.
Get the model out of the silicone. Most likely the model has to be broken to get it out.
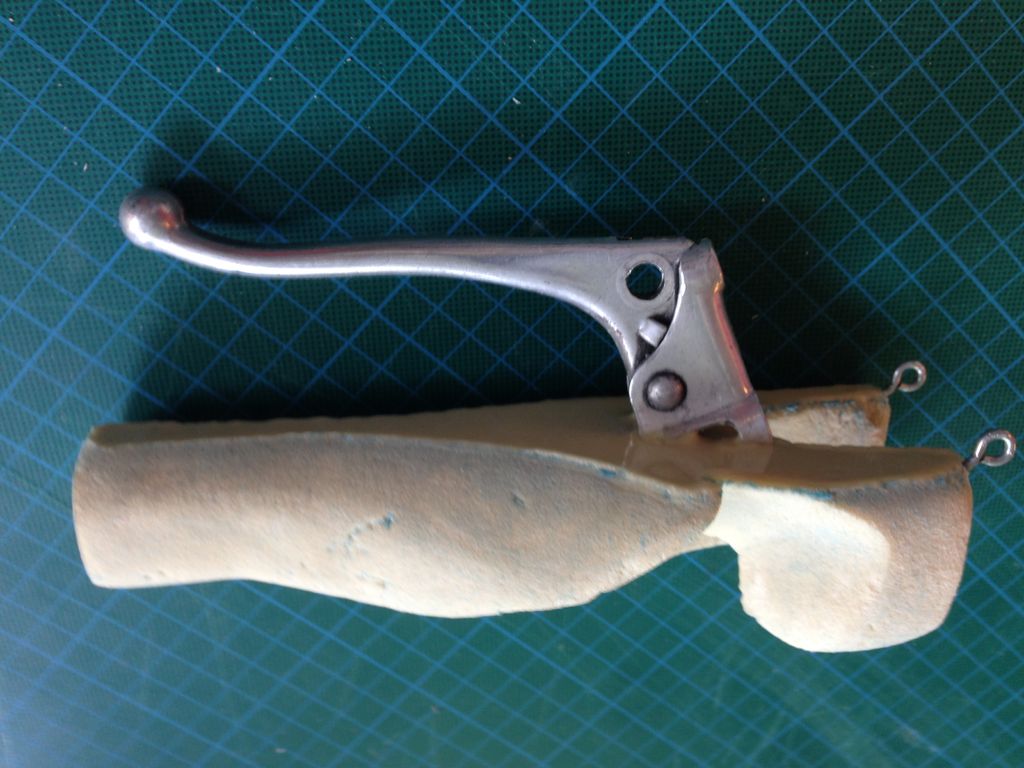
Step 4: Casting

Casting
Casting Complete
First spray the inside of the mold with release wax to get the model easely out of the mold.
Fill the silicone mold with foam. Let the foam cure for a while. During the curing you have to embed the bicycle brake into the foam. So the brake is attached to the model.
Step 5: Finish model
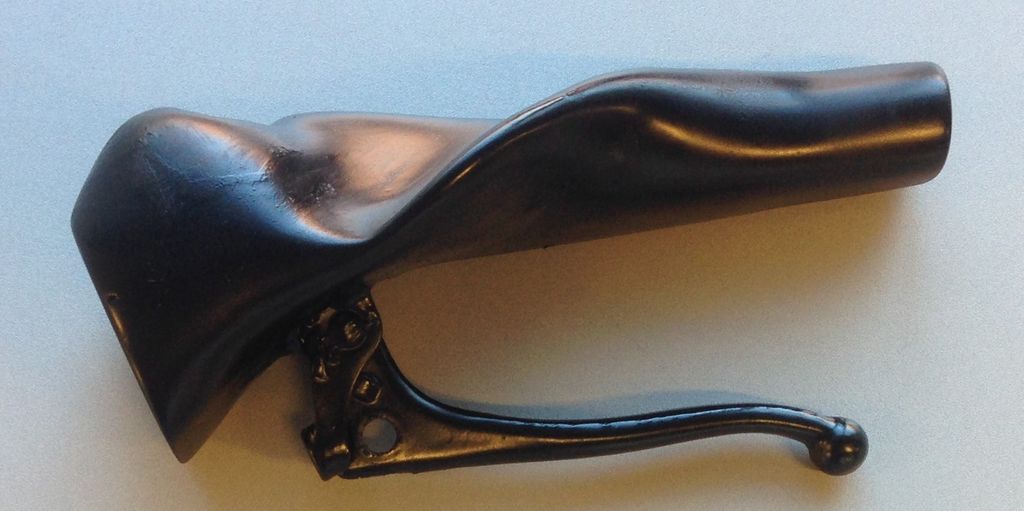
Finished Product
Sand the model to get a clear and good surface. Paint it in a color your client desires.
Step 6: Assemble

Assemble Components
Finished assembly


Leave a reply
You must be logged in to post a comment.